Table of Contents
You’ve got your seed potatoes, perhaps they’re even starting to sprout, and you’re itching to get them in the ground. But then comes the big question: when is the best time to plant potatoes, specifically where you live? Online searches offer general dates, but you know your garden is unique. Frost dates, your specific hardiness zone, and the actual soil temperature are the real keys to a thriving crop.
This guide will walk you through determining the optimal planting window for your garden, cutting through the guesswork by focusing on those crucial local factors. Beyond just timing, we’ll provide clear, beginner-friendly steps for the entire process – from preparing your seed potatoes with ‘green sprouting’ (chitting) to planting them successfully, whether you choose traditional rows or try container gardening in barrels or pots. We’ll also share practical, community-tested tips for managing common challenges like potato bugs.
Getting the timing right is the first crucial step towards a bountiful potato harvest. Let’s explore how to know exactly when your soil is ready.
Decoding Your Local Climate: The Key to Perfect Potato Planting Time
Pinpointing the ideal moment to plant your potatoes starts with understanding your local climate. This knowledge is crucial for potato planting success and helps determine the best planting time for your area by considering frost dates, soil temperatures, and USDA hardiness zones.
Why Timing is Everything for a Great Potato Harvest

The success of your potato crop heavily depends on correct planting time. Planting too early or late risks poor yields or crop failure, a common concern for new gardeners. But understanding a few local factors simplifies this crucial step. As PlantMD horticultural expert advises, “Nailing the planting time for potatoes might seem tricky for newcomers, but it’s truly the first step to a rewarding harvest. Understanding your local climate’s cues is simpler than you think and makes all the difference.” Your first clue involves local last frost dates.
Your First Clue: Understanding Local Last Frost Dates
A fundamental guideline for potato planting is to wait until after your area’s average last spring frost. Potatoes are sensitive to frost, so planting before this date risks damaging young plants. This date serves as your initial benchmark. You can usually find your local last frost date through agricultural extension offices or online resources. However, frost dates are just the start; soil temperature is also key.
The Golden Rule: Ideal Soil Temperature for Planting Potatoes (50-55°F)
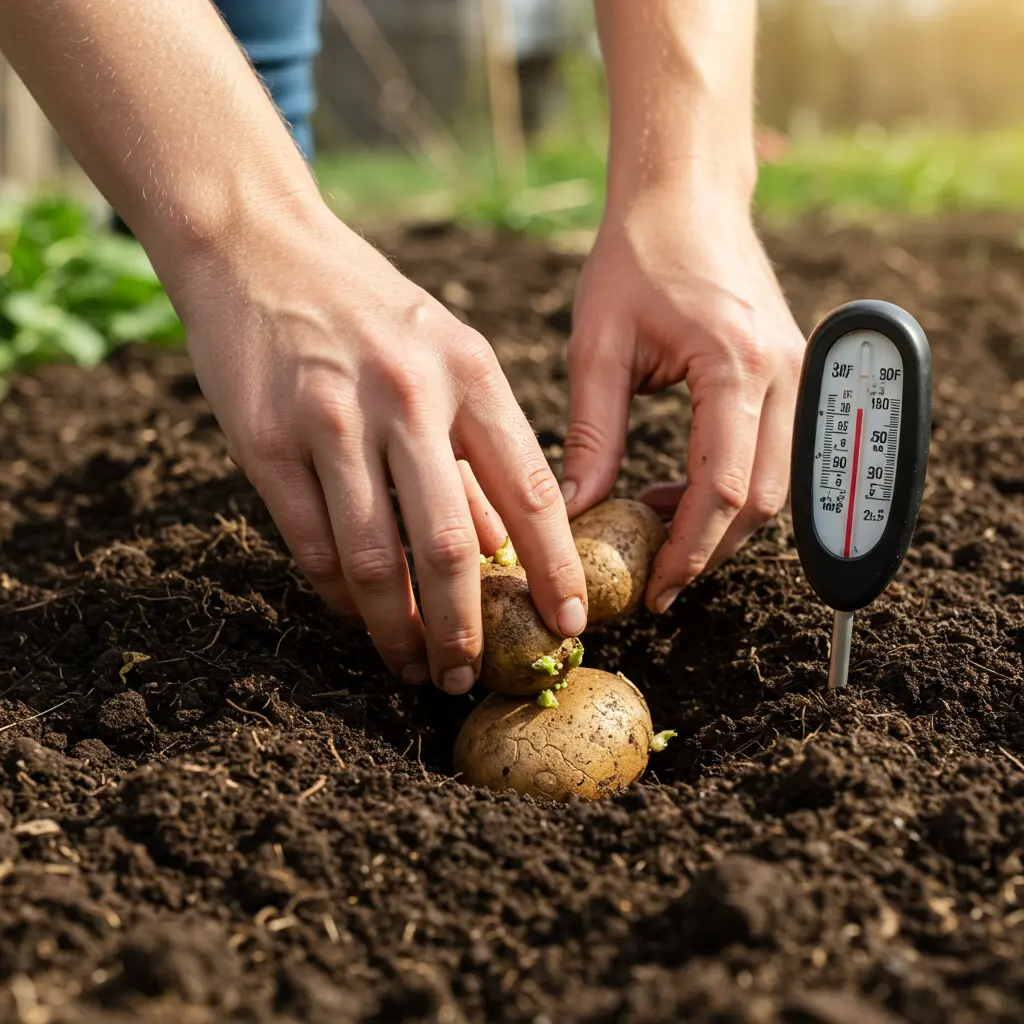
Beyond just frost dates, the true golden rule for planting potatoes lies in achieving the ideal soil temperature. Your soil must consistently reach 50-55°F (10-13°C) at planting depth. This range is vital for good germination and prevents seed piece rot. As the PlantMD horticultural expert states, “That 50-55°F soil temperature isn’t just a suggestion; it’s the golden rule for waking up your seed potatoes. Planting any colder risks rot and poor sprouting, so patience and a soil thermometer are your best friends here.” Let’s see how to measure this.
How to Accurately Measure Soil Temperature in Your Garden
Accurately measuring soil temperature is straightforward:
- Use a soil thermometer, inserting it to the planned planting depth, typically 4-6 inches.
- Take readings in the morning for a few consecutive days.
- Ensure the temperature is consistently at or above 50-55°F before planting.
This consistency is important to confirm the soil has truly warmed. Now, let’s consider your broader climate through USDA hardiness zones.
Decoding USDA Plant Hardiness Zones: What Your Zone Means for Potatoes
Your USDA Plant Hardiness Zone provides general guidelines for potato planting windows. These zones, based on average minimum winter temperatures, suggest broad planting windows. Find your zone via the USDA Plant Hardiness Zone Map. To determine the best potato planting time for your specific hardiness zone, remember local conditions—last frost and soil temperature—are paramount. Microclimates can vary, so prioritize these direct readings. Next, we’ll combine these factors.
Putting It All Together: Pinpointing Your Personalized Planting Window
To determine your personalized potato planting window, synthesize all these climatic clues. Start with your average last frost date as a baseline. Then, confirm your soil has consistently warmed to 50-55°F at planting depth. Use your USDA hardiness zone as a general guide, but always let these hyperlocal observations—your specific frost date and soil temperature—make the final call. This empowers you to move beyond generic advice and confidently determine the best time to plant potatoes in your unique garden.
Now that you can decode your local climate for optimal potato planting time, let’s move on to preparing your seed potatoes and planting site.
Getting Ready: Preparing Seed Potatoes and Your Planting Spot
Before you plant, proper preparation of both seed potatoes and your chosen spot is essential. This involves selecting seeds, chitting, choosing a location, and basic soil prep.
What Are Seed Potatoes and Where to Find Good Ones?
To give your crop the best start, always use certified seed potatoes rather than those from the grocery store. Certified seeds are grown specifically for planting and are checked for diseases, ensuring healthier plants and a better harvest.  You can find good quality seed potatoes at reputable local nurseries or online garden centers. Using these will give your potatoes more vigor from the get-go. Once you have your seeds, the next step is giving them a little boost.
Step-by-Step Guide to Chitting (Green Sprouting) Potatoes for a Head Start
Giving your seed potatoes a head start through a process called chitting, or ‘green sprouting’, can lead to earlier and potentially larger harvests. As a PlantMD horticultural expert notes, “Taking a few weeks to chit or ‘green sprout’ your seed potatoes is a fantastic way to give them an edge. You’re essentially waking them up gently, so they’re eager to grow as soon as they hit the soil.” Here’s how to green sprout potatoes:
- About 2-4 weeks before your target planting date, arrange your seed potatoes in a single layer in an open egg carton or a shallow tray.
- Place them in a cool, bright, frost-free location, like a porch or unheated room, but out of direct sunlight.
- Look for short, sturdy, green or purple sprouts to develop. These are ideal for planting. Long, white, spindly sprouts mean it’s too dark or warm.
With your potatoes chitted, let’s find the perfect garden spot.
Choosing the Best Location in Your Garden for Potatoes (Sun & Drainage)
The right potato planting location is crucial for healthy growth and a good yield. Potatoes thrive with plenty of energy from the sun and don’t like to sit in soggy soil, which can cause them to rot.
Here’s what to look for:
- Full Sun: Aim for a spot that receives at least 6-8 hours of direct sunlight for potatoes each day.
- Well-Drained Soil: Ensure the soil drains well. If water puddles after rain, it’s not ideal.
Once you’ve picked a sunny, well-drained spot, it’s time to get the soil ready.
Preparing Your Soil for Happy Potatoes (In-Ground Beds)
Thorough soil preparation for potatoes can significantly impact your harvest. Potatoes need loose, fertile soil to allow their tubers to expand easily. Before planting, loosen the soil in your garden bed to a depth of at least 8 to 12 inches using a spade or garden fork. Mix in a generous amount of well-rotted compost; this adds vital nutrients and improves soil structure and drainage. It’s important to avoid using fresh manure, as this can encourage potato scab disease. Now, let’s gather your tools.
Essential Tools and Supplies for Potato Planting
Having the right tools and supplies on hand will make planting your potatoes much smoother. You don’t need anything too fancy, especially as a beginner. Here’s a basic list:
- Tools: A sturdy shovel or spade for digging, a hoe for trenching and weeding, and a watering can or hose.
- Supplies: Your prepared seed potatoes, compost, and optionally, a soil thermometer to check soil temperature.
With these items ready, you’re well-equipped for planting.
With your seed potatoes chitted, your planting spot chosen, soil amended, and tools gathered, you’re equipped to learn the different methods for planting potatoes.
How to Plant Potatoes: In-Ground and Container Methods for Beginners
Beginners can successfully plant potatoes using traditional garden beds or popular container methods; here are step-by-step instructions for both.
Planting Potatoes in a Traditional Garden Bed: A Beginner’s Guide
Ready to get your hands dirty with in-ground potato planting? This traditional method is straightforward. Here’s how to plant potatoes for beginners in your garden:
- Dig trenches or individual holes about 4 inches deep. If using trenches, make them about 12 inches wide.
- Place your seed potato pieces cut side down, with the eyes pointing upwards. This helps the sprouts reach for the sun.
- Space them roughly 12 inches apart to give each plant room to grow.

- Gently cover the seed potatoes with soil.
This in-ground potato planting method sets a great foundation. If garden space is limited, container growing is another excellent option.

Growing Potatoes in Barrels or Tall Containers: Step-by-Step
Wondering, “Can I successfully grow potatoes in barrels or large pots as a beginner?” Absolutely! Our PlantMD horticultural expert confirms, “Growing potatoes in barrels is a fantastic option, especially for beginners or those with limited space! The key is good drainage and adding soil as they grow – it mimics hilling and boosts your yield.” Growing potatoes in barrels is a popular method for growing potatoes in containers. Here’s how:
- Ensure your barrel has excellent drainage holes.
- Add 4-6 inches of soil mix to the bottom.
- Place seed potatoes on the soil, then cover with another 3-4 inches of soil.
- As plants reach 6-8 inches tall, add more soil, leaving top leaves exposed. This “hilling” encourages more tubers.
This technique is also adaptable for other large containers like grow bags.
Using Grow Bags or Large Pots for Potato Success
Indeed, growing potatoes in containers like grow bags or large pots is very achievable for beginners! These are great for small spaces. Success with potatoes in grow bags follows similar principles to barrels:
- Select a grow bag or pot of at least 5-10 gallons per seed potato plant for adequate tuber growth.
- Crucially, ensure excellent drainage holes.
- Begin with a few inches of quality, loose soil mix.
- Plant seed potatoes, cover with soil, and “hill up” by adding more soil as plants grow, mirroring the barrel method.
Regardless of the specific container, some universal considerations apply for success.
Key Considerations for Container Potato Gardening (Drainage, Soil Mix, Size)
Successful container potato gardening hinges on a few crucial details. These directly impact root health and tuber formation, preventing rot and ensuring plants thrive:
- Excellent Drainage: Potatoes dislike soggy conditions. Ensure ample drainage holes to prevent waterlogging.
- Loose Soil Mix: Use a quality potting mix, possibly with compost. Avoid heavy garden soil that compacts in pots.
- Adequate Container Size: Tubers need space. Aim for at least 5 gallons per plant.
Understanding these container specifics, let’s consider universal factors like spacing and depth.
Getting Spacing and Planting Depth Right for Optimal Growth
Whether planting in the ground or containers, correct potato spacing and planting depth are vital for optimal growth. Generally, aim to space seed potato pieces about 10-12 inches apart. The ideal potato planting depth is typically 3-4 inches deep. For in-ground planting in rows, keep rows 2-3 feet apart. This proper spacing ensures each plant has enough room, nutrients, and light, reducing competition and allowing tubers to develop fully without crowding. Once planted, they’ll need a good drink.
Watering Your Newly Planted Potatoes: The First Drink
Once your seed potatoes are planted, provide their crucial first drink. Water the area thoroughly. This initial watering settles the soil around the seed pieces, ensuring good contact and removing air pockets. Strive for consistent soil moisture as they establish, but avoid waterlogging to prevent rot. You’ve now successfully planted your potatoes using your chosen method.
Once your potatoes are successfully planted, the focus shifts to nurturing them for a bountiful harvest.
Nurturing Your Spuds: Essential Care for a Bountiful Harvest
Once planted, your potatoes need ongoing care. This includes watering, sunlight, the crucial hilling process, and optional fertilization to ensure a healthy harvest.
Watering Your Potato Plants: How Much and How Often?
Proper watering is key after planting. For successful watering potato plants, aim for consistent moisture, about 1-2 inches of water weekly. This means watering deeply so the soil is moist a few inches down. general watering needs for plants This is especially vital when tubers are forming, as they need water to swell. However, avoid waterlogged soil. Next, let’s consider sunlight.
Ensuring Your Potatoes Get Enough Sunlight
Just as important as water, sunlight for potatoes is crucial. Your plants need at least six hours of direct sun daily to thrive. This sunlight provides the energy for strong plant growth and good tuber development. Without enough light, your harvest may suffer. With water and sun covered, hilling is next.
Hilling Potatoes: Why It’s Crucial and How to Do It
Hilling potatoes is a vital step with several benefits. It protects developing tubers from sunlight, preventing greening, encourages more tubers to form along the buried stem, and provides support to the growing plants.  When your plants reach 8-10 inches tall, gently draw soil up around the stems, forming a mound. Repeat this process two or three times as they grow. This simple technique significantly boosts your harvest. Now, let’s talk about feeding your plants.
To Feed or Not to Feed: Fertilizing Your Potatoes
When fertilizing potatoes, less can be more. If your soil is poor, a balanced fertilizer helps, but compost at planting is often sufficient. Avoid high-nitrogen fertilizers late in the season; they encourage leafy growth, not tubers. Good care leads to good growth, so what are the signs harvest is approaching?
A Quick Peek: Signs Your Potatoes Are Nearing Harvest
Knowing when to harvest potatoes involves watching your plants. Key signs include the foliage yellowing and dying back. You can dig small ‘new potatoes’ earlier, but for the main crop, wait 2-3 weeks after the tops have completely died. This signals your nurturing efforts are paying off.
With your spuds well-nurtured, the next step is protecting your crop from common potato pests.
Protecting Your Crop: Managing Common Potato Pests Organically
Pests can be a challenge for novice gardeners, but they are manageable. This section helps you identify and manage common potato pests, especially potato beetles, using organic methods.
Meet the Enemy: Identifying Colorado Potato Beetles (Potato Bugs)
Don’t worry, encountering pests is common in gardening, but they are manageable. One frequent visitor is the Colorado potato beetle, often called potato bugs. For effective Colorado potato beetle identification, adult beetles are yellow-orange with black stripes, and their larvae are reddish and humpbacked.  Both feed on potato leaves, so early spotting helps. Now you can identify them, let’s explore organic controls.
Effective Organic Ways to Control Potato Bugs (Neem Oil, Hand-Picking, etc.)
For effective organic potato bug control, you have empowering options. The best ways to control potato bugs organically involve direct action and barriers:
- Hand-pick: Regularly remove adults and larvae into soapy water.
- Neem Oil: Use Neem oil , an organic spray for potato bugs. You can learn more about using Neem oil for details.
- Row Covers: Install floating row covers early to block pests.
As a PlantMD horticultural expert notes, “Dealing with potato bugs is a common gardening rite of passage! Consistent hand-picking and organic options like Neem oil are surprisingly effective. The key is to be vigilant and act early.” While these controls work, prevention is also key.
Tips for Preventing Potato Pest Infestations in the First Place
To effectively prevent potato pests, proactive steps are best. Consider these key strategies:
- Crop Rotation: Avoid planting potatoes in the same spot annually.
- Beneficial Insects: Attract helpful predators like ladybugs.
- Garden Cleanup: Remove debris where pests overwinter.
- Early Row Covers: Use them before pests appear.
These tips also help manage other common potato pests, which we’ll look at next.
Other Common Potato Pests to Watch For
Beyond potato beetles, other common potato pests include aphids, flea beetles, and leafhoppers. Aphids suck sap, flea beetles chew small holes in leaves, and leafhoppers can cause leaf tips to brown. Many organic controls, like encouraging beneficial insects or using row covers, can help manage these too. Vigilance also extends to recognizing common potato diseases.
A Quick Note on Recognizing Common Potato Diseases
Also, be aware of common potato diseases. Early or late blight may show as leaf spots, while scab creates rough patches on tubers. Your best defense against these potato diseases is prevention: use certified seed potatoes, ensure good air circulation, and rotate crops. Vigilance with pests and diseases empowers you to protect your crop.
With insights on timing, preparation, planting, ongoing care, and pest protection, you’re now fully equipped to embark on your potato growing adventure. Figuring out when is the best time to plant potatoes for your specific garden might seem daunting, but it’s entirely achievable. By understanding your local frost dates, ensuring soil temperatures reach that crucial 50-55°F, and properly preparing your seed potatoes, you’ve laid the groundwork. Whether planting in-ground or trying potatoes in barrels, the techniques shared—from planting to managing common pests like potato bugs—set you up for a rewarding harvest. This guide has shown how understanding your hardiness zone and using beginner-friendly container methods can lead to success. You’re now equipped to confidently grow your own spuds! We’d love to hear your regional tips or challenges in the comments.
