Table of Contents
Seeing those vibrant green tomato leaves start to yellow can feel like a punch to the gut, especially when you’ve put so much care into your plants. You immediately worry: is this the end of your harvest before it even begins?
It’s confusing because why are my tomato plants turning yellow can have many answers, and online advice often feels contradictory. Is it overwatering (a common suspect!) or something else entirely? How do you know if it’s normal aging or a critical issue needing immediate action?
This guide is designed to end the guesswork. We’ll walk you through a clear diagnostic process to pinpoint the real cause, from common issues like watering problems and nutrient deficiencies to other potential culprits. You’ll get simple, actionable steps to fix the problem, even addressing community-discussed remedies like safely using hydrogen peroxide.
Let’s start by looking at the most likely reasons your tomato leaves are changing color.
Why Are My Tomato Leaves Yellow? First Steps & Top Suspects
Seeing yellow leaves on your tomato plants can be worrying, especially when you’re looking forward to a delicious harvest. Don’t panic just yet! Often, the cause is simple and fixable. Let’s start diagnosing the issue by looking closely at where the yellowing appears on the plant and then tackle the most common culprit: watering problems.
Reading the Yellowing Pattern: Where Do You See Yellow?
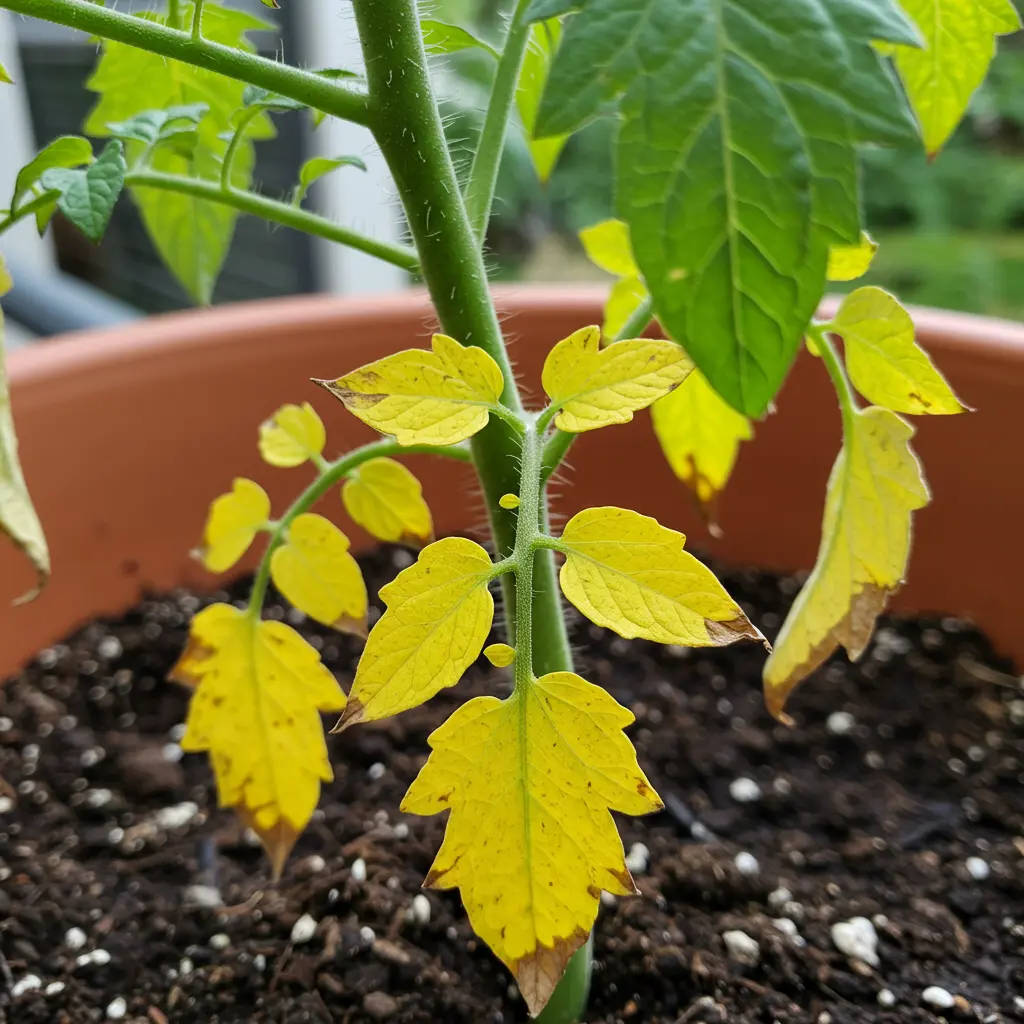
It might seem like a small detail, but where the yellow leaves are showing up on your tomato plant offers the first significant clue to what might be wrong. Think of it like detective work for your garden! Generally, yellowing that starts on the bottom, older leaves often points towards issues with mobile nutrients (like Nitrogen, which the plant can move from old to new leaves), problems with overwatering, or sometimes just the natural aging process called senescence. Finding a tomato leaves yellow bottom fix often starts here. Conversely, if the yellowing primarily appears on the top leaves or the newest growth, it frequently signals a deficiency in an immobile nutrient (like Iron, which the plant struggles to move once placed) or could indicate certain types of diseases.  Understanding why location matters comes down to how plants use nutrients: mobile nutrients can be relocated by the plant to newer growth when supplies are low, sacrificing older leaves, while immobile nutrients stay put once incorporated into leaves. Recognizing this distinction is a crucial first step in diagnosing the problem, based on years of gardening experience.
Is it Overwatering? (The #1 Suspect)
Based on countless gardening forums and questions we hear, overwatering is hands-down the most frequent reason for yellowing tomato leaves, especially for beginners. It’s easy to do, often stemming from a desire to care for your plants! So, what does overwatering look like on tomato plants? It’s not just about yellow leaves; several signs point towards too much moisture suffocating the roots.
Key signs of overwatering include:
- Yellowing lower leaves: Often the first leaves to show distress.
- Wilting despite moist soil: The plant looks thirsty, but the soil is wet to the touch. This happens because waterlogged roots can’t function properly to absorb water or oxygen.
- Mushy stems: The base of the stem near the soil line might feel soft or squishy.
- Leaf edema: Small, water-soaked blisters or bumps may appear on the undersides of leaves.
- Fungus gnats: These tiny, dark flies hovering around the soil surface thrive in consistently damp conditions.
If you spot several of these signs, improper watering is a likely culprit, and focusing on overwatered tomato plant recovery should be your priority.
Stop Guessing: How to Properly Check Soil Moisture
The single most important step to prevent both overwatering and underwatering is to check the soil moisture before you even think about grabbing the watering can. It sounds simple, but doing it correctly is key, especially for container-grown tomatoes where soil dries out differently than in garden beds. Forget watering on a strict schedule; water when your plants actually need it. Here’s how to check:
- The Finger Test: Gently insert your index finger into the soil near the base of the tomato plant, going down about 1 to 2 inches deep. This gets you past the surface layer, which often dries out faster.
- Feel the Soil: Pay attention to what you feel.
- Damp/Slightly Moist: Perfect! Your plant likely doesn’t need water yet. Check again tomorrow or the next day.
- Wet/Soggy: Definitely hold off on watering. This indicates a risk of overwatering. Improving drainage might be necessary for long-term
overwatered tomato plant recovery. - Dry and Crumbly: It’s time to water thoroughly.
- Consider a Tool (Optional): If you’re unsure about the finger test or have many plants, a simple soil moisture meter can be helpful. Just insert the probe to the appropriate depth and read the gauge.
Checking deeply before each watering is a fundamental skill for successful gardening. Understanding how often to water plants in general is useful, but always let the soil condition be your ultimate guide.
Is Lower Leaf Yellowing Just Normal Aging?
Sometimes, seeing yellow leaves on the bottom of your tomato plant isn’t cause for alarm – it can be perfectly normal! As tomato plants mature and start putting energy into producing fruit, they naturally shed their oldest, lowest leaves. This process is called leaf senescence. It’s easy to confuse this natural aging with a serious problem, leading to unnecessary worry.
So, how can you tell the difference? Here’s a quick comparison:
| Sign | Normal Aging (Senescence) | Potential Problem |
|---|---|---|
| Location | Primarily the very bottom, oldest leaves. | Yellowing higher up, on new growth, or widespread. |
| Speed | Gradual yellowing over time. | Rapid yellowing, multiple leaves affected quickly. |
| Pattern | Fairly uniform yellowing of the whole leaf. | Distinct patterns (spots, yellow veins/green leaf). |
| Plant Stage | Typically on mature, fruiting plants. | Can occur on young plants or before fruiting. |
| Overall Health | Rest of the plant looks healthy and vigorous. | Other signs of stress (wilting, poor growth). |
Knowing this difference can save you stress. As a PlantMD horticultural expert advises, “Don’t panic if just the very bottom leaves on a mature, fruiting plant turn yellow – that’s often just normal aging, called senescence. Worry when the yellowing is rapid, affects higher leaves, or shows distinct patterns like spots or green veins.” If it’s just senescence, this isn’t something needing a tomato leaves yellow bottom fix; simply remove the fully yellow leaves if you wish.
To Prune or Not to Prune?
Q: Should I remove yellow leaves from my tomato plant?
A: Generally, yes, it’s a good idea to remove leaves that are fully yellow or brown, especially the lower ones. Here’s why and when:
- Remove:
- Fully yellow/brown leaves: These aren’t contributing much, if anything, to photosynthesis and can sometimes harbor pests or diseases. Removing lower ones also improves air circulation around the base of the plant, which helps prevent fungal issues.
- Diseased leaves: Leaves showing clear signs of disease (like spots, lesions, or fuzzy mold) should be removed immediately to prevent spread. Dispose of them away from the garden.
- Heavily pest-infested leaves: If a leaf is covered in pests like aphids or spider mites, removing it can help control the population.
- Leave (for now):
- Partially yellow leaves: If you suspect a nutrient deficiency and are taking steps to correct it, leave partially yellow leaves for a while. They can still perform some photosynthesis and may even recover some green color once the deficiency is addressed.
Pruning strategically helps the plant direct resources to healthy growth and fruit production and is a key part of disease prevention.
Quick Diagnostic Checklist
Before jumping to conclusions about complex issues, run through these initial checks based on what we’ve just covered:
- Where is the yellowing concentrated? Bottom leaves, top leaves, or new growth?
- How wet is the soil? Check 1-2 inches deep – is it dry, damp, or soggy?
- Is it just the oldest, lowest leaves on a mature, fruiting plant? Could it be normal senescence?
- Do you see any obvious pests (like aphids, spider mites) or distinct spots/patterns that might indicate disease?
- Have there been any recent changes? Think about watering habits, feeding schedules, repotting, or significant weather shifts (extreme heat, heavy rain).
Running through this quick checklist helps narrow down the possibilities considerably. If overwatering or senescence doesn’t seem to be the issue, the next step is to look closer at potential nutrient imbalances.
Nutrient Deficiencies: Spotting the Specific Signs
If watering isn’t the issue, the specific pattern of yellowing on your tomato leaves might point towards a particular nutrient deficiency. Understanding how different nutrients move within the plant is key to deciphering these visual clues and figuring out what your plant needs.
Nutrient Mobility: Why Location Matters (Again)
As introduced, understanding where the yellowing starts is a crucial step in diagnosing the problem. This relates directly to the concept of nutrient mobility, which describes . Some nutrients are considered mobile, meaning the plant can easily relocate them from older tissues to support new growth. Mobile nutrients include Nitrogen (N), Phosphorus (P), Potassium (K), and Magnesium (Mg). Consequently, deficiencies in these mobile nutrients typically show up first on the older, lower leaves as the plant sacrifices them to feed the younger growth. Conversely, immobile nutrients like Calcium (Ca), Iron (Fe), Manganese (Mn), Zinc (Zn), and Boron (B) cannot be easily moved once incorporated into plant tissue. Therefore, deficiencies in these immobile nutrients usually appear first on the newer, upper leaves and growing tips. Observing the location of the yellowing is therefore fundamental for accurate diagnosis, and a good tomato nutrient deficiency identification chart will often categorize symptoms this way.
Nitrogen (N) Deficiency: Overall Yellowing
A lack of nitrogen, one of the most common issues, typically causes a general, uniform yellowing of the entire leaf. This yellowing, known as chlorosis (a lack of chlorophyll, the green pigment), usually starts on the oldest, lowest leaves and gradually progresses up the plant if the deficiency isn’t corrected.  Affected plants may also appear somewhat stunted or less vigorous overall. If you’re trying to use a tomato nutrient deficiency identification chart, look for descriptions emphasizing this overall paleness starting low on the plant. This pattern helps distinguish it from other issues.
Magnesium (Mg) Deficiency: Green Veins, Yellow Leaf
Magnesium deficiency presents a distinctly different pattern than nitrogen deficiency. Instead of uniform yellowing, magnesium issues cause the areas between the leaf veins to turn yellow, while the veins themselves remain green. This is called interveinal chlorosis. Like nitrogen deficiency, this symptom typically starts on the lower, older leaves because magnesium is also a mobile nutrient. Sometimes, you might also notice the leaf edges curling upwards or developing reddish or purplish tints along with the yellowing. So, how do you know if your tomatoes need nitrogen or magnesium? Look closely: Nitrogen causes overall yellowing on older leaves, while magnesium causes yellowing between green veins on older leaves. Consulting a detailed tomato nutrient deficiency identification chart can visually reinforce this difference.
Potassium (K) Deficiency: Yellow Leaf Edges
Potassium deficiency often shows up first as yellowing or browning right along the edges and tips of the leaves. This necrosis (tissue death) can make the leaves look scorched or burnt. While it often starts on the lower or middle leaves (potassium is mobile), the most defining characteristic is the location of the symptoms on the leaf margins. It’s another key pattern to look for when comparing your plant to a tomato nutrient deficiency identification chart.
Less Common Issues: Iron & Others
While Nitrogen, Magnesium, and Potassium are common culprits, other deficiencies can also cause yellowing, though they might appear less frequently or present slightly differently:
- Iron (Fe) Deficiency: Iron causes interveinal chlorosis, much like magnesium deficiency. However, because iron is immobile in the plant, these symptoms appear first on the newest, youngest leaves at the top of the plant, not the older, lower ones. The veins stay green while the tissue between them turns yellow or even white in severe cases.
- Calcium (Ca) Deficiency: While most known for causing blossom end rot on the fruit, severe calcium deficiency (also immobile) can sometimes cause distorted or stunted new growth and yellowing of young leaves.
Using a comprehensive tomato nutrient deficiency identification chart can help differentiate these less common issues based primarily on whether the symptoms appear on new or old growth.
Using a Visual Guide
Comparing your plant’s symptoms side-by-side with photos or illustrations is incredibly helpful. However, be cautious with diagnosis based solely on one leaf. Always assess the overall pattern on the plant – where is the yellowing starting? Is it uniform, interveinal, or on the edges? Consider the plant’s overall health and vigor. Using reliable from university extension services or reputable horticultural sources is highly recommended over random internet images. Referencing a good tomato nutrient deficiency identification chart alongside careful observation of your specific plant provides the best chance for an accurate diagnosis. Recognizing these deficiency patterns is a big step forward.
Now that you can better identify potential nutrient issues based on visual cues, it’s time to consider other factors that might be causing yellow leaves.
Chapter 3: Ruling Out Other Causes: Pests, Diseases, and Stress
If watering and nutrient issues don’t seem to fit, other factors like pests, diseases, or environmental stress could be causing those yellow leaves. It can be frustrating when the obvious solutions don’t work, but let’s investigate these other possibilities methodically.
Look Closer: Checking for Pests
Sometimes, the culprits behind yellowing leaves are tiny invaders. A close inspection is needed to spot them, as they often hide. Grab a magnifying glass if you have one, and let’s check your plant carefully:
- Aphids: Look closely on the undersides of leaves and new stem growth. Aphids are small, pear-shaped insects, often green, yellow, brown, or black. They cluster together and suck sap, causing leaves to yellow, curl, or distort. You might also notice a sticky residue called honeydew on leaves or stems below the infestation.

- Spider Mites: These are incredibly tiny arachnids, difficult to see without magnification. Check the undersides of leaves for fine, delicate webbing, especially where the leaf meets the stem. Affected leaves often develop tiny yellow or white dots (stippling) and may eventually turn entirely yellow or bronze before drying up and dropping.
- Whiteflies: Examine the undersides of leaves for small, white, moth-like insects. If you disturb the plant, they will often fly up in a cloud. Like aphids, they suck sap, leading to yellowing and weakening of the plant, and they also produce honeydew.

Identifying Common Diseases
Several fungal diseases can cause tomato leaves to yellow and die off, often starting from the bottom of the plant and moving upwards. Here are two common ones to look for:
- Early Blight: This typically starts on the lower, older leaves. Look for small, dark brown to black spots that enlarge, often developing concentric rings like a target (target spot). A yellow halo frequently surrounds these dark spots. As the disease progresses, the entire leaf may yellow, wither, and fall off.
- Septoria Leaf Spot: This also usually appears on lower leaves first. Symptoms begin as small, water-soaked spots that quickly develop tan or grayish centers with dark brown borders. Numerous spots can appear on a single leaf. Heavily infected leaves will turn yellow, then brown, and eventually drop.
Observing the pattern of yellowing and the specific type of spots or lesions can help distinguish between diseases. Note whether the problem starts low and moves up, or appears randomly. For more help, consider resources for identifying common tomato diseases.
Could it Be the Environment?
Sometimes, the growing conditions themselves can stress your tomato plants and trigger yellow leaves. Consider these environmental factors:
- Sunscald: If leaves (or fruit) develop bleached, yellowish, or white patches, particularly on the sides exposed to intense, direct afternoon sun, it could be sunscald. This is essentially a plant sunburn.
- Extreme Heat Stress: Prolonged periods of very high temperatures can cause overall stress, leading to general yellowing, wilting (even if the soil is moist), and reduced growth.
- Inconsistent Watering Stress: While different from chronic overwatering or underwatering, fluctuating wildly between very dry and very wet soil can also stress the plant, sometimes resulting in yellow leaves as the plant struggles to adapt.
Check the Roots (Especially in Pots)
If your tomato plant is growing in a container, another potential issue is becoming root-bound. This happens when the roots have filled the entire pot and started circling, lacking space to expand further. This is a common reason why are my potted tomato plants turning yellow. Signs include slowed overall growth, the soil drying out very quickly between waterings, and often, yellowing starting on the lower leaves. When roots are constricted like this, their ability to take up water and essential nutrients is severely limited, leading to deficiency symptoms like yellowing, even if nutrients are present in the soil. To check, gently try to slide the plant out of its pot. If you see a dense mass of roots circling the bottom and sides of the root ball, the plant is root-bound and needs a larger pot. Ensuring your tomatoes have adequate pot size from the start is crucial for healthy root development and nutrient uptake.
Ruling out pests, diseases, environmental stress, and root issues brings you closer to pinpointing the exact cause of those yellow leaves. With these potential culprits investigated, you’re now ready to tackle the next chapter on fixing the problem.
Chapter 4: Fixing Yellow Leaves: Step-by-Step Solutions & Remedy Guidance
Once you’ve diagnosed the likely cause, it’s time for action. Don’t worry, many common issues behind yellowing tomato leaves are fixable with the right approach. Here are step-by-step fixes for the most common problems, including guidance on popular remedies you might have heard about.
Solution: Recovering an Overwatered Plant
Seeing those yellow leaves due to soggy soil can be disheartening, but often, your plant can bounce back if you act quickly. Effective overwatered tomato plant recovery involves correcting the moisture imbalance and giving the roots a chance to breathe. Here’s how to help your plant recover:
- Stop Watering Immediately: This seems obvious, but hold off on adding any more water until the soil has had a chance to dry significantly.
- Ensure Proper Drainage: Check that your container has drainage holes. If it does, empty any standing water from the saucer beneath the pot. Waterlogged roots sitting in a pool of water are a primary cause of problems.
- Aerate the Soil Surface: If the top layer of soil feels compacted, gently poke small holes into the surface using a chopstick or skewer. This helps improve air circulation and allows moisture to evaporate more easily, aiding drainage.
- Consider Repotting (If Severe): If the soil is completely saturated, smells sour (a sign of root rot), or the plant is severely wilted despite wet soil, you may need to carefully repot. Gently remove the plant, inspect the roots, and trim away any brown, mushy, or rotten sections with clean shears. Replant into a clean pot with fresh, well-draining potting mix. This step removes the source of rot and provides a healthier environment.
- Allow Soil to Dry Appropriately: Let the top 1-2 inches of soil dry out completely before watering again. Adjust your watering frequency based on the plant’s needs and environmental conditions.
Community Tip: Using Hydrogen Peroxide Safely
Q: Is it safe to use hydrogen peroxide on tomato plants?
A: You might hear advice about using hydrogen peroxide for yellow tomato leaves, especially in cases of overwatering. While it can be used cautiously in specific situations, it’s not a general cure-all or fertilizer. Its main purpose is to temporarily introduce oxygen into severely waterlogged soil, which can sometimes help combat the effects of root suffocation and anaerobic bacteria associated with root rot.
Consider using it only if you suspect severe overwatering and potential root rot. If you choose to try it, proceed carefully:
- Use standard 3% household hydrogen peroxide (the kind found in brown bottles).
- Crucially, dilute it heavily. A common recommendation is 1 part 3% hydrogen peroxide to 4 parts water (roughly 1-2 tablespoons per gallon of water).
- Apply this diluted solution as a soil drench only once.
As one PlantMD horticultural expert advises, “While hydrogen peroxide can help oxygenate severely waterlogged soil, it’s not a magic bullet. Use the standard 3% household type, heavily diluted – about 1 part peroxide to 4 parts water – and only apply it once as a drench. It won’t fix underlying drainage issues or act as a fertilizer.” Remember, it doesn’t replace the fundamental needs for proper watering techniques and good soil drainage.
Solution: Fixing Nitrogen Deficiency
If your diagnosis, perhaps aided by a tomato nutrient deficiency identification chart, points towards a lack of nitrogen (typically shown by uniform yellowing starting on lower, older leaves), providing the right nutrients is key. Here’s how to correct it:
- Choose an Appropriate Fertilizer: Select a fertilizer that can provide nitrogen. Options include:
- A balanced liquid fertilizer (e.g., 10-10-10).
- A fertilizer slightly higher in nitrogen (the first number in the N-P-K ratio).
- Organic options like fish emulsion or blood meal.

- Apply According to Directions: This is critical! Always follow the package instructions for dilution and application rates. Applying too much fertilizer, especially synthetic types, can burn the plant’s roots, causing more harm than good.
- Water Well After Fertilizing: Watering helps distribute the nutrients into the soil and makes them available to the plant roots.
- Monitor New Growth: Look for improvement in the color of new leaves emerging after treatment. Existing yellow leaves may not fully recover (more on that below), but new growth should be green and healthy.

Solution: Correcting Magnesium Deficiency
Magnesium deficiency often shows up as yellowing between the veins (interveinal chlorosis) on lower leaves, while the veins themselves remain green. If you’ve used a tomato nutrient deficiency identification chart and suspect this is the issue, Epsom salts (magnesium sulfate) can be an effective fix, but use them judiciously.
Confirm Magnesium Deficiency Signs: Double-check that the symptoms match magnesium deficiency (yellowing between veins on older leaves).
Mix Epsom Salts: Dissolve approximately 1-2 tablespoons of Epsom salts per gallon of water.
Apply the Solution: You can apply this mixture either as a soil drench around the base of the plant or as a foliar spray directly onto the leaves. If spraying, do it early in the morning or late in the evening to avoid leaf burn.
Apply Sparingly: This is important! Use this treatment only if magnesium deficiency is confirmed, perhaps once every 2-4 weeks, and only if needed. Over-applying magnesium can interfere with the plant’s ability to absorb calcium, another essential nutrient, potentially leading to other problems like blossom end rot.
Addressing Other Issues (Nutrients, Pests, Disease)
Sometimes yellow leaves signal less common nutrient issues, pests, or diseases identified in earlier chapters. Here’s a brief overview of how to approach these:
- Other Nutrient Deficiencies: If you’ve identified a specific lack (like iron, often causing yellowing on new leaves), use a targeted micronutrient spray or fertilizer formulated to address that specific deficiency, following label instructions precisely.
- Pest Infestations: For pests like aphids, spider mites, or whiteflies, use appropriate control methods. This might include spraying with insecticidal soap or neem oil (follow label directions carefully), physically removing pests with a water spray or by hand, or introducing beneficial insects.
- Fungal or Bacterial Diseases: If diseases like Septoria leaf spot, early blight, or bacterial spot are the culprits (often causing spots with yellow halos), remove and destroy affected leaves immediately (do not compost). Improve air circulation around plants by pruning or spacing. For severe infections, apply fungicides or bactericides according to label instructions, ensuring they are rated for the specific disease and for use on tomatoes.
Managing Expectations: Will Yellow Leaves Recover?
Q: Can yellow tomato leaves turn green again after treatment?
A: This is a common question, and the answer is: it depends. It’s important to set realistic expectations.
Leaves that have turned completely yellow or brown, especially due to aging (senescence), severe nutrient deficiency, significant pest damage, or advanced disease, generally will not turn green again. The chlorophyll (the pigment that makes leaves green) has been lost or damaged beyond repair, or the leaf tissue itself is dying. In these cases, it’s often best to carefully remove these severely affected leaves so the plant can direct its energy towards healthier growth.
However, leaves that are only mildly yellowed due to a temporary and correctable issue – like a slight, short-term nitrogen shortage that you quickly fix, or mild stress from temporary overwatering that you resolve – might regain some of their green color as the plant recovers.
Ultimately, the primary goal of treating yellow leaves is not always to restore the old leaves, but to ensure that new growth emerges healthy, vigorous, and green. Fixing the underlying problem prevents the issue from spreading and allows the plant to thrive moving forward.
With these solutions in hand for fixing common causes of yellow leaves, you’re better equipped to help your tomato plants recover. Now, let’s focus on how to prevent these issues from happening in the first place through proactive care.
Chapter 5: Keeping Leaves Green: Prevention and Ongoing Care
The best way to deal with yellow leaves is often to prevent them in the first place. Consistent care focusing on the basics goes a long way towards maintaining healthy, vibrant green tomato plants throughout the growing season. Let’s look at the key preventative measures you can take.
Water Wisely: Consistency is Key
Getting the watering right is perhaps the single most important step you can take to prevent yellow leaves. Aiming for consistent moisture is crucial, avoiding the extremes that stress your plants. Here’s how to master preventative watering:
- Check First, Water Second: Before watering, always check the soil moisture. Stick your finger about 1-2 inches deep. If it feels dry at that depth, it’s time to water. If it’s still moist, wait. This simple check prevents both underwatering and the conditions that lead to needing overwatered tomato plant recovery.
- Water Deeply: When you do water, water thoroughly until moisture reaches the root zone. Shallow, frequent watering encourages shallow roots, making plants more susceptible to drying out.
- Aim for Consistency: Try to maintain a steady level of soil moisture. Avoid letting the soil become bone dry or constantly waterlogged. Establishing consistent watering practices is key.
- Water the Base: Apply water directly to the soil around the base of the plant.
 Keeping the foliage dry helps minimize the risk of fungal diseases, which can also cause yellowing.
 - Mulch Matters: Applying a layer of organic mulch (like straw, shredded bark, or compost) around your plants helps retain soil moisture, suppresses weeds, and keeps soil temperatures more stable.
 Keeping the foliage dry helps minimize the risk of fungal diseases, which can also cause yellowing.
Feed Regularly and Appropriately
Tomatoes are hungry plants, and providing them with the right nutrients at the right time prevents deficiencies that lead to yellowing. Instead of waiting for problems, feed your plants proactively. Use a balanced fertilizer specifically formulated for tomatoes, which will contain the necessary macro- and micronutrients. Always follow the package instructions regarding the amount and frequency – typically, this might be every 2-4 weeks once the plants start actively growing and setting fruit. While feeding is important, resist the urge to overdo it; over-fertilizing can be just as harmful as under-fertilizing, potentially causing nutrient burn or imbalances. Consistent, appropriate feeding helps ensure you won’t need to consult a detailed tomato nutrient deficiency identification chart later on.
Give Roots Room to Grow
Especially for container gardeners, providing adequate space for root development is a critical preventative step. If you’re wondering “why are my potted tomato plants turning yellow?”, restricted roots could be the culprit. Choose a container that’s at least 5 gallons in size per plant. For larger, indeterminate varieties, opting for 10-gallon or even larger pots is highly recommended when choosing the right pot size. Just as important as size is the growing medium. Use a high-quality, well-draining potting mix specifically designed for containers. Avoid using heavy garden soil, which compacts easily and restricts drainage and airflow. Giving roots ample space and the right soil environment from the start helps prevent the plants from becoming root-bound, a common stressor leading to yellow leaves.
Promote Airflow and Monitor Regularly
Good air circulation around your tomato plants is vital for preventing fungal diseases, a frequent cause of yellowing, especially on lower leaves. Regular monitoring helps you catch any potential issues early.
- Prune for Airflow: Selectively remove some of the lower leaves, particularly any that are touching the soil. You can also prune some of the “suckers” (the small shoots that grow between the main stem and a branch). This thinning allows air to move more freely through the plant canopy, reducing humidity and the likelihood of fungal spores taking hold.
- Inspect Weekly: Make it a habit to take a quick walk through your tomato patch at least once a week. Look closely at the leaves (both tops and undersides), stems, and developing fruit. Catching the first signs of pests, disease, or nutrient issues allows for quicker, more effective intervention. This regular monitoring is a proactive skill learned through experience.
By consistently applying these preventative care strategies – wise watering, appropriate feeding, providing adequate root space, and ensuring good airflow – you significantly increase your chances of keeping those tomato leaves healthy and green all season long.
Yellowing tomato leaves can be baffling, but pinpointing the cause is key to bringing back the green. This guide equipped you to investigate effectively – checking if overwatering is the issue (often the prime suspect!), examining where the yellowing starts, and recognizing signs of nutrient needs or other stressors. You now have straightforward, actionable steps for recovery, cutting through confusing advice and even clarifying how remedies like hydrogen peroxide can help (or hinder!). With these diagnostic skills, you’re ready to nurture your plants back to health. What diagnosis fit your yellowing leaves, and which fix worked for you? Share your experience below – and here’s to a vibrant, productive tomato season!
