Table of Contents
Did a piece of your beloved ZZ plant accidentally snap off, or are you simply hoping to multiply your collection without buying new plants? Water propagation offers a straightforward way to create new ZZ plants, but it’s notorious for testing your patience with its incredibly slow pace. Uncertainty about the correct steps and the long waiting time can be discouraging for beginners.
This comprehensive guide walks you through exactly how to propagate ZZ plant in water, covering the specific techniques for both stem and leaf cuttings. We provide clear instructions, set realistic expectations for the often lengthy timeline, and offer expert troubleshooting advice to ensure your project succeeds. Ready to transform a cutting into a thriving new plant? Let’s start by gathering the necessary supplies and preparing your cutting.
Getting Started: Supplies & Taking ZZ Plant Cuttings
Equip yourself with the necessary materials and learn how to correctly take viable stem or leaf cuttings for water propagation. Starting with the right foundation makes the process smoother and increases your chances of success, helping you multiply your ZZ plant collection affordably.
Gather Your Supplies
Before you make the first cut, gathering your materials ensures a smooth process. Knowing exactly how to propagate zz plant in water starts with having the right tools ready. Here’s what you’ll need:
- A Clean Jar or Glass: Choose a container tall enough to support the cutting and hold enough water to submerge the node(s) or leaf base. A clean jar is essential; any lingering residue can introduce bacteria or encourage algae growth, harming your cutting.
- Fresh Water: Regular tap water is usually fine. If you’re concerned about chlorine or chloramine in your municipal water, let it sit out overnight in an open container, allowing some of these chemicals to dissipate before use.
- A Sharp, Sterilized Cutting Tool: Use sharp scissors, pruners, or a knife. A clean cut causes less damage to the plant tissue, promoting better healing and rooting. Sterilizing your tool before each cut is crucial to prevent the transfer of plant diseases. You can see the basic ZZ plant propagation supplies including a jar, water, and cutting tool ready to go.
Having these simple items on hand sets you up for successful ZZ plant propagation.
Select a Healthy Parent Plant
Your new plant’s success starts with the parent. Choose cuttings from a mature, healthy ZZ plant showing vigorous growth. Look for stems and leaves that are deep green, firm, and free from any signs of pests, yellowing, brown spots, or weakness.
Selecting a cutting from a robust parent plant is important because healthy stems and leaves contain more stored energy and resources, significantly increasing the likelihood of successful rooting and growth. It also minimizes the risk of transferring any underlying health issues or diseases to your new propagation project. A visual example of a healthy, mature Zamioculcas zamiifolia can guide your selection.
Sterilize Your Cutting Tool
Before making any cuts, take a moment to sterilize your chosen tool—whether it’s scissors, pruners, or a knife. Simply wiping the blades thoroughly with rubbing alcohol (isopropyl alcohol) is an effective and quick method. You can see how easily this is done by sterilizing scissors with rubbing alcohol before making a plant cutting.
This step is critical. An unsterilized tool can easily introduce bacteria or fungal spores into the fresh cut on both the parent plant and the cutting. These pathogens can lead to infection, rot, and propagation failure. Taking this simple precaution protects your plants and supports healthy rooting.
How to Take a Stem Cutting
Stem cuttings are generally the faster method for ZZ plant propagation. Follow these steps for successful zz plant stem cutting propagation:
- Select a Healthy Stem: Choose a vigorous stem from the healthy parent plant identified earlier.
- Make the Cut: Using your sterilized tool, make a clean cut directly below a node. A node is a small bump or joint on the stem where leaves emerge – this area contains the specialized cells (meristematic tissue) needed for root development. Cutting here is vital for rooting success. You can observe where to make the cut when taking a ZZ plant stem cutting, highlighting the node.
- Remove Lower Leaves: Gently pull or snip off the lowest one or two sets of leaves from the cut end of the stem. This exposes the node(s) that will be submerged in water. Removing leaves that would otherwise be underwater prevents them from rotting, which could spoil the water and harm the cutting.
For a visual guide, watching a demonstration on how to take a ZZ plant stem cutting can be very helpful.
How to Take a Leaf Cutting
Yes, you can propagate ZZ plant from just a leaf in water, although this method typically takes longer than stem cuttings to produce roots and especially new growth. If you want to try zz plant leaf cutting propagation, here’s how:
- Choose a Healthy Leaf: Select a mature, healthy leaf from the parent plant.
- Make the Cut: Using your sterilized tool, cut the leaf off close to the main stem. Crucially, ensure you include a small piece of the petiole (the tiny stalk that attaches the leaf to the main stem) with the leaf. This petiole base contains the necessary tissue for initiating root and rhizome development; without it, the leaf is unlikely to propagate successfully. You can see how to take a ZZ plant leaf cutting, ensuring the petiole is included.
While slower, this method allows you to propagate even if you only have a single leaf. Watching a video detailing how to take a ZZ plant leaf cutting can clarify the process. Knowing you can root zz plant leaf in water offers another great way to multiply your plants.
Prepare the Cutting (Optional Callousing)
After taking either a stem or leaf cutting, some growers prefer to let the cut end dry out and form a ‘callous’ before placing it in water. To do this, simply leave the cutting in a dry, shaded spot for a few hours up to a full day.
This optional step allows the raw, cut surface to seal over slightly. This calloused barrier can help prevent bacteria and fungi from entering the wound, reducing the risk of rot once the cutting is placed in water. While beneficial, many people successfully root ZZ plants in water without this step, but it’s a good practice if you’ve had issues with rot previously. An image of a ZZ plant cutting with a calloused end drying illustrates this stage.
With your supplies gathered and your cuttings correctly taken and prepared, you’re ready to move on to the actual water propagation process.
The Water Propagation Process: Step-by-Step Rooting
Follow these clear, sequential instructions for placing ZZ cuttings in water and caring for them during the rooting phase. This process sets the stage for successful propagation, turning your cuttings into new plants.
Choose the Right Vessel
Selecting the proper container is your first step. A clear glass or jar works best for water propagation because it allows you to easily monitor root development and check the water’s clarity without disturbing the cutting. You’ll want a visual like seeing your ZZ plant cuttings resting in a clear glass jar. Ensure the vessel is thoroughly cleaned before use and is appropriately sized – large enough to hold the cutting(s) upright without overcrowding, but not so large that the cutting is unstable.
Place Cuttings in Water
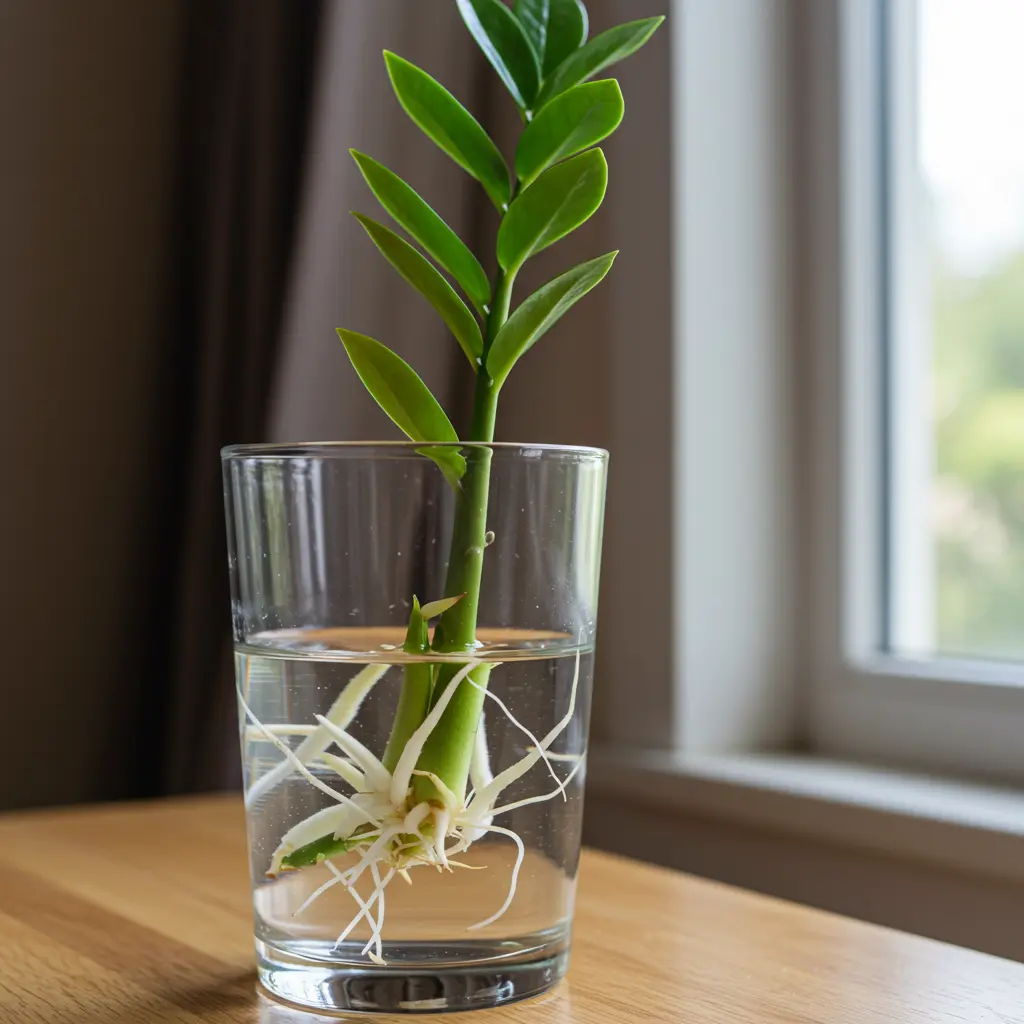
Now, introduce your cutting to its temporary home. Fill your chosen vessel with enough room temperature water to submerge the bottom node (the small bump where a leaf was attached) of a stem cutting, or the very base and petiole (leaf stalk) of a leaf cutting. Carefully place the cutting into the water. Ensure that no leaves are submerged; only the stem base or petiole should be below the waterline, as shown with a ZZ plant cutting at the correct water level in its propagation jar. Submerged leaves will quickly rot and can introduce harmful bacteria, hindering your efforts in learning how to propagate zz plant in water successfully.
Find the Ideal Location
Where you place your propagating cutting significantly impacts its rooting speed. Position the vessel in a location receiving plenty of bright, indirect light. An east-facing window or a spot a few feet back from a brighter south or west window is often ideal. This bright, indirect light provides the energy the cutting needs to focus on developing roots. Avoid direct sunlight, as intense rays can scorch the delicate cutting or encourage algae to grow rapidly in the water. Look for a spot similar to where you might see a plant propagation jar placed near a window, bathed in gentle light.
Change the Water Regularly
This step is absolutely critical for success. Change the water frequently, typically every 3 to 7 days. If you notice the water becoming cloudy or discolored before then, change it immediately. Regular water changes replenish the oxygen supply available to the developing roots and, crucially, prevent the buildup of bacteria that can cause the cutting to rot. Always use fresh, room temperature water; avoid very cold or hot water, which can shock the cutting. Keeping the water fresh, like in visuals showing someone changing water in a plant propagation jar, is one of the most important actions you can take. As experts often note regarding the importance of frequent water changes for ZZ plant water propagation success, diligence here directly correlates with positive outcomes. Don’t skip this step – your commitment directly supports the cutting’s journey to becoming a new plant.
Watch for Root Development
Now comes the waiting game, which requires patience. Keep an eye on the submerged part of the cutting. The first signs of rooting are often small, white nubs appearing at the node or the base of the petiole. Sometimes, particularly with stem cuttings, you might first see a small, potato-like rhizome forming before roots emerge from it. Over weeks, these nubs or rhizomes will gradually elongate into discernible roots. Observing ZZ plant water propagation root development, including the potential rhizome, helps you track progress. Remember, ZZ plants are notoriously slow propagators, so don’t be discouraged if you don’t see activity for several weeks or even a couple of months.
With your cuttings now situated in water and receiving the right care, the next crucial element is understanding the timeline involved.
Patience is Key: Understanding the ZZ Propagation Timeline
Propagating ZZ plants in water is incredibly rewarding, but it requires a healthy dose of patience. Managing your expectations regarding the lengthy rooting and growth timeline is essential. Understanding the biological reasons for this slowness and knowing what to expect duration-wise can make the waiting game much easier.
How Long Does Rooting Take?
So, how long does it take for a ZZ cutting to root in water? Prepare for a wait. The typical zz plant propagation in water timeline for rooting is between two and four months, but it can sometimes take even longer. Understanding this zz plant propagation time frame upfront is crucial because rooting these plants in water is a notably slow process compared to many other houseplants. Feeling like nothing is happening after a few weeks is common. As one expert notes regarding realistic timeline expectations for ZZ plant water rooting: [placeholder for quote text]. A visual timeline, like a graphic showing the weeks and months involved, can help illustrate just how long to root zz plant in water.

Why Are They So Slow?
Why is the process so unhurried? It comes down to the ZZ plant’s biology. These plants grow from thick, fleshy rhizomes, which store significant amounts of energy and water. When you propagate a cutting, the plant often prioritizes using its stored energy to develop a new underground rhizome structure and roots first. Only after establishing this foundation does it typically invest energy into producing visible new stems or leaves. This energy storage strategy, clearly visible in illustrations of a ZZ plant rhizome, is key to their resilience but also explains their slow propagation speed.
Factors Influencing Rooting Speed
While patience is always required, certain conditions can influence how quickly your ZZ cutting develops roots:
- Ambient Temperature: Warmer room temperatures generally encourage faster biological activity, potentially speeding up root development. Aim for consistently warm conditions.
- Indirect Light: While ZZ plants tolerate low light, providing bright, indirect light gives the cutting energy through photosynthesis to fuel root growth.
- Cutting Health and Size: A larger, healthier cutting often has more stored resources and may root slightly faster than a small or stressed one.
- Water Quality and Changes: Regularly changing the water prevents bacterial growth and ensures adequate oxygen, supporting healthy root development.
Timeline for New Shoots/Leaves
Seeing roots is exciting, but the wait isn’t over. The timeline for new shoots or leaves emerging after roots have formed is even longer. Don’t be surprised if it takes many more months, potentially even over a year, before you see that first new stem poke through the soil line (after potting) or emerge from the cutting base if kept in water longer. Managing your expectations for this part of the zz plant propagation in water timeline is critical. Patience truly is paramount. You can see the difference in development when comparing a ZZ plant rooted cutting to one that has finally produced new growth. Regarding the timeline for new shoot development after ZZ plant rooting, experts often advise: [placeholder for quote text].
Visualizing Progress
It helps to know what progress looks like over this extended period. In the first month, you might only see the cut end callousing over or slight swelling at the base. Between months two and four is when you’ll typically start seeing small, white roots emerging and slowly lengthening. By month six or later, you should have a more established root system, possibly with a tiny new rhizome forming. Seeing the first new shoot emerge might take anywhere from nine to twelve months, or even longer. Looking at ZZ plant water propagation progress timeline photos covering month 1, 3, 6, and 9 can give you a good visual reference. Watching a ZZ plant water propagation time lapse showing rooting growth can also be incredibly insightful and reassuring.
Don’t Worry, Slow is Normal
If your ZZ cutting looks green and healthy but seems to be doing absolutely nothing for weeks or even months, take a deep breath. This slow pace is completely normal for ZZ plant water propagation. As long as the stem or leaf isn’t turning mushy, yellow, or showing signs of rot, your patience will very likely be rewarded eventually. Trust the process!
Understanding this extended timeline and the reasons behind it is key to staying patient during ZZ propagation; however, sometimes issues beyond slowness can arise, which we’ll address next.
Troubleshooting Common Water Propagation Problems
Water propagation is often straightforward, but sometimes things don’t go as planned. Don’t worry – many common issues are easy to fix. This section helps you proactively address common problems, understand why a cutting might fail, and find actionable solutions to overcome challenges in your ZZ plant propagation journey.
Why isn’t my ZZ cutting rooting in water?
It can be frustrating when your zz plant cutting not rooting in water after weeks or even months. Patience is the most crucial factor, as ZZ plants are notoriously slow propagators. However, if significant time has passed, several other factors could be hindering root development.
Common reasons why your ZZ cutting might not be rooting:
- Impatience: This is the number one reason! ZZ plants can take several months just to start developing roots. Give it more time before assuming failure.
- Insufficient Light: While they tolerate low light as established plants, cuttings need bright, indirect light to fuel the rooting process. Too little light slows everything down. Check if your cutting is receiving adequate light.
- Infrequent Water Changes: Stagnant water loses oxygen and allows bacteria or fungi to build up. This can inhibit rooting or lead to rot. Are you changing the water every 3-7 days? If not, start doing so immediately. You might notice the water becoming cloudy, a clear sign it needs changing, as illustrated when troubleshooting ZZ plant propagation issues like cloudy water or poor light conditions.
- Unhealthy Parent Plant/Cutting: A cutting taken from a stressed or unhealthy plant may lack the energy reserves needed to root successfully. Ensure you started with a healthy, vigorous cutting.
- Rot Has Started: Check the base of the cutting submerged in water. Is it soft, mushy, or discolored (brown/black)? This indicates rot, which prevents rooting.
Regarding the common reasons why ZZ cuttings fail to root in water, it often boils down to patience, environment, and hygiene. By carefully reviewing these points and checking your light levels, water change frequency, and the cutting’s base for any signs of softness, you can often diagnose the issue. Remember, troubleshooting zz plant propagation often starts with patience and careful observation.
What if the stem or leaf turns yellow/brown/mushy?
Seeing your ZZ cutting’s stem or leaf turn yellow, brown, or especially soft and mushy is usually a sign of rot. This bacterial or fungal infection can quickly spread and kill the cutting if not addressed promptly.
Here’s what to do immediately:
- Remove: Take the cutting out of the water right away.
- Inspect & Cut: Carefully examine the stem or leaf base. Using a clean, sharp knife or shears (sterilized with rubbing alcohol), cut away all soft, mushy, brown, or discolored tissue. You must cut back to healthy, firm, green tissue. Seeing the difference between a ZZ plant cutting with a mushy stem due to rot compared to a healthy one is key. Be thorough when cutting away the rot with your sterile knife; even a small amount left behind can allow the rot to return.
- Callous: Allow the newly cut end of the healthy portion to dry and callous over in the air for at least a few hours, or ideally, a full day. This helps seal the wound and prevents immediate reinfection.
- Retry: Place the trimmed and calloused cutting back into fresh water in a thoroughly cleaned jar.
Removing all affected tissue is critical because rot spreads quickly through the plant’s vascular system. Leaving any infected part behind means the infection will likely continue, undermining your efforts. This step is essential when troubleshooting zz plant propagation failures.
What does cloudy or smelly water mean?
If the water in your propagation jar becomes cloudy or develops an unpleasant smell, it’s a clear warning sign indicating the growth of bacteria or fungi. While not immediately fatal, it creates an unhealthy environment that stresses the cutting and significantly increases the risk of rot developing at the submerged base.
Take these steps immediately:
- Change Water: Discard the old, cloudy, or smelly water.
- Clean Vessel: Thoroughly wash the propagation jar or vessel with soap and hot water. Rinse it well to remove any soap residue.
- Rinse Cutting: Gently rinse the submerged part of the ZZ cutting under cool running water to wash away any bacterial slime or fungal growth.
- Refill: Place the cutting back into the clean jar with fresh, clean water (filtered or tap water left out overnight is ideal).
- Increase Frequency: Start changing the water more frequently, perhaps every 2-3 days, until you’re sure the problem is resolved.
Acting quickly when you see cloudy water in your ZZ plant propagation jar, which signals bacteria, is crucial for preventing rot and ensuring successful rooting. Addressing this is a common part of troubleshooting zz plant propagation.
My cutting has roots, but no new growth. Is something wrong?
You’ve patiently waited, and finally, your ZZ cutting has developed roots! But now you’re waiting again, and no new leaves or stems are appearing. Don’t panic; this is perfectly normal and very common with ZZ plants.
ZZ plants prioritize establishing a strong root system and developing their underground rhizomes (the potato-like structures) before putting energy into producing new top growth (leaves and stems). This is a key part of their survival strategy. It can take many more months, sometimes even over a year, after roots appear before you see the first signs of a new shoot emerging from the base. The sight of a ZZ plant cutting with healthy roots but no new shoots is typical for this stage.
Ensure the rooted cutting continues to receive bright, indirect light and keep changing the water regularly. As discussed regarding the plant’s growth strategy and timeline, patience remains essential even after roots form. This phase is just another step in the slow, steady process of troubleshooting zz plant propagation expectations.
What are common mistakes to avoid?
Propagating ZZ plants in water is generally easy, but beginners often encounter a few common pitfalls. Being aware of these can save you time and frustration.
Common mistakes when propagating ZZ plants in water:
- Giving Up Too Soon: ZZ plants test your patience. Expecting roots in weeks like some other houseplants leads to disappointment. Consequence: Discarding a perfectly viable cutting.
- Not Changing Water Often Enough: Stagnant water lacks oxygen and breeds bacteria. Consequence: Rotting stem/leaf base.
- Placing in Direct Sunlight: While needing bright light, direct sun scorches leaves and stresses the cutting. Consequence: Leaf burn, dehydration, slowed rooting.
- Using an Unhealthy or Tiny Cutting: Weak cuttings lack the energy to root. Very small leaf cuttings might root but take excessively long to produce new growth. Consequence: Failure to root or extremely slow progress.
- Submerging Leaves: Only the stem or the very base of the petiole (leaf stalk) should be in water. Submerged leaf surfaces rot easily. Consequence: Leaf rot spreading to the stem.
- Expecting Rapid New Growth: Even after rooting, ZZ plants focus on rhizome development underground first. Consequence: Unnecessary worry and impatience.
Regarding the top beginner mistakes in ZZ plant water propagation and how to avoid them, understanding the plant’s slow nature and maintaining good hygiene are paramount. Avoiding these common errors is key to successful troubleshooting zz plant propagation.
Distinguishing Normal Changes from Problems
It’s natural for the cut end of your ZZ cutting to change slightly as it sits in water. The very end typically seals itself off, forming a callus. This might involve a slight darkening or hardening right at the cut surface, which is perfectly normal and part of the healing process. However, it’s crucial to differentiate this benign callousing from the onset of rot. Problems typically involve changes that spread: look for discoloration (yellowing, browning, or blackening) moving up the stem from the cut end, or any signs of softness or mushiness when gently squeezed. Observing a ZZ plant cutting’s normal callousing versus the signs of rot side-by-side can help you learn the difference. If the tissue is firm and the changes are confined to the very tip, it’s likely fine; if it’s spreading or soft, it’s time to intervene.
Having learned how to troubleshoot common issues, you’re better equipped to handle the waiting game and ensure your cutting thrives until it’s ready for the next big step: moving to soil.
Success! Potting Your Rooted ZZ Plant Cutting
You’ve patiently watched your ZZ plant cutting develop roots in water, and now it’s time for the exciting final step: successfully transitioning it into soil. This guide walks you through the process, ensuring your new plant thrives in its permanent home.
When Are the Roots Ready for Soil?
A common question is, “When should I move my water propagated ZZ plant to soil?” Patience during the rooting phase pays off here. You’ll know it’s time for the transfer zz water propagation to soil when the cutting has developed several healthy, white roots that are at least 1-2 inches long. Seeing a small, developing rhizome (a swollen, potato-like structure) at the base of the cutting is another excellent indicator of readiness, as shown in images of ZZ plant roots ready for soil with this 1-2 inch growth and rhizome development. Don’t rush this critical step; well-established roots have a much better chance of adapting to soil without shock. Properly developed roots are key for successful potting zz plant water roots.
Choose the Right Pot Size
Selecting the appropriate pot is crucial for your newly rooted ZZ cutting. Opt for a small container, typically only 2-4 inches in diameter, that is just slightly larger than the cutting’s root system. Using a pot that’s too large significantly increases the risk of overwatering and subsequent root rot because the excess soil stays wet for too long around the delicate new roots. You can see examples comparing the correct pot size for a ZZ plant rooted cutting. Most importantly, ensure the pot you choose has drainage holes at the bottom to allow excess water to escape.
Select the Best Soil Mix
ZZ plants absolutely require excellent drainage, thanks to their water-storing rhizomes and natural drought tolerance. For potting your cutting, use a very well-draining potting mix. A commercially available cactus or succulent mix is ideal. Alternatively, amend a standard indoor potting mix by adding generous amounts of perlite, pumice, or coarse sand to improve aeration and drainage. A visual example can show a suitable well-draining soil mix featuring cactus/succulent soil components like perlite. This ensures water flows through easily, preventing the roots from sitting in soggy conditions.
How to Pot Your Cutting
Gentle handling is key during the potting zz plant water roots process to avoid damaging the fragile new roots. Follow these steps for a smooth transition:
- Add a layer of your well-draining soil mix to the bottom of the chosen pot.
- Carefully position the rooted cutting in the center of the pot, holding it gently.
- Slowly fill the pot with soil mix around the roots. Aim to keep the base of the stem or leaf at roughly the same level it was sitting in the water. Visual guides often illustrate these potting steps for ZZ plant rooted cuttings clearly.
- Lightly firm the soil around the base of the cutting to provide support, but avoid compacting it heavily.
For a visual walkthrough, watching a demonstration on how to pot a water-propagated ZZ plant cutting can be very helpful.
Initial Watering After Potting
Once your cutting is potted, water the soil lightly. This initial watering helps the soil settle around the new roots, eliminating large air pockets. After this first drink, allow the soil to dry out significantly before you water again. It’s critical to avoid keeping the soil constantly moist during this transition phase. Water roots are accustomed to constant hydration and need time to adapt to the drier conditions of soil; keeping the soil too wet now increases the risk of shock and root rot. You can find images demonstrating watering a newly potted ZZ plant cutting lightly. For more detailed guidance, you can learn more about .
Care Tips for Your Newly Potted Plant
Your ZZ cutting has successfully made the leap from water to soil! Now, focus on providing the right care as it establishes itself:
- Light: Continue providing bright, indirect light, just like during the water propagation phase.
- Patience: Don’t be discouraged if you don’t see immediate new growth. The plant is focusing energy on establishing its root system in the soil. It can still take weeks or months for new shoots to appear.
- Watering: Monitor the soil moisture carefully. Treat it much like a mature ZZ plant, allowing the top inch or two of soil to dry out completely between waterings. Be extra vigilant against overwatering during these first few months. Refer back to guidance on ongoing ZZ plant watering care as needed.
Soon, you should see your healthy young ZZ plant, potted after propagation, begin to put out new growth.
With your ZZ cutting successfully potted and settling into its new home, you’ve completed the water propagation journey!
Successfully propagating your ZZ plant in water is entirely achievable with the right approach. This guide has equipped you not just with the step-by-step process – from taking the perfect cutting to potting your rooted success – but also with the crucial understanding of the patience required and why. By anticipating the long timeline and knowing how to troubleshoot common issues like slow rooting, you can navigate the journey confidently. You now have the knowledge and foresight needed to multiply your ZZ plant collection using just water and time. Embrace the process!
