Table of Contents
Imagine harvesting your own buttery, delicious Yukon Gold potatoes right from your backyard or patio! Growing these versatile spuds is incredibly rewarding, and it’s a fantastic project for any home gardener, especially if you’re just starting out.
If the idea of planting potatoes feels a little daunting, don’t worry – you’re not alone. Many beginners wonder exactly how deep to plant them, when to start, or if they need special preparation before going in the ground.
This guide is designed to make planting Yukon Gold potatoes simple, clear, and stress-free, specifically for first-time growers. We’ll walk you through every essential step, from selecting and preparing your seed potatoes (yes, we’ll explain ‘chitting’!), to choosing the right spot and soil, determining the perfect planting depth and spacing, and getting them into the ground or containers successfully. We’ll cover the ‘why’ behind each action, giving you the confidence needed to get your potato patch thriving.
Ready to get your hands dirty and start your journey towards homegrown Yukon Golds? Let’s begin with the essential preparations.
Preparing for Planting: Essentials for Yukon Gold Success
Before you put any potatoes in the ground, a little preparation goes a long way. Taking the time now will set your plants up for success. Let’s cover the key steps to get your Yukon Gold seed potatoes ready and choose the perfect spot for them to thrive. This foundational work helps ensure clear, easy steps from the outset.
Getting Started with Yukon Gold Potatoes
Yukon Gold potatoes are a fantastic and rewarding choice for home gardeners, especially if you’re just starting out. They’re known for their delicious buttery flavor and smooth texture, making them incredibly versatile in the kitchen – perfect for roasting, mashing, or boiling. When you’re planning to grow potatoes, you’ll typically start with what are called ‘seed potatoes.’ These aren’t regular potatoes from the grocery store; they are specially grown to be free of diseases and pests, giving you a much better chance of a healthy crop. Using certified Yukon Gold seed potatoes is generally recommended for the best results. This guide focuses on breaking down the planting process into clear, easy steps specifically for beginners.
Essential Timing: When to Plant Yukon Golds
Knowing the right time to plant is critical. For most climates, the ideal planting window for Yukon Gold potatoes is after the danger of the last hard frost has passed in early spring. The soil temperature should ideally be around 45-50°F (7-10°C) or warmer. A good way to figure out the exact timing for your area is to check your local average last frost dates or contact your local university extension office – they can provide region-specific guidance. Many guides, like those focused on planting potatoes in specific regions like Texas, emphasize local climate considerations. Once planted, you might wonder, “How long does it take to grow Yukon Gold potatoes?” Generally, Yukon Golds are considered mid-season potatoes, typically ready for harvest in about 75 to 90 days from planting. This means you can usually expect to start answering the question, “When should I harvest my Yukon Gold potatoes?” sometime in mid to late summer, depending on when you planted.
Preparing Your Seed Potatoes (Chitting Explained)
A common question is, “Should you chit Yukon Gold potatoes before planting?” Chitting, also known as pre-sprouting, is a simple process that gives your seed potatoes a head start. While not strictly necessary, chitting Yukon Gold seed potatoes has benefits like faster emergence once planted and potentially an earlier harvest. To chit your seed potatoes, place them in a single layer in a tray or egg carton with the ‘eyes’ (small indentations where sprouts will form) facing upwards. Put the tray in a cool room (around 50-60°F or 10-15°C) that receives indirect light. Avoid direct sunlight, which can scorch them. Over two to four weeks, you’ll see short, stout, greenish-purple sprouts form.  This image shows seed potatoes with healthy, sturdy sprouts ready for planting. Healthy sprouts should be thick and colored, not long, white, and spindly, which indicates they were stored in the dark. This preparation differs from dealing with potatoes that have already sprouted long, thin shoots from being left in a pantry; for those, you might need different steps, as outlined in our guide on how to plant already sprouted potatoes.
Choosing the Right Spot & Preparing the Soil
“Do Yukon Gold potatoes need full sun?” Yes, for the best yield, Yukon Gold potatoes need at least 6-8 hours of direct sunlight per day. Choose a location in your garden that gets plenty of sun. The best type of soil for growing potatoes is loose, well-drained, and slightly acidic (a pH between 5.0 and 6.0 is often recommended). Heavy clay soils or areas that hold water are not suitable. Preparing the garden bed or area involves loosening the soil deeply, at least 8-12 inches, to allow the tubers room to grow. Incorporating organic matter, such as well-rotted compost, is a great way to improve soil structure and fertility, addressing a common beginner concern about getting started with soil prep. This image illustrates the process of incorporating compost into the soil, showing the enriched texture. You might also wonder, “What is the best fertilizer for Yukon Gold potatoes?” While specific needs vary, potatoes generally benefit from a balanced fertilizer applied at planting, but avoid excessive nitrogen, which promotes leafy growth over tuber development. Organic options like compost and aged manure are excellent soil amendments. According to university extension recommendations for potato soil conditions, proper soil texture and pH are key findings for promoting healthy potato growth.
With your seed potatoes prepped and your soil ready, you’re set to move on to the actual planting process.
Planting Your Yukon Gold Potatoes: Methods and Steps
With your seed potatoes prepped and the site ready, it’s time for the main event: planting! We’ll cover the standard method step-by-step, plus specific tips for popular container and raised bed approaches, ensuring you have a clear path to getting your Yukon Golds in the ground.
The Standard Planting Method: Step-by-Step
This section walks you through the most common and reliable method for planting Yukon Gold potatoes directly into the ground. It’s designed to be straightforward, even if you’re planting potatoes for the first time.
Step 1: Prepare Seed Pieces (If Necessary)
If your seed potatoes are large, you can cut them into smaller pieces. Each piece must have at least one or two “eyes” (sprouts or buds). Cutting allows you to get more plants from your seed potatoes, but ensure each piece is substantial enough (roughly the size of a golf ball or slightly larger) to provide energy for the initial growth. Allow cut pieces to cure for a day or two in a dry, airy spot before planting; this helps prevent rot.
Step 2: Dig Trenches or Holes
Now, prepare the planting area. You can dig individual holes or a trench. The crucial question is, “How deep should Yukon Gold potatoes be planted?” For standard in-ground planting, aim for a depth of 4 to 6 inches. Planting them this deep helps protect the developing tubers from sunlight (which can turn them green and inedible) and provides space for “hilling” later, which increases your yield.
Step 3: Space Your Seed Pieces
Proper spacing is vital for healthy growth and sufficient room for hilling. Place seed pieces about 10 to 12 inches apart within the row. If you’re planting multiple rows, space the rows about 2 to 3 feet apart. This spacing allows plants to grow without competing too much for resources and gives you room to work between rows.
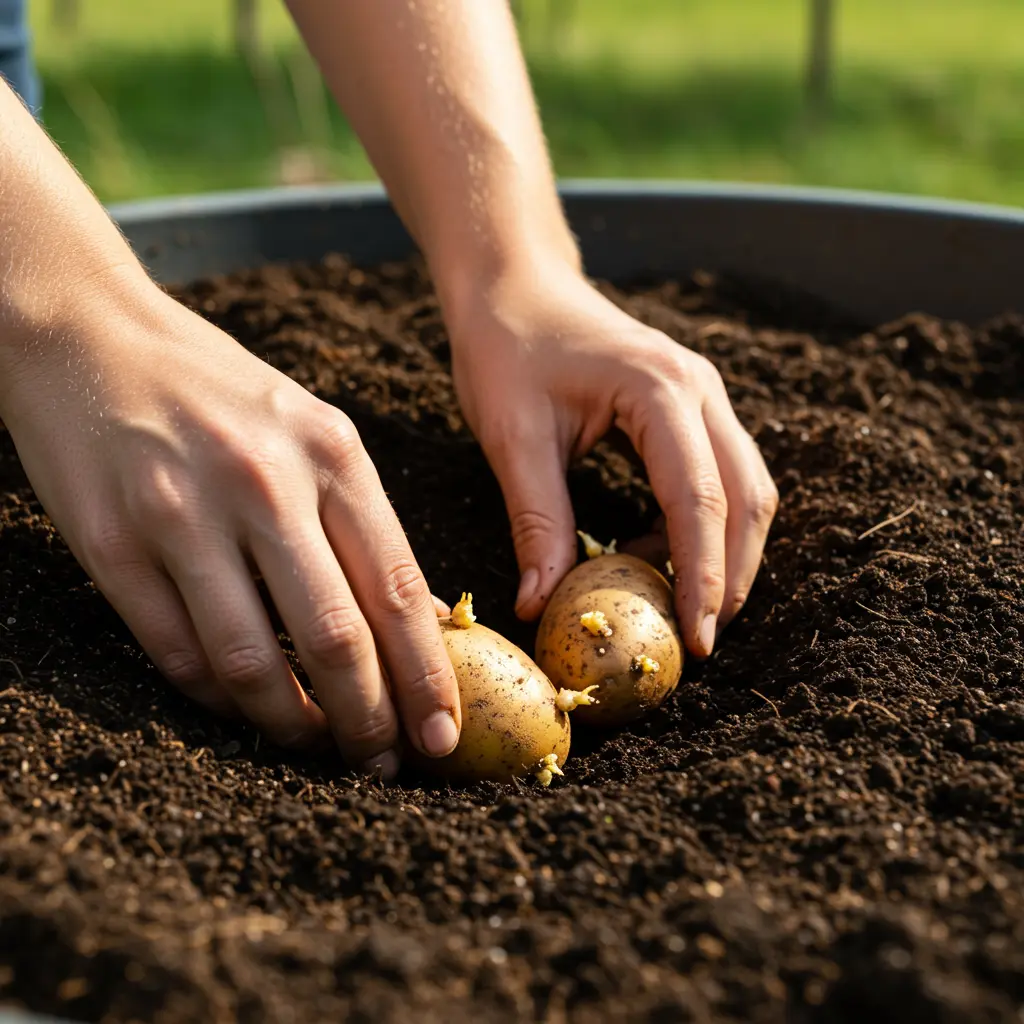
Step 4: Place and Cover
Gently place each seed piece in the trench or hole. The best practice is to place the cut side down, with any visible sprouts pointing upward. Once the seed pieces are in place, carefully backfill the trench or hole with about 3-4 inches of soil, loosely covering the seed piece. Don’t compact the soil too much.
Don’t worry if it doesn’t look absolutely perfect – gardening is a learning process! Following these general guidelines for potato planting depth and spacing will set your plants up for success.
To see these steps in action, watch our video guide:
. The video clearly demonstrates the correct depth for placing the seed potatoes and how to position them before covering. You can also visualize the ideal depth with this image:  . It provides a helpful visual reference to ensure your planting depth is just right.
Growing Yukon Gold Potatoes in Containers
Don’t have a large garden space? No problem! Growing potatoes in containers is a fantastic option for small yards, patios, or even balconies. Yes, you absolutely can grow Yukon Gold potatoes in buckets or other pots! Suitable containers include grow bags, large plastic or terracotta pots (at least 10 gallons is recommended), or even repurposed buckets, as long as they have excellent drainage holes.
The planting process in containers is a bit different. Start by filling the bottom of your container with about 4-6 inches of a good quality potting mix – not garden soil, as potting mix drains better and is lighter. Place 1-3 seed potato pieces on top of this layer of soil, depending on the container size (don’t overcrowd). Cover the seed potatoes with another 3-4 inches of potting mix. As the potato plant grows, you’ll add more soil (hill) until the container is full.
Good drainage is paramount in containers to prevent root rot. Use a potting mix specifically designed for containers, and make sure your pot has ample drainage holes at the bottom. Container potatoes also tend to dry out faster than in-ground plants, so consistent watering is key. This method is a great way to practice growing potatoes indoors or in limited spaces.
This image shows Yukon Gold potatoes thriving in fabric grow bags, illustrating how effective container growing can be.
Growing Yukon Gold Potatoes in Raised Beds
Raised beds offer several advantages for growing potatoes, including excellent drainage and the ability to control your soil composition. If you’re planting Yukon Gold potatoes in raised beds, the standard planting process is similar, but you might have a little more flexibility with depth and spacing depending on your bed’s size and depth.
Prepare your raised bed with a loose, fertile soil mix. Dig trenches or holes 4-6 inches deep, just as you would in the ground. Place seed pieces 10-12 inches apart. The main difference is that hilling is often easier in a raised bed, as you can simply draw soil up from between the plants or even add more compost or soil mix to the bed as the plants grow.
This image shows lush potato plants growing in a raised bed, highlighting the neat and controlled environment this method provides.
Now that your Yukon Gold seed potatoes are tucked into their new homes, let’s look at how to care for them as they grow.
After Planting: Essential Care and Troubleshooting
Getting your potatoes planted is a great start, but ongoing care is key to a successful harvest. Here’s what to do next, including watering, the crucial step of hilling, and how to tackle common sprouting issues.
Initial Care: Watering and Hilling
Consistent watering is vital for healthy potato growth, particularly when the plants are flowering and developing tubers underground. Aim for evenly moist soil, but be careful not to waterlog the area, as this can lead to rot. Proper watering ensures your plants can support the formation of many healthy potatoes.
One of the most important steps in potato care after planting is called “hilling.” This involves gently drawing soil or compost up around the base of the emerging potato stems as they grow, creating a mound or “hill.”
You should start how to hill potatoes when the plants are about 6-8 inches tall, covering all but the top few leaves. Repeat this process every few weeks as the plants grow taller, adding more soil until the hills are substantial.
Why do we hill? Hilling serves two main purposes: it protects the developing tubers near the surface from sunlight, which can turn them green and inedible (this greening is called solanine build-up), and it encourages the plant to produce more tubers along the buried stem. While it might seem like extra work, hilling is a necessary step for good yields and is standard practice for growing potatoes.
Troubleshooting: Why Aren’t My Potatoes Sprouting?
A common concern for beginner gardeners is when their planted seed potatoes don’t seem to be sprouting. If you’re asking, “Why aren’t my Yukon Gold potatoes sprouting?”, rest assured it happens, and there are several potential reasons for potato sprouting problems.
Potential culprits include poor quality seed potatoes that weren’t viable, planting them too deep, or cold, overly wet soil conditions that inhibit growth or cause the seed piece to rot before it can sprout. Pests underground might also nibble on the seed.
To diagnose the issue, you can gently dig around where you planted one or two seed pieces. Check if the seed piece is still firm and healthy-looking, or if it’s soft, mushy, or gone. If the seed piece has rotted, the soil might be too wet or cold. If it’s gone or chewed, pests could be the cause.
Solutions depend on the problem: If the soil is too cold, waiting for warmer temperatures might help, or consider replanting in better conditions next season. If rot is widespread due to waterlogging, improving drainage is key for future plantings. If pests are an issue, consider appropriate controls. While these issues apply to all potatoes, including Yukon Golds, addressing them promptly gives your plants the best chance. Keep an eye out for signs of diseases like potato blight later in the season, which can sometimes originate from diseased seed potatoes.

This image illustrates potential issues preventing potato sprouts, such as a rotted seed piece or signs of pest damage.
Now that you know how to care for your plants and troubleshoot common issues, let’s look at some frequently asked questions.
Yukon Gold Planting FAQ
Let’s answer some of the most frequently asked questions beginners have about planting and growing Yukon Gold potatoes. Getting answers to these common queries can help you feel more confident as you start your potato-growing journey.
Here are some answers to common questions about growing Yukon Gold potatoes:
How deep should Yukon Gold potatoes be planted?
When planting seed potato pieces, aim for a depth of about 4-6 inches (10-15 cm). This initial depth allows for covering the shoots with soil later as they grow, a process known as hilling, which helps protect the developing tubers from sunlight and increases yield.
Do Yukon Gold potatoes need full sun?
Yes, Yukon Gold potatoes thrive in full sun. They need at least 6-8 hours of direct sunlight per day to grow vigorously and produce a good harvest. Choose a planting location that receives ample sun throughout the day.
How long does it take to grow Yukon Gold potatoes?
Yukon Gold potatoes are considered a mid-season variety. Typically, they are ready for harvest about 75-90 days after planting. The exact time can vary depending on your climate and growing conditions.
Should you chit Yukon Gold potatoes before planting?
Chitting, or pre-sprouting, is highly recommended for Yukon Gold potatoes. This involves exposing seed potatoes to light and moderate temperatures for a few weeks before planting to encourage them to develop short, sturdy sprouts. Chitting can lead to faster growth and an earlier harvest.
Can you grow Yukon Gold potatoes in buckets?
Absolutely! Yukon Gold potatoes are well-suited for growing in containers like large buckets (at least 5 gallons or 20 liters). Ensure the container has drainage holes. Growing in buckets is a great option for small spaces or poor soil conditions.
What is the best fertilizer for Yukon Gold potatoes?
Potatoes benefit from a balanced fertilizer, often slightly higher in phosphorus and potassium than nitrogen. A good option is a fertilizer formulated for vegetables, applied at planting time and again when the plants are about 6-8 inches tall. Avoid excessive nitrogen, which can lead to lush foliage but fewer tubers.
When should I harvest my Yukon Gold potatoes?
You can begin to harvest “new” potatoes (smaller, tender tubers) shortly after the plants flower. For mature Yukon Gold potatoes, wait until the plant’s foliage begins to yellow and die back, typically in late summer or early fall. This indicates the potatoes have finished growing and the skins have set, which improves storage life.
Why aren’t my Yukon Gold potatoes sprouting?
Several factors can cause potatoes not to sprout. The most common reasons include planting in soil that is too cold or too wet, using seed potatoes that were not viable, planting too deeply in heavy soil, or issues with dormancy if planted too soon after purchase. Ensure proper soil temperature and moisture levels for successful sprouting.
Understanding these common questions about growing Yukon Gold potatoes should help you feel more prepared as you tend your crop from planting through harvest.
You’ve now got the essential steps to successfully plant your own Yukon Gold potatoes! It might seem like a lot at first, but by following this simple guide, you’re well on your way to enjoying delicious homegrown spuds. We’ve covered everything from preparing your seed potatoes and choosing the right spot to getting them in the ground at the correct depth and giving them the best start. Gardening is a rewarding journey, and planting potatoes is a fantastic place to begin. Don’t be afraid to get your hands dirty and watch your efforts grow into a bountiful harvest. With a little care and patience, you’ll be digging up those golden treasures before you know it!
Wondering what to do if your seed potatoes already have sprouts? Find out in our guide!
