Table of Contents
Planting an acorn and watching it grow into a magnificent oak is a deeply rewarding endeavor. Yet, for many gardeners, this simple act comes with frustrating questions: Will the acorn sprout? How do you keep squirrels from finding it? If you’ve struggled with germination failure or pest problems, you’re not alone. This comprehensive guide gives you the practical, step-by-step knowledge needed for success. We’ll show you exactly how to plant and grow acorns, covering essential steps like testing viability, understanding cold stratification for different oak types, choosing the right planting method, and providing proven strategies to protect your future trees from hungry critters. Ready to embark on this journey and give your future oak the best possible start? Let’s begin by selecting the perfect acorns.
Getting Started: Collecting and Testing Your Acorns
Begin your oak-growing journey by learning how to find healthy acorns and test their viability using a simple, reliable method.
Finding Healthy Oak Trees and Timing Your Collection
Start by looking for healthy, mature oak trees in early autumn, typically September or October.  Collecting from robust, mature trees often suggests better genetic stock for your future oak. You can plant acorns gathered directly from the tree or, more commonly, those freshly fallen to the ground. Carefully inspect each one, avoiding any with small holes or signs of mold, as this indicates insect or fungal damage which significantly reduces viability. Knowing your local species can also be helpful .
Performing the Acorn Float Test
What is the acorn float test? It’s a simple, reliable method used by experienced growers and conservationists to quickly check acorn viability before planting. The test works based on density: healthy, fully developed acorns are dense and will sink, while acorns damaged by insects, rot, or incomplete development often contain air pockets and will float. Here’s how to perform the test:
- Fill a bucket or deep bowl with cool water.
- Gently place your collected acorns into the water.
- Wait for 2-5 minutes, giving them time to settle.
- Observe which acorns sink to the bottom and which remain floating.
Keep the sinkers and discard the floaters.
Understanding Float Test Results (Sinkers vs. Floaters)
Generally, acorns that sink during the float test are considered viable and good candidates for planting. Those that float usually have internal damage, such as insect tunnels, rot, or an undeveloped embryo, creating air pockets that cause buoyancy. While the float test is a very useful indicator of viability, remember it’s not a 100% guarantee. Occasionally, a viable acorn might float initially due to surface tension, or a non-viable one might sink. It remains a highly reliable first check.
Keeping Collected Acorns Healthy (Prevent Drying)
It is critically important to prevent your viable acorns (the sinkers) from drying out after collection and testing. The oak embryo inside can lose viability very quickly if the acorn dehydrates. For temporary storage before stratification or planting, place the acorns in a resealable plastic bag with a slightly damp paper towel and keep them in the cool environment of your refrigerator.
With your viable acorns collected and tested, you’re now ready to learn about preparing them for germination through stratification.
Preparing for Germination: Understanding Acorn Stratification
Learn about cold stratification – a crucial step for many acorns – and determine if your acorns need this cold treatment before they can sprout.
Before planting, some acorns need key preparation. What is cold stratification? It’s a process mimicking winter, providing a sustained cold, moist period essential for breaking seed dormancy in certain species.  This artificial winter acts as a critical germination trigger. Understanding the need for acorn cold stratification helps ensure these specific acorns receive the signal to sprout. Without it, they might remain dormant indefinitely.
Red Oaks vs. White Oaks: Stratification Needs
Do all oak acorns need cold stratification? No, and this is a common point of confusion for beginners, often highlighted in community discussions. The requirement depends heavily on the oak group. Red Oak acorns (like Pin Oak, Northern Red Oak) generally require 30-90 days of cold stratification before they will germinate, making this step crucial when growing red oak from acorn. White Oak acorns (like White Oak, Bur Oak), conversely, usually germinate readily in the fall soon after dropping and typically do not need stratification. Identifying your acorn’s group helps determine the right approach.
Fridge Stratification Method Explained
One of the most common and reliable acorn cold stratification methods involves using your refrigerator. This gives you control over the process. Follow these steps carefully:
- Select a suitable stratification medium: slightly damp peat moss, coconut coir, vermiculite, or even shredded paper towels work well.
- Moisten the medium lightly. Critically, it should feel slightly damp to the touch, like a wrung-out sponge, not wet, to prevent mold and rot.
- Combine your Red Oak group acorns (or others needing stratification) with the damp medium in a sealable plastic bag or container. Label it with the date and acorn type.
- Place the bag in your refrigerator’s main compartment (typically 34-40°F or 1-4°C). Avoid the freezer!
- Leave the acorns to stratify for the required period, usually 30-90 days (check specific recommendations for your oak species).
- Check the bag every week or two. Why? This allows you to monitor moisture levels (adding a few drops of water if drying out), check for and remove any moldy acorns immediately, and catch any acorns that might start sprouting early in the bag.
Natural Stratification (Direct Fall Sowing)
Alternatively, you can mimic nature through direct sowing in the fall, letting winter provide the cold period. This involves planting acorns directly into their final growing spot outdoors. This approach has distinct trade-offs:
- Pros: It closely follows natural processes and involves less initial indoor setup.
- Cons: There’s a significantly higher risk of acorns being eaten by pests (especially squirrels!), and you have much less control over moisture and temperature conditions.
This natural stratification method is generally more feasible for White Oak acorns (which often sprout quickly anyway) or if you can implement very effective protection against animals. Remember the high pest risk, a challenge we’ll address later. You must choose between controlled fridge stratification or risking natural stratification.
Now that you understand whether your acorns need stratification and how to provide it, you’re ready to decide on the best way to plant them.
Planting Your Acorns: Direct Sowing vs. Starting in Pots
With your acorns ready, decide on the best planting method for your situation – planting directly in the ground or starting them in pots. Each approach has advantages and disadvantages to consider.
Choosing Your Method: Ground or Containers?
Deciding whether to plant acorns directly or start them in pots depends on your goals and environment. Many gardeners debate this, but there’s no single “best” answer; it’s about balancing pros and cons.
Direct sowing allows the oak’s crucial taproot, essential for long-term stability and water uptake, to grow deep and undisturbed from the start.  This method mimics nature and reduces transplant shock later. However, directly sown acorns are highly vulnerable to squirrels, chipmunks, and drying out, requiring immediate and robust protection. Monitoring their progress is also more challenging.
Starting acorns in pots offers greater control. You can protect them more easily from pests (consider protecting potted plants from squirrels), manage watering precisely, and monitor germination closely. The main drawback is potential taproot issues; if the root hits the pot bottom, it can circle or J-hook, hindering future growth. Deep pots minimize this, but careful transplanting is still necessary. Choose the method that best suits your ability to protect and monitor the young oaks.
Direct Sowing Technique Steps
If you choose to plant acorns directly in the ground, follow these steps for the best chance of success:
- Select the Site: Choose a permanent location with appropriate sunlight (this varies by oak species, so research your specific type). Ensure the soil drains well.
- Plant the Acorn: Dig a small hole 1 to 2 inches deep. This depth balances protection from drying and minor pests with the seedling’s ability to emerge. Place the acorn on its side, or pointed end down if you’re certain.
- Cover and Water: Gently cover the acorn with soil, pressing lightly. Water the area thoroughly.
- Space Appropriately: If planting multiple acorns, space them according to the mature size of the tree, or plant several close together with the intent to thin later.
- Protect Immediately: This step is crucial. Unprotected acorns are almost certain snacks for wildlife. Implement protection methods right away (covered in the next chapter).
Potting Technique Steps
To grow acorns in pots, careful setup is key to accommodate their growth needs:
- Choose Deep Pots: Select containers at least 6-10 inches deep, preferably deeper (selecting deep pots). This is vital to allow space for the rapidly growing taproot before it hits the bottom.
- Use Well-Draining Soil: Fill pots with a that drains well to prevent root rot, a common issue for oaks. A mix of potting soil, compost, and sand or perlite works well.
- Plant the Acorn: Plant the acorn about 1-2 inches deep, similar to direct sowing. If the acorn has already sprouted a root (radicle), place it on its side.
- Water and Maintain Moisture: Water thoroughly after planting. Keep the soil consistently moist but not waterlogged.
- Provide Protection: While less exposed than direct-sown acorns, potted ones still need protecting acorns in pots from digging squirrels.
Planting Tip: Which Way is Up?
Unsure which end is up? Experienced growers often recommend this simple tip: plant the acorn on its side. If a root (radicle) has already emerged, definitely plant it sideways. Gravity will naturally guide the root downwards and the emerging shoot upwards, taking the guesswork out of orientation.
With your acorns now planted using your chosen method, the next critical step is ensuring their survival against eager wildlife.
Protecting Your Investment: Keeping Squirrels and Pests Away
One of the biggest challenges is protecting your planted acorns and young seedlings from pests, especially squirrels. Here are community-tested methods that work.
The Squirrel Challenge: Why Acorns are So Vulnerable
Protecting your newly planted acorns presents a real challenge, a frustration shared by many gardeners in community discussions. Squirrels are the primary culprits; acorns are a favorite food, and these persistent animals are excellent diggers, often unearthing seeds shortly after planting.  Understanding how to protect acorns from squirrels is vital.
Stopping Squirrels (Community-Tested Method)
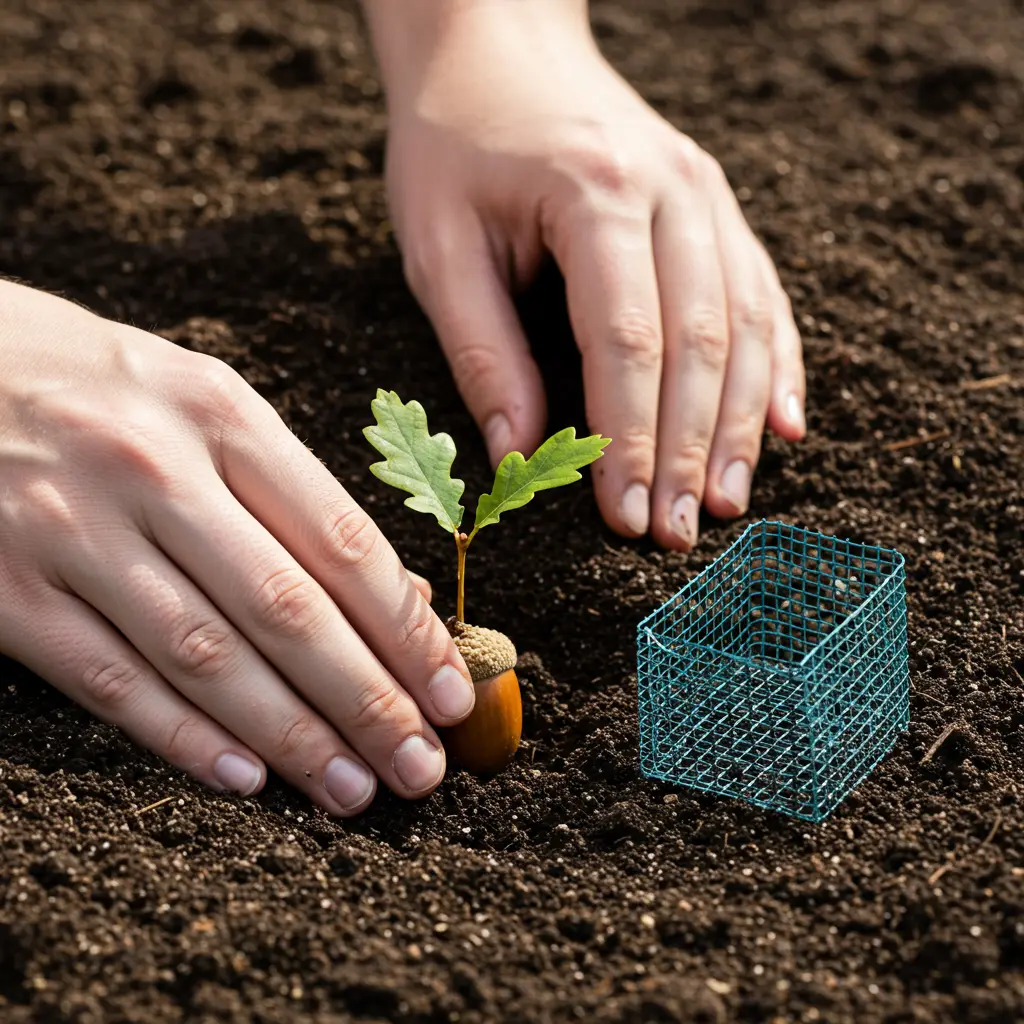
So, how do you stop squirrels from eating planted acorns? The most effective, community-tested method involves creating a physical barrier using hardware cloth. This simple technique is the best way to plant acorns so squirrels don’t dig them up because it creates a barrier they struggle to bypass.
Here’s how to protect acorns from squirrels when planting:
- Cut a piece of hardware cloth (1/4-inch or 1/2-inch mesh) or sturdy chicken wire, roughly 1 foot square.
- Place the square directly over the spot where you planted the acorn.
- Secure the edges firmly to the ground using landscape staples or heavy rocks to prevent squirrels from getting underneath.
- Leave the barrier in place until the oak seedling is well-established and the stem begins to thicken, typically through the first growing season.
As a PlantMD horticultural expert notes, “Physical barriers like hardware cloth are overwhelmingly the most reliable way to stop squirrels. Don’t rely on repellents alone for newly planted acorns; squirrels are persistent, and a physical deterrent is key during this vulnerable stage.”
Protecting Young Oak Seedlings from Squirrels and Rabbits
Even after your acorn sprouts, the young seedling remains vulnerable. Community experience shows that squirrels and rabbits can quickly damage or destroy tender new growth. It’s wise to keep the initial hardware cloth ground protection in place until the stem shows significant thickening. For added security against both pests:
- Consider placing small wire mesh cages or commercially available cloches directly around individual seedlings.
- Ensure these cages are tall enough to prevent animals from reaching over the top and are secured to the ground.
These practical steps offer effective protection as your oak begins its journey.
Keeping Deer Away from Young Oak Trees
As your oak sapling grows taller, deer can become a significant threat, browsing on leaves and tender branches, especially in areas with high deer populations. While the initial ground protection deters smaller pests, you’ll need taller, sturdier solutions for deer. Experience confirms that robust tree cages or protective fencing building effective deer fencing offer the most reliable long-term protection. Some gardeners use as a secondary measure, but physical barriers consistently provide better results against determined deer.
Implementing these physical barriers is the surest way to safeguard your investment from pests, setting the stage for nurturing your young oak through its early growth stages.
Nurturing Your Young Oak: Early Care and Troubleshooting
Your acorn has sprouted and is protected! Now, focus on the essential care needed to help your young oak seedling thrive.
Watering Your Oak Seedling: How Much and How Often?
Keep the soil consistently moist but never waterlogged, especially during the first growing season. Water deeply when the top inch of soil feels dry.  This deep, less frequent watering encourages strong, deep root growth for better drought resistance, unlike shallow watering which keeps roots near the surface. Be mindful not to overwater, as this can lead to root rot. Following these general watering principles is crucial as you grow oak tree from acorn.
Sunlight Needs for Young Oak Trees
Most oak species prefer full sun for optimal growth, although young seedlings can tolerate partial shade. When planning the final planting location to grow oak tree from acorn, consider the mature tree’s sunlight requirements for long-term health. Specific needs can vary slightly by species , so research your particular oak type.
Monitoring Growth and Troubleshooting Common Issues
Proactive monitoring helps ensure your young oak thrives. Regularly inspect your seedling for common problems like pests, signs of disease , or general stress indicators such as yellowing leaves or unusually slow growth. Potential causes often include:
- Incorrect watering (too much or too little)
- Nutrient deficiency
- Transplant shock
Linking symptoms like yellowing leaves to potential causes like watering issues helps diagnose problems early for effective troubleshooting.
When and How to Transplant Potted Oak Seedlings
The best time to transplant potted oak seedlings is during dormancy (late fall or early spring) to minimize transplant shock while the plant is less metabolically active. Handle the root ball gently, taking extreme care not to damage the sensitive central taproot. Plant the seedling at the same soil depth it occupied in the pot and water it thoroughly immediately after planting. Careful handling during this step is vital to successfully grow oak tree from acorn. Proper transplanting sets your seedling up for successful establishment. See general tree planting techniques.
By carefully nurturing your seedling through these early stages, you’ve given your future mighty oak the best possible start on its long journey.
Transforming a simple acorn into a towering oak is within your reach. You now understand the essential steps, from collecting and testing viability with the float test to navigating the critical stratification process based on oak type. We’ve tackled the common frustrations, offering practical, community-tested solutions for protecting your acorns from squirrels and deciding between planting directly or starting in pots. Armed with this step-by-step guidance and troubleshooting advice, you can confidently nurture your acorn. Embrace the process – the satisfaction of watching your tiny seed grow into a legacy tree is unparalleled.
