Table of Contents
Ever finished a delicious date, maybe a sweet Medjool, and wondered if that pit could become something more? You’re not alone! Many home gardeners are curious about how to plant a date seed, especially if it comes from store-bought fruit, and whether those seeds are truly viable. The journey from a hard pit to a green sprout can seem daunting, requiring patience and the right approach.
This guide walks you through everything you need to know to successfully germinate date seeds and grow a thriving palm indoors. We’ll explore and compare the most popular germination methods, share practical troubleshooting tips based on common grower challenges, and show you what to expect as your seedling emerges, including that initial ‘grass’ stage.
Get ready for the rewarding experience of watching your own date palm sprout! First, let’s confirm if this project is even possible.
Getting Started: Can You Really Grow a Palm from a Date Seed?
This section confirms that growing a palm from a store-bought date seed is indeed possible and outlines the basic requirements and realistic expectations for this rewarding project.
Yes, You Can Grow Dates from Store-Bought Seeds!
 Absolutely! You can definitely grow dates from store bought seeds, and many people successfully sprout a Medjool date seed. So, can you grow a date palm from a Medjool date you bought at the store? Yes, the seeds from those delicious dates are often viable. This project is quite achievable, and many gardeners have seen these seeds spring to life. Understanding the basic needs for germination is the next step.
Understanding Basic Germination Needs
Successful date palm germination primarily depends on two key elements: consistent warmth and steady moisture. These conditions mimic their native environment, signaling the seed it’s time to sprout. While specific techniques will be detailed later, providing these basics encourages growth. However, it’s also important to set your expectations regarding the timeline.
Patience is a Virtue: Setting Expectations
One crucial aspect is patience. The date palm germination time can be lengthy, often taking from a few weeks to several months. Waiting can be tough, but don’t be discouraged by a slow start. This variability depends on conditions, but success is achievable. Knowing this, you understand that growing a date palm from seed is indeed possible with some basic care.
With the exciting possibility confirmed and basic requirements understood, you’re now ready to move on to Step 1: Preparing Your Date Seed for Success.
Step 1: Preparing Your Date Seed for Success
This step details the crucial preparation of your date seed, including thorough cleaning and soaking, to maximize its chances of sprouting.
Gathering Your Supplies
First, gather your essential supplies to start the process. You will need:
- Fresh date seeds
- Water
- A small container for soaking
- Optionally, paper towels for drying/handling

Having these ready simplifies the next task: cleaning the date pit.
Cleaning the Date Pit: Removing All Fruit Flesh
Next, you must thoroughly clean the seed pit. Removing all fruit flesh is critical because any remaining pulp can lead to mold or fungal growth, preventing germination. Follow these steps for cleaning, a key part of successfully planting a date seed:
- Gently scrub or rub off all sticky fruit residue under cool running water.
- Inspect the cleaned seed for any significant cracks or damage.
A properly cleaned seed is essential before moving on to soaking.
The Importance of Soaking Your Seed
Once your date seed is clean, soaking is beneficial. This simple step significantly helps germination by softening the seed’s tough outer coat. It also allows water to penetrate and rehydrate the dormant embryo inside, signaling that it’s time to start growing.
Soaking Method: Duration and Water Changes
Here’s how to effectively soak your prepared date seed:
- Place the clean seed(s) in your container and cover with fresh water.
- Soak for 24 to 48 hours.
- Change the water completely every 12-24 hours. This is vital to prevent cloudiness, fermentation, or mold growth.
Proper preparation through cleaning and soaking is simple but crucial for success.
With your date seed properly prepared, you’re now ready to decide on the best way to sprout it in Step 2: Choosing Your Germination Method (Soil vs. Baggie).
Step 2: Choosing Your Germination Method (Soil vs. Baggie)
This section explores the two primary methods for germinating date seeds—direct sowing in soil and the paper towel/baggie technique—helping you choose the best approach for your situation.
When you’re ready to germinate date seeds, you have two main paths. You can plant them directly into soil, a straightforward approach. Alternatively, many use a moist paper towel inside a plastic baggie, which allows for easy progress checks. Let’s explore direct soil planting first.
Method 1: Direct Sowing in Soil
This traditional method involves planting your date seed directly. First, select a small pot with drainage holes and fill it with well-draining potting mix. Plant the seed about 1 inch deep, cover it with soil, and water gently.  Keep the soil consistently moist, not soggy, and ensure the pot is in a warm location. Planting a date seed this way is quite easy.
Pros:
- Simple process with minimal supplies needed.
- Reduces risk of damaging the initial root, as no transplanting from a baggie is required.
Cons:
- Difficult to monitor germination progress without disturbing the seed.
- May take longer for sprouts to emerge.
While simple, if you want to watch the magic happen, consider the next method.
Method 2: The Paper Towel / Baggie Technique
Many home growers prefer the “baggie method” for date seed germination paper towel success. Lightly moisten a paper towel (damp, not soaking wet) and place your seed(s) on one half. Fold the other half over the seeds. Carefully slide the folded paper towel into a sealable plastic baggie. Seal the bag, leaving a little air inside, and place it in a warm, dark spot, like on top of a refrigerator. Check every few days for moisture and signs of sprouting.
Pros:
- Easy to monitor germination progress visually.
- Often results in faster sprouting.
- Saves space, as many seeds can be started in a small area.
Cons:
- Higher risk of mold if the paper towel is too wet.
- Requires careful transplanting once sprouted, which can stress the seedling.
This technique offers excellent visibility, but how do the methods compare?
Which Method is Best?
Ultimately, there isn’t a single “best” method; it truly depends on your preferences and situation. If you value simplicity and want to minimize transplant shock for the seedling, direct soil sowing is a solid choice. However, if you enjoy closely monitoring progress, need to save space, or are aiming for potentially faster visible results, the paper towel/baggie method is often favored.
Drawing from shared grower experiences, many find the baggie method particularly rewarding due to its high visibility of the sprouting process. This allows for quick identification of viable seeds. Understanding these options helps you choose the best fit for your date seed growing adventure.
With these germination methods understood, you’re now ready to learn about Step 3: Planting Your Sprouted Date Seed.
Step 3: Planting Your Sprouted Date Seed
Once your date seed has sprouted, this section guides you through the process of planting it correctly, from choosing the right pot and soil to initial care.
Recognizing a Ready-to-Plant Sprout
Your date seed is ready for planting when you see a distinct, small white root emerging, usually about an inch or two long.  A tiny shoot might also be visible. This confirms successful germination. With your sprout ready, the next crucial step is selecting the ideal pot and soil mix.
Choosing the Right Pot and Soil Mix
Selecting the right container and soil mix for date palm seedlings is crucial. Date palms grow a long taproot, requiring depth, and need excellent drainage to prevent rot. Consider these points:
- Choose a pot at least 6-8 inches deep with drainage holes.
- Use a well-draining soil mixes like a cactus/succulent blend, or mix potting soil with sand/perlite for aeration.
Proper preparation sets the stage for correct planting depth and orientation.
Planting Your Sprouted Seed: Depth and Orientation
With your pot and soil ready, it’s time to plant. Here’s how to plant a date seed correctly:
- Make a hole in the center of the soil, about one inch deep.
- Gently place the sprouted seed in the hole. Orient the root downwards; if unsure, lay the seed flat. This ensures the root grows down.
- Lightly cover the seed with soil.
With the seed planted, let’s move on to essential initial care.
Initial Care: Watering, Light, and Warmth
Proper initial care for a baby date palm seedling is vital after planting. Gently watering your new palm seedling is the first step; keep the soil consistently moist but never waterlogged, as this prevents rot. Place the pot in a warm location receiving bright, indirect sunlight. Direct sun can scorch the young plant. Consistent warmth encourages growth. Following these horticultural best practices gives your sprout the best start in soil.
Successfully planting your sprouted seed gives it the foundation it needs. But what if you encounter issues like seeds not sprouting at all? The next section addresses troubleshooting common problems.
Troubleshooting: What If My Date Seed Isn’t Sprouting?
If your date seeds are slow to sprout or you encounter issues, this troubleshooting section offers solutions to common problems and helps manage timeline expectations.
How Long Does Germination Really Take? (Managing Expectations)
It’s easy to get discouraged, but growing dates takes patience. How long does it really take for a date seed to sprout? The date palm germination time varies widely, typically ranging from 3 weeks up to 3 months, sometimes even longer. Consistent conditions help, but don’t lose hope if you don’t see immediate results. As a PlantMD horticultural expert advises, “Date seed germination is a marathon, not a sprint. Consistent warmth and moisture are key, but patience is the most vital ingredient – it can take anywhere from 3 weeks to 3+ months, so don’t give up too soon!” Understanding this timeline is the first step; next, let’s look at common reasons for delays.
Common Culprits: Why Your Seed Might Not Sprout
If weeks turn into months with no sign of life, several factors could be causing your date seed not germinating. Many growers encounter these common issues:
- Old or Non-Viable Seed: Seeds, especially from store-bought dates, may not be fresh enough or capable of sprouting.
- Insufficient Warmth: Date seeds need consistent warmth to trigger germination.
- Incorrect Moisture: Too much or too little water can halt the process.
- Improper Cleaning: Leftover fruit pulp can inhibit sprouting or encourage mold.
Consider trying a few more seeds if you suspect viability is the problem. Now, let’s specifically troubleshoot temperature issues.
Troubleshooting Warmth: Is it Too Cold or Inconsistent?
Date seeds thrive in consistently warm conditions, ideally between 70-85°F (21-29°C). If your home is cooler or temperatures fluctuate, this could be the issue. Try placing your container in a reliably warm spot, like on top of the refrigerator. For more controlled warmth, you could consider using seedling heat mats safely, but use them cautiously to avoid overheating. Ensuring proper warmth is crucial, but so is moisture management.
Troubleshooting Moisture: Too Wet or Too Dry?
Finding the right moisture balance is key. Your germination medium (soil or paper towel) should be consistently damp, like a wrung-out sponge, but never soggy or waterlogged. Applying proper watering techniques from the start helps. Too much water encourages rot, drowning the seed, while allowing the seed to dry out completely, even briefly, can stop germination permanently. Check moisture levels regularly. But what if moisture issues lead to mold?
Dealing with Mold or Rot on Seeds
Discovering fuzzy growth can be alarming. If you see minor surface  mold on date seed husks, you might gently wipe it off with a damp cloth. Ensure the environment isn’t overly wet and has some air circulation. However, if the seed itself feels soft, mushy, or smells bad, it has likely rotted and won’t sprout. Discard rotten seeds and start fresh, focusing on proper moisture and warmth.
Don’t give up if your first attempts face hurdles; troubleshooting these common issues often leads to success. With potential germination problems addressed, you’re now ready to learn about what to expect when caring for your young date palm.
What to Expect: Caring for Your Young Date Palm
Learn about the early growth stages of your date palm seedling, its basic care needs, typical growth rate, and important considerations for long-term indoor management.
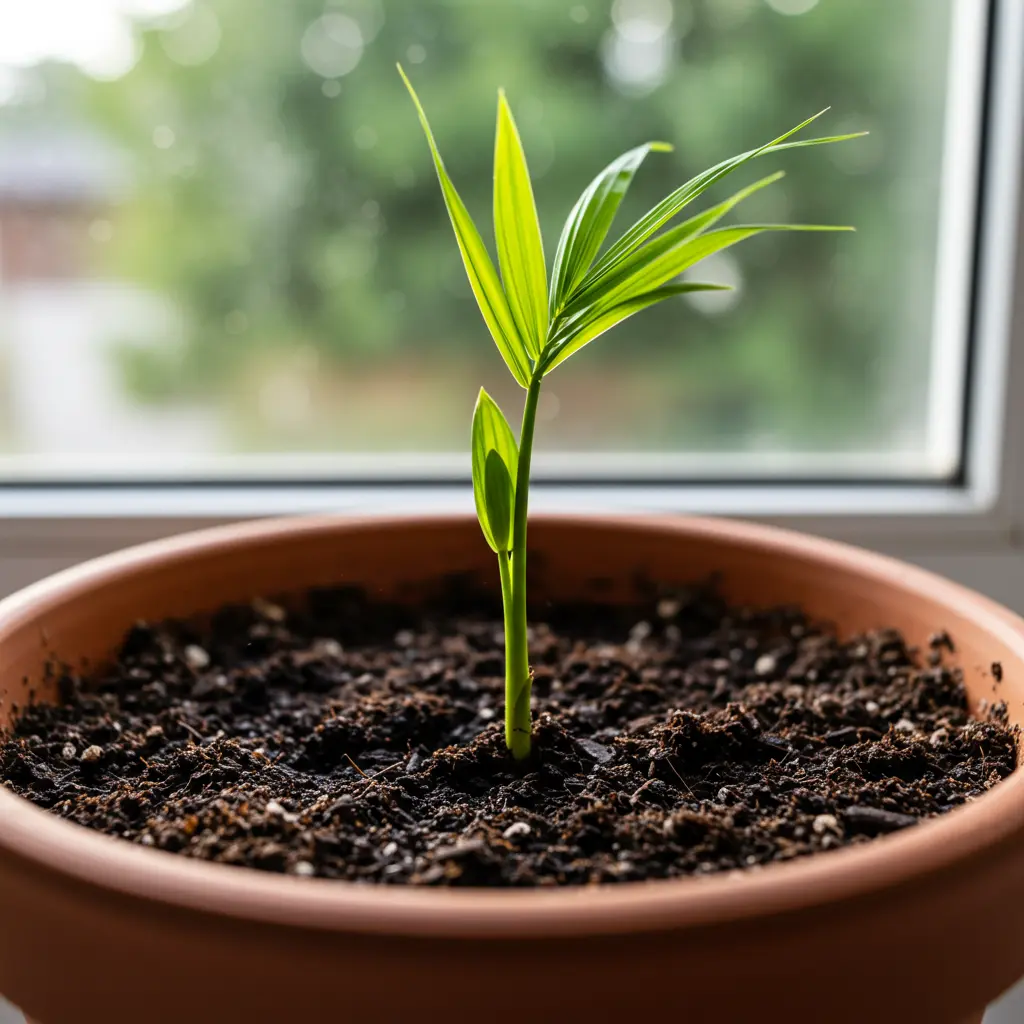
The ‘Grass Blade’ Stage: Early Seedling Appearance
Once your seed sprouts, don’t be surprised if it looks like a single blade of grass. This initial appearance is completely normal for the date palm seedling grass stage and doesn’t yet resemble a typical palm.  This single leaf gathers energy before the plant develops its first true, more complex fronds. Understanding this stage helps set expectations as you move into providing basic care.
Basic Care for Your Young Date Palm Seedling
So, how do you care for a baby date palm seedling indoors? Consistent care is key as your seedling establishes itself. If you want to successfully grow Medjool date palm indoors, provide the right conditions. Here are the basics:
- Light: Bright light is essential. Place it near a sunny window where it can receive several hours of direct sunlight daily.
- Water: Keep the soil consistently moist but not waterlogged. Allow the top inch of soil to dry out slightly between waterings. Good drainage is crucial caring for indoor palms.
- Soil: Use a well-draining potting mix, perhaps one designed for cacti or palms.
- Feeding: Wait a few months until the seedling is established before applying a diluted liquid fertilizer occasionally during the growing season.
Proper care now influences its growth rate later.
Growth Rate and Development of True Fronds
Patience is vital when growing date palms from seed. The initial date palm growth rate is often slow. After the initial “grass blade,” your seedling will gradually begin to produce its first true fronds. These initial fronds might still be simple, but over months and years, they will develop the characteristic pinnate (feather-like) shape. Don’t expect rapid growth early on; focus on consistent care while considering its long-term size.
Managing Size Indoors: Long-Term Considerations
Standard date palms (like those Medjool dates come from) grow into enormous trees, making them unsuitable as long-term indoor plants. Be realistic about the eventual indoor date palm size. If space is limited, consider smaller palm species like Pygmy Date Palms (Phoenix roebelenii), which are better adapted to container life.
The Reality of Fruiting for Indoor Palms
Will an indoor date palm produce dates? It’s extremely unlikely. Fruiting requires maturity (often decades), significant size, specific pollination (date palms are male or female), and high heat levels typically not achievable indoors. Grow your seedling for the enjoyment of the plant itself. Understanding these long-term aspects helps manage expectations for your indoor palm journey.
Transforming that leftover date pit into a thriving houseplant is well within your reach. You now understand that even store-bought Medjool seeds hold potential, provided you prepare them correctly and embrace patience during germination. We’ve compared the straightforward soil method against the popular paper towel technique, equipping you to choose what fits best.
Remember those troubleshooting tips drawn from fellow growers, especially regarding the weeks or months it might take for that first sprout – often resembling a blade of grass – to appear. With this knowledge, you’re ready to nurture your tiny seed into a unique palm. What germination timeline did you experience? Share your story below!
