Table of Contents
Want to fill your garden or patio with cheerful, classic daisies? Growing these hardy flowers from seed is incredibly rewarding, but it’s common for beginners to feel unsure about the best way to start. Knowing the right time, depth, and conditions is crucial for success, and nobody wants to see their seeds fail to sprout.
This expert-backed guide takes the guesswork out of planting. We’ll provide clear, step-by-step instructions designed specifically for beginner daisy growers, covering everything you need to know to successfully start your seeds. You’ll learn the ideal timing, how deep to plant, and the perfect conditions for germination, with distinct guidance for planting in both containers and directly in the ground. We’ll even help you troubleshoot common issues like poor germination.
Ready to get those daisies growing? Let’s start by determining the best time to plant your seeds.
Getting Ready: What You Need & When to Plant Your Daisies
Before you dive into planting, getting the timing and supplies right sets you up for success. This initial preparation helps ensure your daisy seeds have the best possible start, answering key questions before you even touch the soil.
Choosing to grow daisies from seed is a rewarding experience. It’s often more cost-effective than buying established plants, and it opens up a much wider world of varieties you might not find locally. Plus, there’s a unique satisfaction that comes from nurturing a plant from a tiny seed into a blooming beauty in your own garden.
When to Plant Daisy Seeds
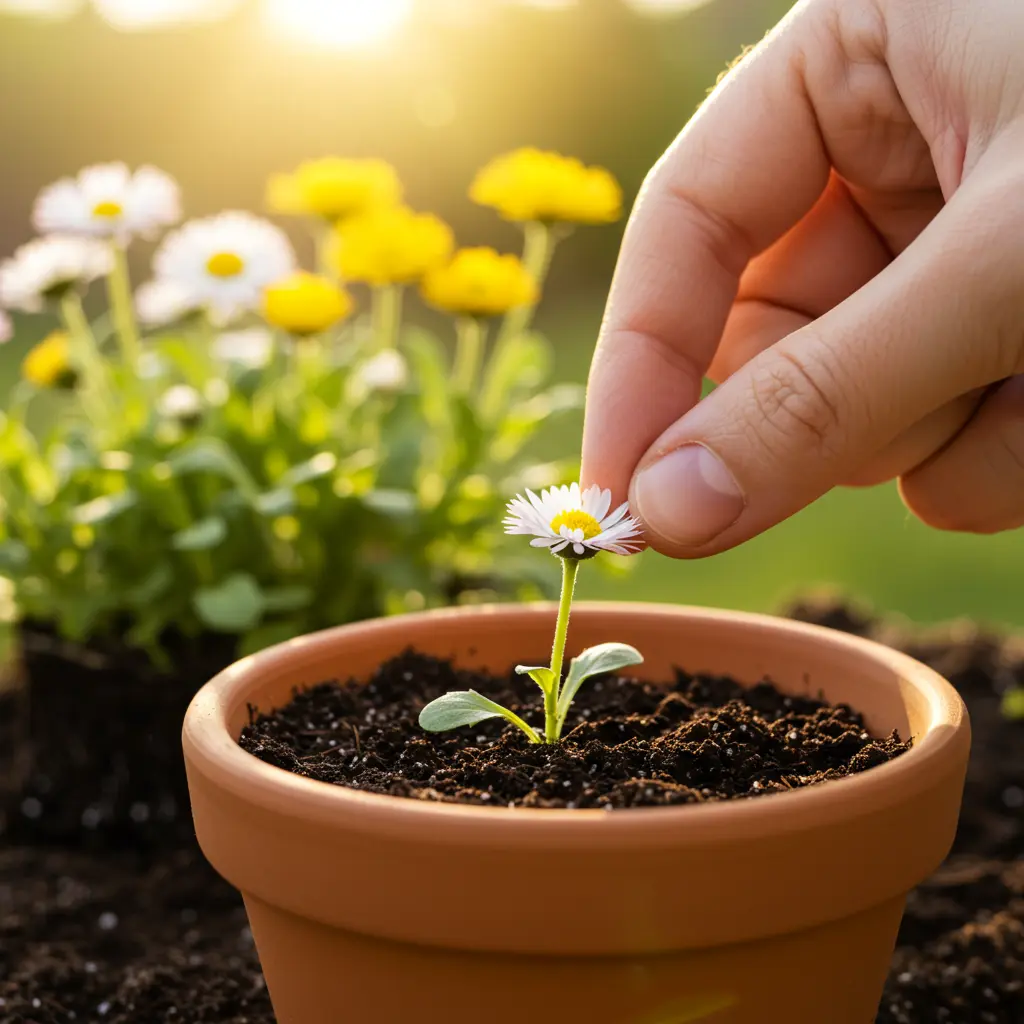
So, when is the best time to plant daisy seeds? The ideal window is in the spring, after all danger of frost has passed in your area. Daisies need warmth to germinate properly. Aim for a soil temperature of around 70°F (21°C), a recommendation often cited by university extension programs. You can easily learn about checking soil temperature to ensure conditions are just right. Waiting until the soil is warm enough gives your seeds the signal they need to sprout, much like you might picture when seeing daisy seeds being planted in gentle spring weather.
Ideal Growing Conditions
According to horticultural best practices, daisies thrive under specific conditions. Providing these will greatly increase your success when planting daisy seeds:
- Full Sun: This means your daisies need at least 6 hours of direct sunlight each day. Choose a spot in your garden or on your patio that receives ample light, like a bright, sunny garden location.
- Well-Drained Soil: Daisies dislike sitting in waterlogged soil, which can lead to root rot. Well-drained soil allows excess water to escape while retaining enough moisture for the roots. If planting in the ground, you can amend heavy clay soil with compost; for containers, use a quality potting mix.
Essential Supplies Checklist
Gathering your materials beforehand makes the planting process smooth and enjoyable. Here’s what you’ll need:
- Quality Daisy Seeds: Choose fresh seeds from a reputable supplier.
- Containers or Garden Space: Decide if you’ll start seeds indoors in trays/pots or sow directly outdoors.
- Seed Starting Mix or Garden Soil: Use a light, airy mix for containers or prepare your garden bed.
- Plant Labels: Essential for keeping track of varieties and planting dates.
- Watering Can or Spray Bottle: For gentle watering that won’t dislodge seeds.
You can see typical seed starting supplies like seed packets, soil, and labels ready for action. For a convenient reference, remember to grab the downloadable checklist mentioned earlier in our guide.
Choosing Your Daisies
While many daisies can be grown from seed, some are easier for beginners than others. Horticultural experts often recommend varieties like the classic daisy, known for its cheerful white petals and yellow center, or the charming English daisy (Bellis perennis) for reliable results. Painted daisies (Tanacetum coccineum) also offer vibrant color options. While Gerbera daisies are beautiful, starting them from seed can sometimes be more challenging, requiring specific conditions. Keep in mind that while general planting advice applies, slight nuances might exist for specific varieties, like needing slightly different conditions for optimal Shasta daisy seeds planting compared to others. You might enjoy seeing images comparing the different looks of popular daisy varieties like Shasta, Gerbera, and English daisies.
Now that you know when to plant, what conditions daisies prefer, and what supplies you need, you’re ready for the next step: actually planting the seeds.
Planting Your Daisy Seeds: A Step-by-Step Guide
Now that you have your seeds and know the best time to start, let’s get down to the core task: planting. Following these steps carefully will give your daisy seeds the best possible start, whether you’re using containers or planting directly into a garden bed.
Step 1: Prepare the Soil
Good soil preparation is the foundation for successful seed starting, a principle emphasized by horticultural experts. Before planting daisy seeds, ensure your chosen spot (whether a pot or a garden patch) has loose, well-draining soil.
- Loosen the Soil: Use a trowel or small cultivator to loosen the top few inches of soil. This helps tiny roots penetrate easily. You can see examples of preparing garden soil by loosening and amending it.
- Amend for Drainage: Daisies dislike sitting in soggy soil. Improve drainage and add nutrients by mixing in some compost or other well-rotted organic matter. This step is crucial for both containers and garden beds. A helpful video can demonstrate how to prepare soil effectively for planting seeds.
Step 2: Sow the Seeds
How deep do you plant daisy seeds? This is a critical detail. Proper planting depth is key to germination success.
- Plant Shallowly: Daisy seeds are quite small and need light or warmth near the surface. Plant them only about 1/8 inch deep. According to PlantMD recommendations, this shallow depth is ideal. As noted by gardening experts, a common mistake is planting daisy seeds too deep, which can prevent them from sprouting. Achieve this by gently pressing the seeds onto the soil surface and then covering them with a very light dusting of fine soil or vermiculite. An image illustrating this shallow 1/8 inch planting depth can be helpful.
- Space Appropriately: Sprinkle the seeds sparingly over the prepared area. Check your seed packet for specific spacing recommendations. If you sow thickly, you can always thin the seedlings later. Watching a demonstration on planting daisy seeds to the correct depth can clarify the technique.
Step 3: Water Gently and Consistently
Once your seeds are sown, careful watering is essential.
- Water Gently: Use a watering can with a fine rose attachment or a gentle mist sprayer. You want to moisten the soil without washing the tiny seeds away. Visualizing this gentle watering technique on newly planted seeds can guide your approach.
- Maintain Moisture: Keep the soil consistently moist, like a well-wrung-out sponge, throughout the germination period. Avoid letting it dry out completely, but also steer clear of waterlogged conditions, as this can rot the seeds. PlantMD confirms that consistent, gentle moisture is vital. Understanding how to water seeds properly after planting is key.
Step 4: Ensure Correct Conditions
With the seeds planted and watered, providing the right environment is the final step for germination.
- Light Requirements: Do daisy seeds need light to germinate? Generally, no. Most common daisy seeds do not require light to sprout; darkness is often preferred. Always check your specific seed packet, but unless it states otherwise, covering them lightly with soil (as mentioned in Step 2) is correct. This aligns with guidance from horticultural resources like university extensions.
- Maintain Temperature: Keep the soil consistently warm, ideally around 70°F (21°C), as discussed earlier. This temperature encourages the quickest and most reliable germination.
With these steps completed, your daisy seeds are well on their way. Now, let’s consider the specific advantages and techniques for planting in containers versus directly in the ground.
Container vs. In-Ground Planting: Choosing What’s Best for You
Deciding whether to plant your daisy seeds in containers or directly in your garden bed is a key choice. Both methods work well, but each has unique considerations based on your space, time, and desired outcome. This section breaks down the specifics to help you choose the best approach for successfully growing your daisies from seed.
Planting Daisy Seeds in Containers
Growing daisies in pots offers great flexibility, especially if you have limited garden space or want to move your flowers around. When planting daisy seeds in pots, select containers that are at least 6-8 inches wide and deep to give roots room to develop. Crucially, ensure the pots have drainage holes at the bottom; good drainage is vital to prevent waterlogged soil, which can rot seeds and roots. You can often see suitable pots with drainage being used in images depicting container planting.
Use a high-quality, well-draining potting mix specifically designed for containers – avoid using heavy garden soil, which compacts easily. Follow the core planting steps regarding seed depth and initial watering. Keep in mind that containers tend to dry out much faster than garden beds, especially in warm or windy weather. You’ll need to check the moisture level daily and water more frequently. Successful planting daisy seeds in containers relies heavily on managing water correctly.
Planting Daisy Seeds Directly in the Ground
Many gardeners wonder, “Can you plant daisy seeds straight into the ground?” The answer is a definite yes! Planting daisy seeds directly in ground is a fantastic way to establish them in your landscape. Start by choosing a location that receives at least six hours of direct sunlight per day, as daisies thrive in sun. The soil must also be well-draining; avoid areas where water tends to puddle after rain.
Prepare the planting site by loosening the soil to a depth of about 6-8 inches using a spade or garden fork. If your soil is heavy clay or very sandy, amend it with compost to improve its texture and fertility. Follow the same core planting steps for sowing the seeds, paying close attention to spacing recommendations on your seed packet to accommodate the mature size of the daisy plants. Visuals showing daisies being planted in a prepared, sunny garden spot can provide a good reference. Once seedlings are established, adding a layer of mulch can help conserve moisture and suppress weeds. With proper site prep, planting daisy seeds in ground is very achievable.
Pros and Cons Summary
Still deciding? Here’s a quick comparison to help:
- Container Planting:
- Pros: Excellent control over soil quality; easy to move plants for optimal sun or protection; ideal for balconies, patios, or small spaces; can bring plants indoors overwinter in some cases.
- Cons: Requires more frequent watering; soil can dry out very quickly; root growth is limited by pot size; may need repotting as plants grow.
- In-Ground Planting:
- Pros: Less frequent watering needed once established; plants have ample room for root growth; integrates naturally into the garden landscape; generally less maintenance regarding watering.
- Cons: Requires available garden space with suitable conditions; less control over existing soil (may need amending); plants are stationary; potential competition from weeds or pests.
Choosing between containers and the ground depends largely on your specific situation and preferences. Now that you’ve considered where to plant, sometimes challenges arise during the initial growth phase. Let’s explore how to handle common germination issues.
Help! Troubleshooting Common Daisy Seed Germination Problems
It can be disheartening when your carefully planted daisy seeds don’t sprout as expected. This is a common concern for beginner gardeners, but don’t worry! Understanding potential issues and knowing how to address them can significantly improve your success rate. Let’s look at some frequent problems and how to solve them.
How long does it take for daisy seeds to germinate?
Under optimal conditions, you can generally expect your daisy seeds to sprout within 10 to 20 days. Key factors influencing this daisy germination time include consistent moisture, suitable temperatures (usually between 65-75°F or 18-24°C), and correct planting depth. Horticultural resources confirm that most common daisy varieties when these needs are met. Patience is important, but if 2-3 weeks pass with no signs of life, it’s time to investigate potential issues.
Why didn’t my daisy seeds sprout?
Several factors can prevent daisy seeds from germinating successfully. Horticultural experts often encounter these common daisy seed germination problems:
- Incorrect Planting Depth: Planting seeds too deep prevents them from reaching the surface, while planting too shallowly can cause them to dry out or wash away. Most daisy seeds should only be lightly covered with soil or vermiculite (about 1/8 inch deep).
- Moisture Issues: Soil that’s constantly waterlogged can suffocate seeds or lead to fungal diseases like damping off. Conversely, soil that dries out completely, even briefly, can halt the germination process. Consistent, even moisture is crucial.
- Unsuitable Temperatures: Most daisies prefer relatively warm soil to germinate. If the soil is too cold (often the case with early outdoor planting), germination can be significantly delayed or prevented altogether.
- Old or Poorly Stored Seed: Seed viability decreases over time. If your seeds are old or were stored in hot, humid conditions, they may no longer be capable of sprouting.
- Damping Off: This fungal disease attacks seedlings at the soil line, often causing them to collapse. It thrives in overly wet, cool conditions and can sometimes prevent seeds from emerging at all. Using a sterile seed-starting mix can help prevent this.
How to Fix Germination Problems
If your daisy seeds aren’t sprouting, run through these simple diagnostic checks and corrective actions:
- Check Planting Depth: Gently excavate a small area to see how deep the seeds are. If they’re buried too deep (more than 1/8 inch for most types), consider replanting, ensuring only a very light covering of soil or vermiculite.
- Assess Moisture Levels: Feel the soil. Is it bone dry or soggy? Adjust your watering routine to maintain consistent moisture – damp like a wrung-out sponge, but not soaking wet. Ensure containers have drainage holes.
- Evaluate Temperature: Are the conditions too cold? If starting seeds indoors, consider using a heat mat to provide bottom warmth. If planting outdoors, ensure soil temperatures are consistently warm enough (check local weather and soil thermometers). You might need to wait longer for warmer weather or start seeds indoors next time.
- Consider Seed Freshness: If you suspect old seeds are the issue, try testing a few by placing them on a damp paper towel inside a plastic bag in a warm spot. If none sprout within a week or two, the seeds are likely no longer viable. Purchase fresh seeds from a reputable source.
- Prevent Damping Off: If replanting, always use a fresh, sterile seed-starting mix, especially when starting indoors. Avoid overwatering and ensure good air circulation around your seedlings once they emerge.
What Healthy Seedlings Look Like
Recognizing healthy growth is key. When your daisy seeds successfully germinate, the first things you’ll see are two small, often rounded or oval leaves called cotyledons, or “seed leaves.” These initial leaves provide energy to the young plant. Soon after, the seedling will develop its first “true leaves,” which will look more like the characteristic foliage of a mature daisy plant. Seeing these true leaves is a great sign that your seedling is establishing itself. A visual reference, like a photo showing healthy daisy seedlings with both cotyledons and emerging true leaves, can be very helpful for comparison.

Having addressed potential germination hurdles, you’re better equipped to achieve success, setting the stage for the next phase: caring for your young daisy seedlings.
What’s Next? Caring for Your Young Daisy Seedlings
Your daisy seeds have sprouted – congratulations! Now the focus shifts to nurturing these tiny plants into strong, healthy seedlings ready for the garden. Proper care during this early stage is crucial for their continued development.
Watering Seedlings
Young daisy seedlings need consistent moisture to thrive, but their delicate roots are susceptible to rot. Keep the soil evenly moist, feeling like a wrung-out sponge, but never soggy. It’s crucial to avoid overwatering, as this can lead to “damping off,” a fungal disease fatal to seedlings. Water gently at the base of the plants, avoiding wetting the leaves. You can see the proper technique for  to minimize splashing and prevent disease.
Sunlight Needs
Once your daisy seeds germinate, they need plenty of light to grow strong. Place your seedlings where they will receive at least six hours of direct sunlight each day. If you’re growing them indoors on a windowsill, this might be sufficient, but check that they aren’t stretching or becoming pale, which indicates they need more light. For indoor setups lacking adequate natural sun, consider using grow lights to provide the bright conditions require for healthy development.
Thinning Seedlings
If you sowed your seeds densely, you might find several seedlings sprouting close together. Thinning is necessary to give the remaining plants enough space, light, and nutrients to grow vigorously. From an expert perspective, overcrowding leads to weak, spindly plants that compete excessively and have poor air circulation, increasing disease risk. Once seedlings develop their first set of true leaves (not the initial seed leaves), choose the strongest-looking seedling in each group or cell. Snip the weaker ones off at the soil line using small scissors – pulling them out can disturb the roots of the seedling you want to keep. Refer to your seed packet for the recommended final spacing for mature plants. Observing can help you identify when thinning is needed, and understanding
ensures you do it without harming the remaining plants.
Hardening Off (If Started Indoors)
Seedlings started in the controlled environment indoors need a gradual transition to outdoor conditions before being planted in the garden. This process, called hardening off, prevents transplant shock. From a plant physiology standpoint, sudden exposure to intense sun, wind, and temperature fluctuations can severely stress or even kill unprepared seedlings. Begin about 7-10 days before your target planting date. Start by placing the seedlings outdoors in a sheltered, shady spot for just an hour or two. Gradually increase their time outdoors each day, also slowly introducing them to more direct sunlight and gentle breezes. The involves this careful, incremental exposure. Following guidance on will help you acclimate your young daisies properly.
After germination, you’ll first see small, often rounded or oval leaves emerge. These are the cotyledons, or seed leaves, which provide initial energy from the seed. Soon after, a new set of leaves will appear that look more like miniature versions of mature daisy leaves – these are the first “true leaves.” The appearance of is a significant milestone. From a horticultural view, true leaves indicate the seedling has established its root system and begun effective photosynthesis, producing its own food. This signals the plant is moving beyond its initial stored energy and is ready for more standard care, including potential gentle fertilizing if needed.
By following these care steps, you’ve successfully navigated the journey from seed to established seedling, setting the stage for beautiful daisy blooms in your garden.
By following this step-by-step guide, you’ve gained the essential knowledge needed to successfully plant daisy seeds, whether starting them in containers or directly in your garden bed. Understanding the right timing, proper soil conditions, and the critical planting depth of just 1/8 inch are key. We’ve also equipped you with practical troubleshooting tips to navigate common germination hurdles, ensuring you’re prepared for potential setbacks. With this comprehensive approach, you’re now empowered to confidently nurture those tiny seeds into the cheerful, classic daisy blooms you envision.
