Table of Contents
Dreaming of growing your own majestic Black Walnut tree? Starting from a simple seed can feel like a daunting task, shrouded in mystery about chilling requirements and whether the nut will ever actually sprout. You’ve probably heard it can be tricky, and figuring out the right steps for successful germination is the biggest hurdle for many aspiring tree growers.
But don’t worry! Growing a Black Walnut tree from seed is entirely achievable, even for complete beginners. This guide cuts through the complexity, offering you a straightforward, reliable path from nut to seedling. We’ll walk you through each essential step, focusing specifically on Black Walnuts – the most common type you’re likely to find.
From selecting the best nut to understanding the crucial chilling period (stratification) and getting it successfully into the ground, we’ve got you covered. We’ll also address common issues that might arise, helping you troubleshoot and significantly increase your chances of success. Get ready to embark on a rewarding journey; let’s start by picking the perfect seed.
Getting Started: Why Black Walnuts and Seed Selection
Before diving into the planting process, let’s clarify why focusing on Black Walnuts is beneficial and how to choose the best seeds for success. This initial step is crucial for setting the stage for your tree-growing journey.
Why Grow Black Walnuts from Seed?
Growing a Black Walnut Tree (Juglans nigra) from seed offers a uniquely rewarding experience, especially for a beginner gardener or hobbyist seeking a simple yet impactful project. While other tree types exist, the Black Walnut holds a particular appeal due to its relatively rapid growth potential and valuable outputs. There’s a special satisfaction in knowing you started this impressive tree from a simple nut. This guide focuses specifically on the Black Walnut Tree, a popular choice for backyard planting and timber. Beyond the personal achievement of watching your tree grow, a mature Black Walnut can provide significant shade, produce edible nuts, and potentially offer timber value in the very long term. Starting from seed, or learning how to grow a walnut tree from nut, makes this accessible project even more tangible and exciting. Understanding these benefits helps motivate the effort involved.
Selecting and Preparing Your Black Walnut Seeds
The success of your project begins with selecting viable seeds. You might wonder, “Can you plant a walnut straight from the tree?” The answer is yes, but with a crucial preparation step. Walnuts are typically ready for collection in the fall when the outer husk begins to soften or split. It’s essential to remove this outer husk, also known as the hull. Be cautious during hull removal as the juice can stain hands and clothes; wearing gloves is highly recommended. You can remove the hull by stepping on the nut with a sturdy shoe, using a wire brush, or even a corn sheller for larger quantities.
Once the hull is removed, you’re left with the hard shell of the walnut. To determine if a seed is viable and likely to germinate, you should perform a Seed Viability Test (Float Test). This simple test helps answer the question, “How do you know if a walnut seed is viable?“
How to Perform the Float Test:
- Fill a bucket or container with water.
- Place the hulled Black Walnut seeds into the water.
- Observe the seeds. Those that sink are generally considered viable as they are dense and likely healthy. Those that float are often non-viable, meaning they are either empty or damaged, and should be discarded.

This test significantly improves your likelihood of success (viability) by allowing you to plant only the most promising seeds. After selecting your viable seeds, they are ready for the next critical step: preparing them for germination through stratification.
The Core Process: Stratification to Planting
With viable seeds prepared, the next crucial stages involve mimicking winter conditions (stratification) and encouraging germination before planting. These steps are vital for signaling to the seed that it’s time to sprout and begin its journey into a tree. Mastering stratification and initial germination sets the stage for successful growth.
The Importance of Cold Stratification
For many tree seeds, including Black Walnuts, a period of cold and moisture is absolutely essential for germination. This process is called cold stratification. It breaks down dormancy within the seed, mimicking the natural conditions the seed would experience overwintering buried in the ground.
So, do you need to stratify walnut seeds? Yes, definitively. Without this chilling period, the seed’s internal clock won’t tell it that spring has arrived, and it won’t sprout.
While seeds can stratify naturally outdoors if planted in the fall, you can also do it artificially indoors. The easiest indoor method involves placing the seeds in a damp medium like sand, peat moss, or a mix, inside a sealed container or plastic bag. This setup is then kept in a cold environment, typically a refrigerator, at temperatures between 32°F and 40°F (0°C to 4°C). This artificial method gives you more control over the process and timing. 
The recommended duration for cold stratification for Black Walnuts is typically 90 to 120 days. Research from university extension programs supports this timeframe as being highly effective. university extension recommendations Following these university extension recommendations helps ensure the seed is properly prepared for germination. This chilling period is non-negotiable for breaking dormancy.
How to Germinate Your Stratified Walnut Seeds
After the required cold stratification period, it’s time to check for germination. Carefully inspect the seeds; you’re looking for the emergence of the radicle, which is the primary root. It will look like a small white sprout emerging from the shell. Not all seeds may sprout at once, and some may need a little longer.
What is the best way to germinate black walnut seeds after stratification? Once the root has emerged, the seed is ready to be planted. You have a couple of options: planting directly outdoors or starting the seed indoors in a pot.
Starting seeds indoors allows you to monitor them closely and protect tender sprouts from pests or harsh weather. However, walnut trees develop a long taproot quickly, which can become restricted in pots. Planting directly outdoors in the intended location avoids this issue and is often considered an easy way to germinate black walnut seeds at home if your climate allows.
Another outdoor germination technique is called Winter Sowing. This involves planting the stratified seeds directly in the ground in late fall or early winter, allowing nature to handle the rest of the stratification and germination process. This method is simple but relies on consistent winter temperatures.
If your seeds are slow to sprout after stratification, ensure they remain consistently moist but not waterlogged. Warm temperatures are also needed to trigger growth after the cold period. Providing consistent moisture and warmth can encourage stubborn seeds.
So, when should I plant walnut seeds? The ideal time to plant stratified or germinated walnut seeds is in the spring, after the risk of hard frost has passed. This timing allows the seedling to establish itself during the favorable growing season. Now, let’s move on to planting that sprouted seed.
Planting Your Sprouted Black Walnut Seed
Once your black walnut seed has successfully germinated and developed a visible root, it’s ready for its permanent home. Planting the seed correctly is crucial for the seedling’s survival and future growth.
Begin by selecting your Planting Site Selection carefully. Black walnuts need plenty of sunlight, ideally at least 6 hours per day. They also require well-drained soil; they do not tolerate standing water. Consider the mature size of the tree – they become large, so ensure there is adequate space away from buildings, power lines, and other trees.
Now, how to plant a walnut seed? Dig a hole that is slightly wider than the seed and about 2-3 inches deep. This depth allows the taproot to grow downward easily while allowing the sprout to reach the surface. How deep should you plant a walnut seed? Aim for the top of the seed to be covered by about 1-2 inches of soil.
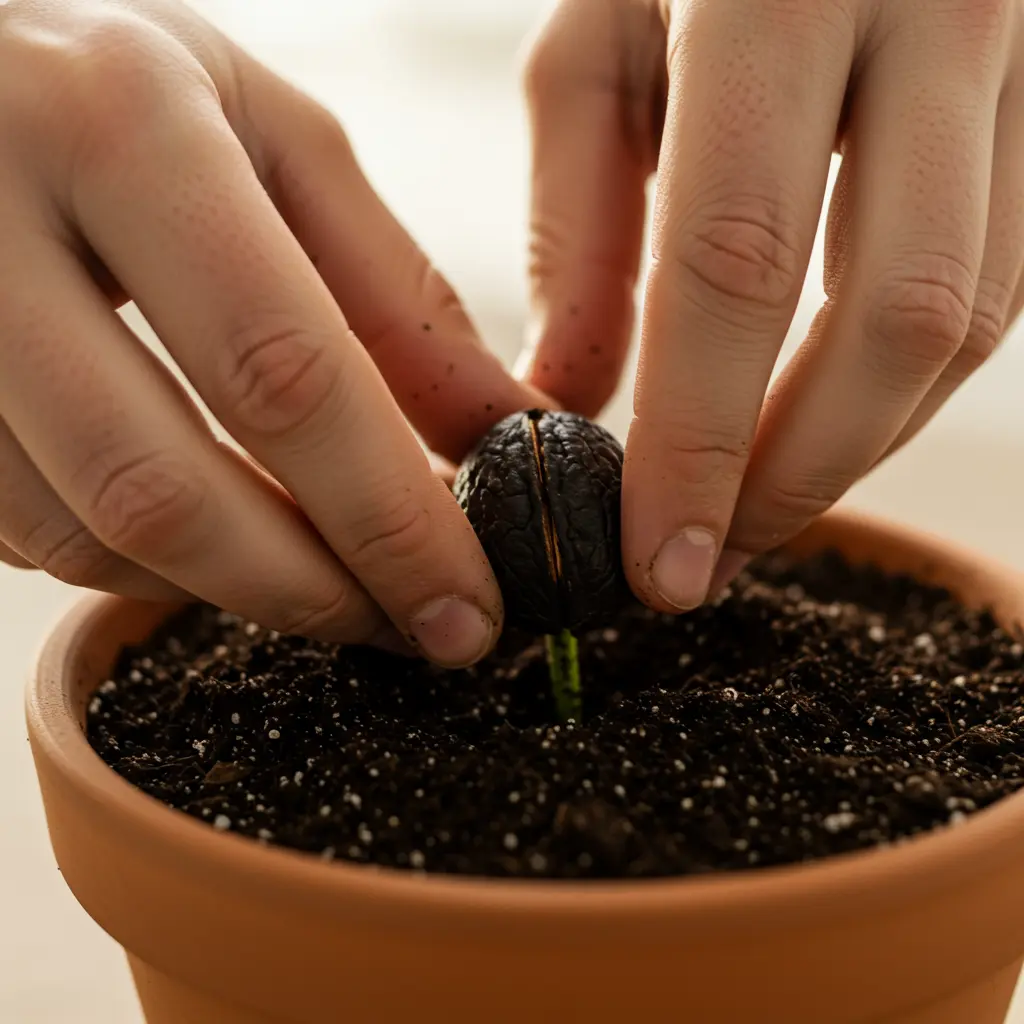
Place the sprouted seed in the hole. If the radicle (root) is clearly visible, orient the seed so the root points downward. Gently backfill the hole with soil, lightly firming it down to remove air pockets. Water the planting site thoroughly after planting to settle the soil and provide initial moisture.
This video explains the process clearly, showing the proper technique for planting a germinated black walnut seed.
The key takeaway is ensuring the root is pointed down and the seed is covered just deep enough.
With your seed now in the ground, the next phase involves providing the right care to help your young black walnut seedling thrive.
After Planting: Early Care and Troubleshooting
Once your seed is planted, providing the right care and knowing how to address common issues will help ensure your young walnut tree thrives. This stage is exciting as you anticipate or see the first signs of growth, but it also requires attention to give your seedling the best start.
Early Care for Your Walnut Seedling
Proper Walnut Tree Care begins the moment your seed is in the ground or sprouts. For a newly emerged walnut seedling, consistent care is key to establishing a strong root system and healthy initial growth.
One of the most critical aspects is watering walnut seedling appropriately. Young plants need consistent moisture, especially during their first year. Avoid letting the soil dry out completely, but also be careful not to waterlog it, which can lead to root rot. The frequency and amount will depend on your climate and soil type, but a good rule of thumb is to keep the soil consistently moist, like a wrung-out sponge. For more detailed guidance on moisture levels, refer to our general watering guidelines.
Keeping the area around your young walnut tree weed-free is also vital. Weeds compete for water, nutrients, and sunlight, which can hinder your seedling’s development. Gently remove any weeds by hand. Depending on your location, you may also need to protect your seedling from potential pests or animals like squirrels or deer, perhaps using a small cage or netting. Ensure your seedling receives adequate sunlight, typically at least 6-8 hours of direct sun per day for optimal growth.

Proper early care sets the foundation for a healthy tree.
Troubleshooting Common Walnut Seed Growing Problems
Even with careful preparation, beginners can encounter challenges. Addressing common walnut germination problems early can save you frustration.
If you find your walnut seed not sprouting after the expected time, there could be several reasons. Insufficient cold stratification is a common culprit; the seed may not have received enough consistent cold exposure to break dormancy. Poor seed viability is another possibility, highlighting why the Seed Viability Test (Float Test) mentioned earlier is a valuable preventative step. Rot due to excessive moisture or fungal issues in the soil can also prevent sprouting.
During stratification, mold can sometimes appear. If you notice mold, gently rinse the seeds and the stratification medium (like peat moss) and replace the medium with fresh, slightly damp material. Ensure good air circulation if stratifying indoors.
After sprouting, seedlings can face issues like damping off (a fungal disease causing the stem to rot at the soil line) or simply slow growth. Damping off is often caused by overwatering or poor ventilation. Ensure good drainage and avoid overcrowding. Slow growth can be due to insufficient light, nutrients, or water. Assess your care routine based on the tips above.
It’s important to manage expectations regarding the question, “How long does it take to grow a walnut tree from seed?” While germination can happen relatively quickly after stratification, the seedling will be small initially. Growing it into a noticeable tree takes many years. Don’t be discouraged if your first attempt isn’t perfect; gardening is a learning process, and sometimes it takes a few tries to get it right.
Now that you understand the basics of seedling care and troubleshooting, let’s address some frequently asked questions that often arise during this journey.
Your Walnut Growing Questions Answered
Here are concise answers to some of the most frequently asked questions about growing Black Walnut trees from seed. This section aims to clear up common confusion and provide quick tips for success.
Common Questions Answered
Do you need to stratify walnut seeds?
Yes, absolutely. Black Walnut seeds require a period of cold, moist conditions to break dormancy before they can germinate. This process, known as cold stratification, mimics the natural winter cycle the seeds would experience outdoors and is essential for successful sprouting.
How long does it take to grow a walnut tree from seed?
While germination itself can happen within a few weeks or months after proper stratification and planting, growing a seedling into a mature, nut-producing tree takes considerable time. Expect it to take 10-15 years before the tree starts producing nuts, and significantly longer to reach its full majestic size.
What is the best way to germinate black walnut seeds?
The best way involves proper cold stratification (either naturally planted outdoors in the fall or artificially mimicked indoors). After stratification, plant the seed in well-draining soil, ensuring it has adequate moisture and warmth. Patience is key, as germination can still take several weeks after planting.
How deep should you plant a walnut seed?
When planting, aim for a depth where the top of the seed is covered by about 1-2 inches (2.5-5 cm) of soil. This helps protect the seed from drying out or being disturbed by animals while still allowing the sprout to reach the surface relatively easily.
How do you know if a walnut seed is viable?
A simple test is the float test. Submerge the hulled walnut seed in water. Viable seeds that are dense and healthy will typically sink, while non-viable or damaged seeds often float. While not foolproof, it’s a good initial indicator.
With answers to your most pressing black walnut questions, you’re well-equipped to avoid common pitfalls and encourage your seed’s growth.
Growing a Black Walnut tree from a seed might seem daunting, but as you’ve seen, it’s a rewarding process broken down into manageable steps. By understanding stratification, testing viability, and providing the right conditions during planting and early care, you significantly increase your chances of success. This guide walked you through the essentials, from preparing your nut to troubleshooting common issues, empowering you to nurture your own tree from the very beginning. Embrace the journey and enjoy the satisfaction of watching your effort take root.
Learn more about caring for your new seedling with our general guide on how often to water plants.
