Table of Contents
Growing vibrant, fruit-laden tomato plants is a highlight of any garden, but supporting their rapid growth can sometimes feel overwhelming, especially if you’re new to gardening. The thought of tying up delicate stems might bring concerns about causing damage, and you might wonder what the easiest, most effective way truly is. Leaving plants unsupported, however, risks disease, broken branches, and a significantly reduced harvest.
Fortunately, mastering how to tie up tomato plants doesn’t have to be a difficult task. This guide is designed to simplify the process, offering clear, step-by-step instructions for popular, easy tomato tying techniques using common materials. We’ll show you exactly how to provide the sturdy structure your plants need for maximum health and yield. We’ll also dive into using plastic trellis netting, an alternative gaining popularity in the gardening community for its potential ease of use. Ready to give your tomatoes the best chance at success? First, let’s explore why supporting them is so crucial.
Why Supporting Your Tomatoes is Key (And What Type You Have)
Understanding why your tomato plants need support is the first step to a healthier, more bountiful harvest. Knowing the reasons for support helps, as does understanding how your tomato’s growth type (determinate or indeterminate) influences its needs.
The Importance of Supporting Tomato Plants
Supporting your tomato plants offers significant benefits that boost overall plant health:
- Keeps fruit off ground, preventing rot and pests.

- Improves air circulation, reducing disease.
- Makes harvesting easier.
- Can lead to larger yields.
Lifting plants off the ground also improves airflow, which helps prevent fungal issues. As PlantMD horticultural expert advises, “Giving your tomatoes proper support isn’t just about looks; it’s fundamental for preventing common diseases and ensuring each plant can reach its full fruiting potential.”

Risks of Leaving Tomatoes Unsupported
Conversely, leaving tomatoes unsupported invites several problems, including:
- Increased risk of fungal diseases like fungal diseases due to soil splash and poor airflow.
- Easier access for pest attacks on fruit/foliage.
- Fruit rot from contact with damp soil.
- Stem breakage as heavy fruit pulls them down.
This lack of support not only stresses the plant but also creates humid conditions near the ground, ideal for diseases, and makes the fruit vulnerable.
Determinate vs. Indeterminate: Knowing Your Tomato Type
Understanding your tomato’s growth habit is key to providing the right kind of support. Determinate, or “bush” tomatoes, grow to a fixed size and produce fruit around the same time, usually needing less staking. Indeterminate, or “vining” types, keep growing and fruiting all season, requiring taller, sturdier support. Knowing whether you have determinate or indeterminate varieties helps you choose the appropriate support method and intensity, ensuring your plants thrive.
With a clear understanding of why support is vital and how tomato type influences needs, let’s gather the necessary supplies.
Gathering Your Supplies: Choosing the Right Tying Materials
Before you start tying, gathering the right supplies is crucial. Let’s look at selecting appropriate support structures and, most importantly, gentle tying materials to prevent damaging your plants.
Choosing Your Main Support Structure
Common tomato support ideas include sturdy tomato stakes, convenient tomato cages, or simple trellises. Stakes and trellises often suit indeterminate (vining) tomatoes, while cages can work well for determinate (bushy) types. Your choice will depend on your tomato variety, available space, and personal preference. 
Selecting Gentle Tying Materials (Softness is Key)
Next, select your tying materials. To prevent tomato stem damage, always choose soft, flexible options. These are some of the best tomato ties:
- Strips of old fabric (like t-shirts or nylon stockings)
- Commercial soft plant ties
- Wide garden twine (used gently)
Using soft ties for tomatoes is crucial to avoid cutting into stems.
Materials to Avoid and Essential Tools
It’s equally important to know which materials to avoid, as some can harm plants by cutting or constricting stems. You’ll also need a couple of essential tools.
- Avoid: Thin wire, fishing line, hard plastic zip ties.
- Essential tools: Sharp scissors/snips, gloves (optional).
With your gentle materials and suitable supports selected, you’re ready to learn the staking method.
How to Tie Up Tomato Plants: Step-by-Step Guide (Staking Method)
Staking is one of the most common traditional methods for supporting tomatoes. Follow these steps for secure, plant-friendly support.
Preparing for Tying: Positioning Supports and Plants
Proper preparation is key for effective staking:
- Install Supports Early: Drive stakes (1-2 inches thick, 5-8 feet tall for indeterminates) at transplanting or soon after. Installing early prevents root damage.
- Position Stakes Carefully: For correct positioning tomato stakes, place each stake 3-4 inches from the plant’s base.

- Gather Stems: Gently guide the main stem(s) towards the stake, ready for tying.

Step-by-Step: The Figure-Eight Tying Method
With the stakes ready, use the figure-eight method to gently secure your plants:
- Cut Tie Material: Cut a piece of soft garden twine or fabric strip, long enough to encircle the stem and stake, plus extra for tying.
- Loop Around Stem: Gently hold the tomato stem to the stake. Make a loose loop with the tie around the stem.
- Form Figure-Eight: Cross the tie’s ends between the stem and stake, creating a “figure eight tomato tie.” This forms a buffer, preventing the tie from cutting into the growing stem and shielding it from direct pressure.
- Wrap Around Stake: Bring both ends of the tie around the back of the stake.
- Tie Securely but Loosely: Tie the ends together. Ensure the loop around the stem is loose enough for growth, preventing girdling.
This method supports the plant without restricting development.
Key Considerations: Tie Placement and Frequency
Knowing where and how often to add ties is vital for continuous support. Place ties every 6 to 8 inches along the main growing stem, always positioning a tie just below a heavy fruit cluster to provide adequate support for its weight. Check your rapidly growing tomato plants weekly. Add new ties as needed to secure new growth and ensure the plant remains upright and well-supported, keeping pace with its development.
Common Tying Mistakes and How to Avoid Them
Avoid common mistakes to prevent damaging your plants and ensure effective support:
- Tying too tightly: Constricts and damages growing stems.
- Using damaging materials: Thin wire or string can cut into plants.
- Securing flower/fruit clusters directly: Can harm developing fruit.
- Infrequent tying: Unsupported new growth may break.
- Not checking/adjusting ties: Existing ties can become too tight.
Avoiding these pitfalls helps maintain plant health and effective support.
Now that you’ve mastered staking, let’s explore an alternative that many gardeners find easier: plastic trellis netting.
Exploring Easier Alternatives: Using Plastic Trellis Netting
If traditional tying seems too labor-intensive, plastic trellis netting offers a popular and potentially easier alternative for supporting your tomato plants.
What is Plastic Trellis Netting and Why Consider It?
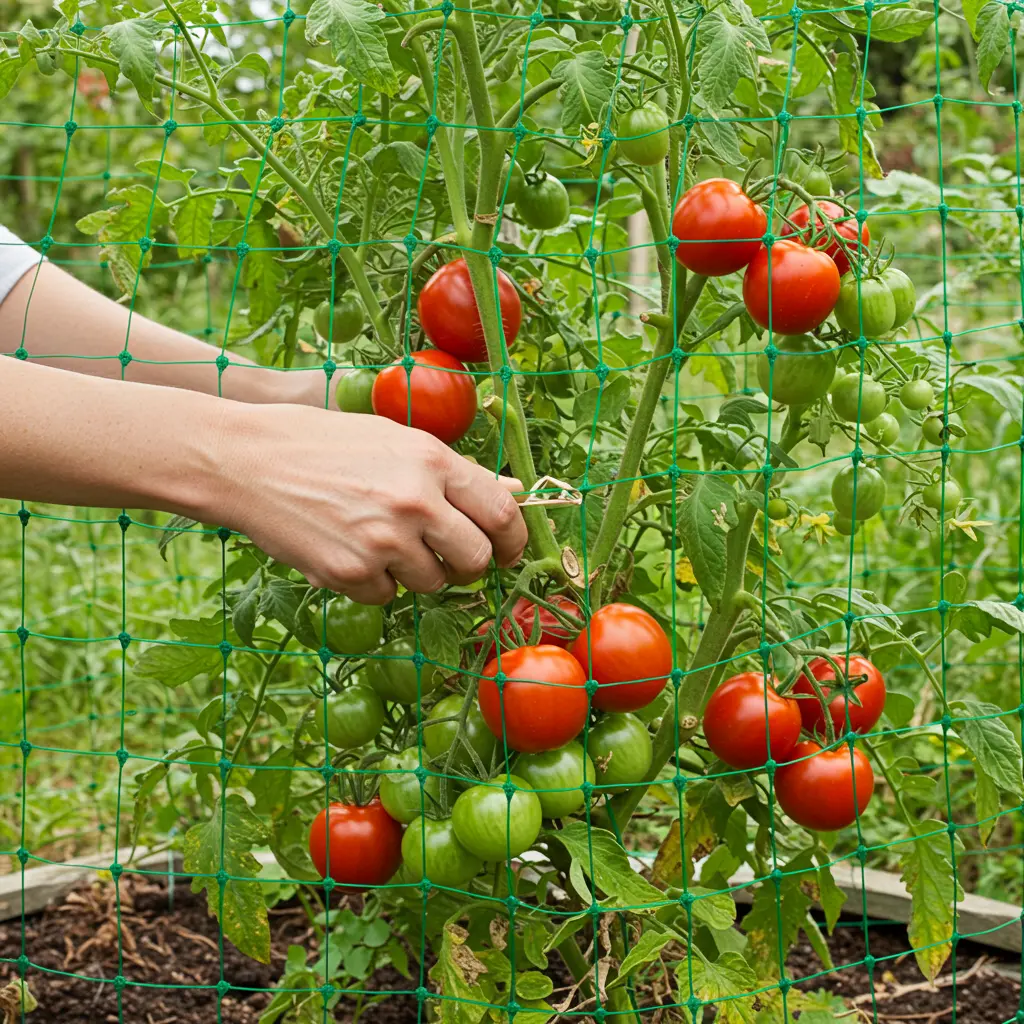
Plastic trellis netting is a compelling solution for gardeners seeking a simpler approach than individual ties. This durable mesh, often referred to as tomato mesh netting, is specifically designed to support climbing plants, making it particularly well-suited for indeterminate tomato varieties.  Many find that using plastic trellis netting for tomatoes is considerably quicker to install than securing each plant stem by stem, as it provides multiple support points across its structure. Furthermore, it’s often reusable for several seasons, offering an economical and easy tomato support system. Its popularity as an easier method reflects a common desire among gardeners for efficient and effective plant care.
Setting Up Plastic Trellis Netting: A Step-by-Step Guide
Setting up your plastic trellis netting correctly is key to providing strong support. Here’s a simple guide:
- Install Your Support Posts: Begin by securely installing sturdy posts at each end of your tomato row. T-posts or wooden posts work well. For longer rows, add intermediate posts every 6-8 feet to prevent the netting from sagging and ensure robust support.
- Attach the Netting: Unroll the plastic trellis netting and stretch it tautly between your posts. Secure it firmly to the posts using zip ties, wire, or strong twine. Ensure the bottom edge of the netting is a few inches above the ground to prevent rot and allow for good airflow around the base of your plants. Achieving proper tension is crucial for the netting to effectively support your growing tomatoes.
- Choose Your Configuration: You can install the netting vertically, creating a simple wall of support for your plants to climb. Alternatively, you can create an A-frame structure by angling two rows of netting towards each other and securing them at the top; this provides support on both sides of the plants.
Guiding and Training Tomatoes onto the Netting
Once the netting is up, gently train the growing tomato plants onto it. Gently guide the main stems and larger branches, weaving them through the netting squares to encourage climbing. Start this process when the plants are young and pliable to avoid damaging the stems. A little light pruning to remove lower leaves or non-fruiting suckers can also make weaving easier and improve air circulation around your plants.
Tip: For heavier branches or particularly vigorous vines, you might occasionally need to use soft ties or clips to provide extra support and keep them securely attached to the mesh.
Understanding how to use plastic trellis netting gives you another option. Let’s compare it directly with traditional tying to help you decide.
Tying vs. Netting: Which Support Method is Easiest for You?
Now that you understand both traditional tying and trellis netting, let’s compare them to help you decide which method is easier and more effective for your garden.
Comparing Traditional Tying vs. Plastic Trellis Netting
When comparing tying versus netting tomatoes, consider the ease of use and time commitment involved. Traditional tying offers precise support, ideal if you have few plants and enjoy detailed care. However, it can be time-consuming for larger gardens, requiring ongoing effort. Plastic trellis netting, on the other hand, is often faster for many plants once set up, reducing individual tying tasks. Its main drawbacks are the initial setup time and potentially less precise support for specific pruning styles. Both methods can be very effective; the best choice depends on your garden’s scale and your personal preference.
Is Trellis Netting Better Than Tying Tomatoes?
Whether trellis netting is “better” than tying depends on your priorities and garden setup. For many gardeners, especially those with several indeterminate plants, trellis netting often proves to be the easiest tomato support. It can be significantly faster to implement for larger quantities and provides consistent support as plants grow. Traditional tying, however, allows for more precise control over individual stems, which some gardeners prefer. Both methods are excellent for preventing disease and supporting heavy fruit when done correctly. If your main goal is ease with multiple plants, netting frequently comes out ahead.
What’s the Easiest Way to Support Indeterminate Tomatoes?
For indeterminate tomatoes, which grow tall and fruit all season, trellis netting or tall, sturdy cages are often the easiest support methods. These provide ongoing support as plants vigorously grow, requiring less frequent intervention. Traditional staking and tying can become laborious with indeterminates due to their continuous growth; you’ll be tying new growth constantly. Netting offers a framework they grow into, making it a strong contender for the best support for indeterminate tomatoes. The Florida weave method is another easy option for rows, simplifying support for multiple plants.
Making Your Choice: Which Method Suits Your Garden?
To choose the support method that’s most manageable and effective for you, consider these key factors:
- Number of plants: More plants might favor netting.
- Tomato type: Indeterminates need robust, ongoing support.
- Time commitment: Tying is more hands-on.
- Budget/materials: Simple stakes vs. netting systems.
Select the approach that best suits your garden and resources.
With these comparisons in mind, you can confidently select the support system that best suits your garden. Finally, let’s cover some pro tips for healthy, well-supported tomatoes.
Pro Tips for Healthy, Well-Supported Tomatoes
Whichever support method you choose, these additional tips will help prevent damage and ensure your tomatoes thrive.
Gentle Giants: Techniques to Avoid Stem Damage
Gentle handling is crucial when securing plants to avoid stem damage. Always use appropriate, soft materials, ensuring ties are never cinched tight against the stem. Check ties periodically as the plant grows. Best practices for gentle tomato tying include:
- Handle stems carefully during tying.
- Leave about a finger’s width of space within ties.
- Avoid tying directly onto fruit or flower clusters.
- Use wide, soft materials like cloth strips or garden twine.
- Check ties periodically and loosen if needed.
Keep Checking: Adjusting Support as Plants Grow
Regular checks are vital for successful support. Inspect your supports at least weekly. As plants grow taller and heavier, you’ll need to add new ties or gently guide new growth onto the support system. Loosen any ties that become too tight. Adjusting supports as needed ensures they remain stable and effective all season.
Let Them Breathe: Support for Better Airflow
Proper support significantly improves air circulation around your tomato plants. Lifting foliage off the ground and separating branches allows air to move freely, helping leaves dry faster after rain or watering. This simple practice helps reduces fungal diseases. Good airflow is crucial to prevent tomato diseases; understanding improving air circulation highlights its importance. Pruning lower leaves can also enhance circulation near the base.
Quick Fixes for Common Support Problems
Encountering support problems is common, but most have simple solutions. Address issues promptly to keep plants healthy:
- Slumping plant: Add more ties higher up or reinforce with a stronger support.
- Broken tie: Replace it immediately to prevent stem kinking or breakage.
- Leaning support: Reinforce the base or consider fixing tomato stakes more securely.
- Overloaded branch: Add extra, individual support directly under the heavy branch.
By carefully supporting your tomatoes using these tips, you set the stage for healthy growth and a bountiful harvest.
Tying up tomato plants effectively should now feel much clearer. From understanding why support is vital and selecting the right materials to mastering step-by-step staking, you’re well-equipped. We also explored plastic trellis netting, comparing it to traditional tying and highlighting why it’s often an easier path, especially for beginners. This guide provided straightforward instructions for both methods, helping you choose with confidence. Ultimately, whether you opt for meticulous tying or the broader support of netting, the reward is a garden brimming with healthy, well-supported tomatoes and a fantastic harvest. What are your preferred tomato support techniques or lessons learned? Share your insights in the comments!
