Table of Contents
Spotting sprouts on a sweet potato in your pantry is exciting – it’s nature’s invitation to grow your own! While it might seem intuitive to just plant the whole thing, the secret to a thriving sweet potato harvest actually lies in those sprouts themselves, specifically when they’re grown into “slips.” Many home gardeners wonder how to properly use these promising starts. Planting the whole potato can lead to poor yields and pest issues, making the slip method the preferred and most reliable technique.
The key is mastering the process of creating and planting sweet potato slips, which ensures vigorous, healthy plants ready to produce plenty of tubers. This guide provides clear, step-by-step instructions to make planting sprouted sweet potatoes simple and successful. We’ll walk you through transforming sprouts into viable slips, rooting them effectively (including options like water or soil), and getting them successfully planted, whether you have garden beds or are focusing on containers. Plus, we’ll equip you with practical solutions for common challenges, helping you avoid pitfalls and maximize your harvest. Ready to turn those humble sprouts into a productive sweet potato patch? Let’s begin with preparing your slips.
Understanding and Preparing Sweet Potato Slips
Before planting, it’s crucial to understand why using sweet potato ‘slips’ is the preferred method and how to properly prepare them from a sprouted sweet potato. This first step lays the foundation for a healthy, productive sweet potato harvest.
Sweet Potato Slips vs. Planting the Whole Potato
When you see a sweet potato that has started to sprout, you might wonder, “Can I just plant a whole sprouted sweet potato?” While it’s technically possible, it’s generally not the recommended or most effective method for growing a good crop. Planting the entire potato can lead to overcrowding as multiple sprouts compete for space and nutrients directly from the parent potato. This often results in smaller, fewer sweet potatoes.
Another common question is, “Can you grow sweet potatoes from grocery store potatoes?” You can, but be aware that some commercially grown potatoes may be treated with growth inhibitors to extend shelf life, which can make sprouting more difficult or inconsistent. Choosing an organic or untreated sweet potato is often best for starting slips.
The superior method for home gardeners, and the one that leads to better yields and healthier plants, is using “slips.” Sweet potato slips are essentially the sprouts or shoots that grow from a mature sweet potato. Unlike planting a whole potato, slips are rooted cuttings that develop into individual plants. This is different from how regular sprouted potatoes are planted, where you might cut sections of the potato itself. By starting with slips, you create separate, vigorous plants ready to establish themselves in the soil, avoiding the competition issues of a whole potato. This clear comparison highlights why slips are the best method for robust growth.
How to Create Sweet Potato Slips from a Sprouted Potato
So, “How do you start sweet potato slips from a sprouted potato?” It’s a simple process that requires a little patience. Start with a healthy, mature sweet potato, preferably one that shows signs of sprouting or ‘eyes.’ To encourage slips to grow, you need to provide warmth and moisture.
A common method is to suspend the sweet potato partially submerged in a jar of water. You can use toothpicks inserted into the sides of the potato to balance it on the rim of a glass jar, ensuring the bottom half is in the water. Place the jar in a warm, bright location, like a sunny windowsill.  In a few weeks, sprouts will begin to emerge from the potato.
Once the sprouts (slips) are several inches long (usually 4-6 inches) and have developed a few leaves, they are ready to be harvested from the parent potato. Carefully twist or cut the slips off as close to the potato surface as possible.
Rooting Your Sweet Potato Slips (Water vs. Soil)
After separating the slips from the parent potato, the next crucial step is rooting them before planting them in your garden or containers. This gives them a head start and increases their chances of survival. “Should sweet potato slips be rooted in water before planting?” Yes, rooting in water is a very popular and effective method, though not the only one.
To root slips in water, place the cut end of each slip into a jar or glass of water. Ensure only the bottom inch or two is submerged. Place the container in a warm, bright spot, avoiding direct scorching sun. Change the water every few days to keep it fresh. Within one to two weeks, you should see roots beginning to form.
Alternatively, you can root slips directly in moist potting soil or sand. Simply insert the cut end of the slip about an inch deep into the moist medium. Keep the soil consistently moist but not waterlogged. Rooting in soil can sometimes lead to stronger initial root systems, but water rooting allows you to easily see the root development. For most home gardeners, both methods work well. Your rooted slips are ready for planting when they have a good cluster of roots, typically about an inch or two long.
With your sweet potato slips successfully prepared and rooted, you’re ready for the next step: getting them into their final growing location.
Planting Your Sweet Potato Slips
Once your sweet potato slips have developed healthy roots, it’s time to plant them in their final location, whether that’s directly in the garden bed or in suitable containers. This stage is crucial for establishing strong plants that will produce a bountiful harvest later in the season. Getting the timing and technique right ensures your slips transition smoothly from rooting to vigorous growth.
Step-by-Step Planting in Garden Beds
Knowing when to plant sweet potato slips is key to success. The ideal time is after the last threat of frost has passed in your area and when the soil temperature consistently reaches at least 60°F (15°C), ideally closer to 65-70°F (18-21°C). Planting too early can stunt growth or even kill the young slips.
Before planting your sprouted sweet potato slips, prepare the garden bed. Sweet potatoes thrive in well-drained, loose soil. Avoid heavy clay or compacted ground. Amend the soil generously with compost or other organic matter to improve drainage and fertility. Create mounds or rows about 6-8 inches high and 3 feet apart.
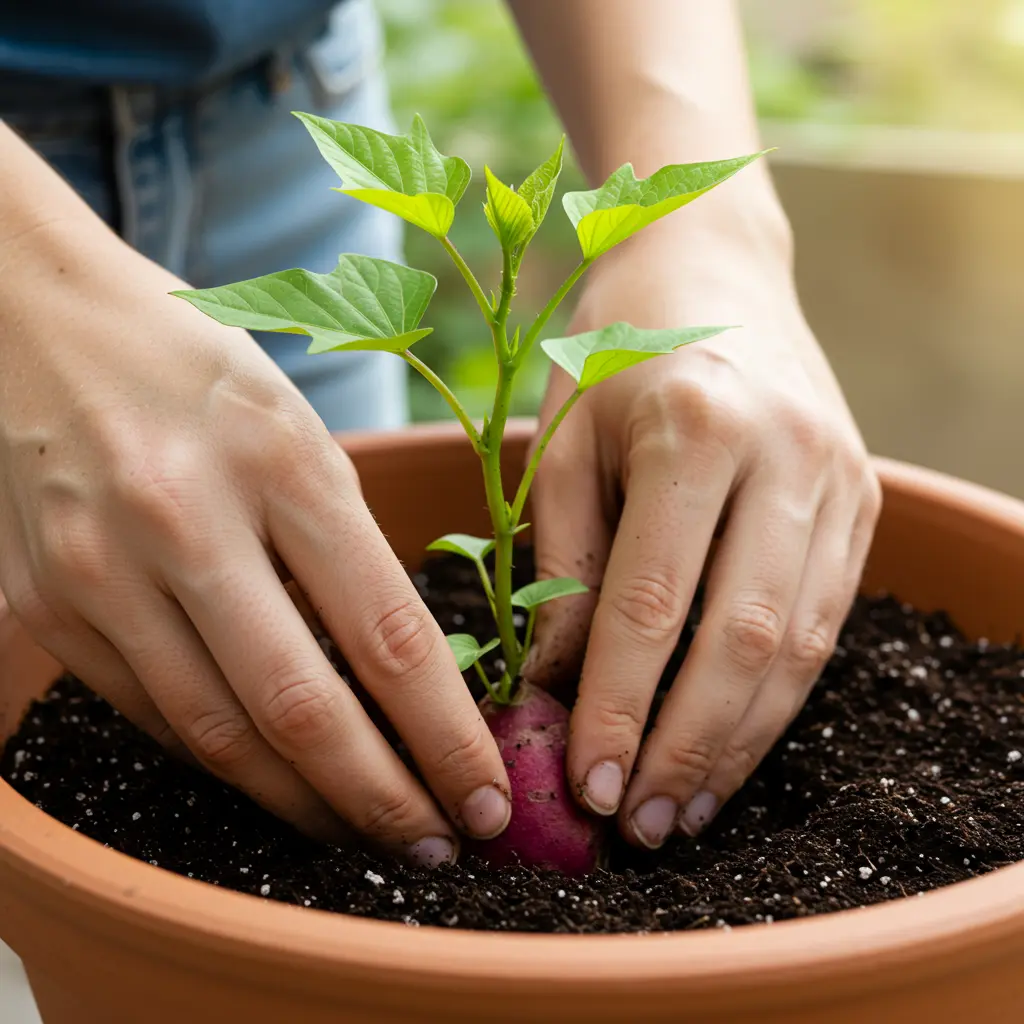
When you’re ready to plant, carefully handle the rooted slips. Using a trowel or your hands, make a hole deep enough to cover the roots and the lower portion of the stem (about 3-4 inches deep). Gently place the slip in the hole, ensuring the roots are spread out slightly. Backfill the soil around the stem, firming it gently to remove air pockets but avoiding compaction. Space slips about 12 inches apart along the mounds or rows.
Immediately after planting, water the area thoroughly. This helps settle the soil around the roots and provides essential moisture for the young plants to establish themselves. Keep the soil consistently moist for the first week or two as the slips get established.
For a visual walkthrough of this process, check out our embedded guide:
. This video demonstrates the proper way to handle and plant your slips, minimizing stress on the delicate roots and ensuring a good start. You can see the process illustrated here:  .
.
Growing Sweet Potatoes in Containers: Tips for Success
If you’re wondering about container needs for sweet potatoes, rest assured they can be successfully grown this way! Growing sweet potatoes in containers is an excellent option for gardeners with limited space or less-than-ideal garden soil.
Choosing the right sweet potato container size is vital for a good harvest. Sweet potatoes need plenty of room for their roots and tubers to expand. Opt for containers that are at least 15-20 gallons (about 18-24 inches in diameter and depth). Fabric pots or those made from breathable materials are often recommended as they promote air pruning of roots, leading to a healthier root system. Ensure any container has adequate drainage holes.
Fill your containers with a high-quality potting mix formulated for vegetables or containers. A good mix will be loose, well-drained, and retain moisture without becoming waterlogged. You can enhance it with some compost for added nutrients.
The step by step planting sweet potato slips in containers is similar to in-ground planting. Fill the container most of the way with potting mix. Make a hole about 3-4 inches deep and gently place 1-2 slips per container (depending on size), covering the roots and lower stem. Water thoroughly after planting.
To maximize yield in containers, pay close attention to watering – containers dry out faster than garden beds. Consistent moisture is critical, especially during tuber formation. You might even consider DIY self-watering pots for easier watering. Fertilize regularly with a balanced liquid fertilizer according to product instructions, starting a few weeks after planting. While sweet potatoes are vines, you can let them trail or gently guide them around the container. Growing sweet potatoes in containers requires similar attention to moisture and nutrients as tips for growing potatoes indoors, though sweet potatoes require more space. A thriving container setup can look like this: .
With your sweet potato slips successfully planted, the next step is providing the ongoing care they need to grow strong and healthy vines, which we’ll cover next, along with common issues you might encounter.
Sweet Potato Plant Care and Troubleshooting
Proper care throughout the growing season and knowing how to handle common issues are key to a successful sweet potato harvest. Once your sweet potato slips are planted and establishing roots, their ongoing health depends on consistent attention. Understanding their basic needs and being prepared for potential problems will help ensure your efforts result in a bountiful crop come fall.
Ongoing Care and Addressing Common Problems
Sweet potato plants are relatively low-maintenance once established, but they do have specific needs. Adequate sunlight is crucial; they thrive in full sun, needing at least 6-8 hours per day. Watering is important, particularly during dry periods and when the plants are young. While sweet potatoes are somewhat drought-tolerant once mature, consistent moisture promotes better root development. You can refer to general plant watering guidelines for a baseline, but remember sweet potatoes prefer slightly drier conditions than some other vegetables, especially as harvest time approaches. Fertilization is often unnecessary, especially in rich soil, as excessive nitrogen can lead to lots of leafy growth at the expense of tubers.
Managing the sprawling sweet potato vine care is a common question. Sweet potatoes produce long vines that spread across the ground or can be trained up a trellis. Pruning the vines is generally not recommended as it can reduce your final yield. The energy from the leaves is needed to grow the tubers underground. Simply let them spread or gently redirect them if they are growing out of bounds.
Despite their resilience, you might encounter some sweet potato problems. These can range from environmental stress to pests and diseases. Yellowing leaves, for instance, might indicate overwatering, nutrient deficiency, or even the presence of pests.  Keep an eye on the foliage for any signs of distress.
One of the most serious pests is the sweet potato weevil, though it’s more common in warmer climates. Other potential issues include fungal diseases like stem rot or scurf, often related to soil conditions or infected slips. Addressing issues early is vital. For specific guidance on identifying and managing pests and diseases, sweet potato pests diseases extension resources are invaluable. often provide regionally specific advice. Findings from university extension office advice frequently highlight integrated pest management strategies, emphasizing prevention through crop rotation, using certified disease-free slips, and maintaining healthy soil to build plant resistance. If you encounter common planting issues like slow growth or damping off shortly after getting your slips in the ground, ensure you haven’t overwatered and that the soil isn’t compacted.
Knowing how to handle these challenges increases your chances of a successful outcome. With proper care and vigilance, your sweet potato vines will flourish, leading you towards the exciting time of harvesting sweet potatoes, typically occurring in late summer or fall before the first frost.
Even with careful preparation, questions often arise. Let’s address some common ones:
Frequently Asked Questions About Growing Sweet Potatoes
Here are answers to some common questions home gardeners have when growing sweet potatoes from slips. Getting these basic questions answered can help ensure a successful growing season.
FAQ: Your Sweet Potato Growing Questions
One common question is about the potential harvest. How many sweet potatoes do you get from one plant or slip? While it varies depending on growing conditions, soil fertility, and variety, you can generally expect to harvest anywhere from 3 to 6 sweet potatoes per plant. Some vigorous plants in ideal conditions might produce slightly more.
Another frequent query concerns the timeline. How long does it take to grow sweet potatoes from slips? From the time you plant the slips in the ground, it typically takes between 90 to 120 days for the tubers to mature and be ready for harvest. This time frame is highly dependent on the specific sweet potato variety and your local climate.
Gardeners also often ask about timing. What month do you plant sweet potato slips? The most crucial factor isn’t a specific month, but rather ensuring the soil is warm enough and all danger of frost has passed. Sweet potatoes are tropical plants and are very sensitive to cold. You should wait until at least two weeks after your average last frost date, and ideally when the soil temperature consistently stays above 60°F (15°C), usually late spring or early summer, depending on your region.
Understanding these basics about sweet potato yield per plant, the time it takes to grow sweet potatoes, and when to plant sweet potato slips can set you up for a rewarding harvest.
Turning a simple sweet potato sprout into a thriving plant is a rewarding step in your gardening journey. You’ve now mastered the reliable method of using slips, understanding how to root them successfully and get them planted, whether in the ground or containers. We covered essential care tips and solutions for common hiccups, equipping you with the practical knowledge to nurture your sweet potato vines. Growing your own food from a sprout connects you deeply to the process and promises a delicious harvest later on. Embrace the growth ahead!
Looking for ways to simplify container care? Explore DIY self-watering pot options for easier care!
