Table of Contents
You reached into the pantry for a potato, only to find it sporting some enthusiastic sprouts. Don’t feel bad – it happens to the best of us! Before you toss them, know this: those sprouts are little green promises of new potato plants. You absolutely can turn those forgotten spuds, even the ones from the grocery store or those with awkwardly long sprouts, into a thriving garden patch or container harvest.
This guide is designed for resourceful gardeners like you, who see potential in every sprout. We’ll walk you through the simple steps needed to prepare your sprouted potatoes (yes, we cover cutting and handling those long sprouts!), plant them correctly whether in the ground or pots, and give them the best start for a successful yield. Get ready to transform kitchen scraps into homegrown goodness!
Why Bother Planting Those Sprouted Potatoes?
Before you toss those spuds with eyes, let’s explore why planting sprouted potatoes is a great idea for resourceful gardeners, even if they’re from the grocery store. It might seem counterintuitive to plant something that looks past its prime, but those sprouts are actually the plant’s first step towards growth!
Turning sprouted potatoes into a new harvest is the ultimate act of resourcefulness. Instead of becoming kitchen waste, they can provide fresh food right from your garden or containers. This aligns perfectly with the spirit of an “Opportunistic Gardener” – someone who sees potential in what’s readily available.
A common concern is whether store-bought potatoes, or those that have been sitting in your pantry, are viable for planting. The good news is that in most cases, yes, they absolutely can be successfully grown! Those sprouts are a clear sign the potato has the energy and intention to start a new plant.
There’s a unique satisfaction in harvesting food you grew yourself, especially when it started as something you might have otherwise discarded. It’s a simple, rewarding process that feels like getting something for nothing.
If you’re new to gardening or have only ever grown from “seed potatoes,” don’t worry. This guide will walk you through the process of planting sprouted potatoes easily, step-by-step.
Now that we know why it’s worth it, let’s look at how to get your sprouted potatoes ready for planting.
Preparing Your Sprouted Potatoes for Planting Success
Proper preparation is key to turning those sprouted potatoes into a productive harvest. Don’t just toss them in the ground! Let’s cover the essentials, from understanding the difference between types of spuds to cutting them correctly so they’re ready for planting.
Grocery Store Spuds vs. Seed Potatoes: What You Need to Know
So, you’ve got some potatoes from the grocery store that have started sprouting. Can you plant them? The short answer is yes, you can plant potatoes directly from the grocery store, but there are some important things to consider.
The biggest difference lies between certified seed potatoes and the potatoes you buy for eating. Certified seed potatoes are specifically grown to be disease-free and are not treated with growth inhibitors. This gives them a much higher chance of successful germination and healthy growth. Grocery store potatoes, on the other hand, may have been treated with inhibitors to prevent sprouting on the shelf, and they can potentially carry diseases that could harm your garden soil for years to come. While store potatoes will often grow, it’s important to have realistic expectations about yield and potential risks.
This is why many experienced gardeners recommend using certified seed potatoes for the best results. However, if you’re feeling resourceful and want to try planting your sprouted store-bought spuds, it’s definitely possible! Just be aware of the potential downsides. Research suggests there are potential disease risks with store-bought potatoes that can be transmitted through the tubers, impacting soil health.
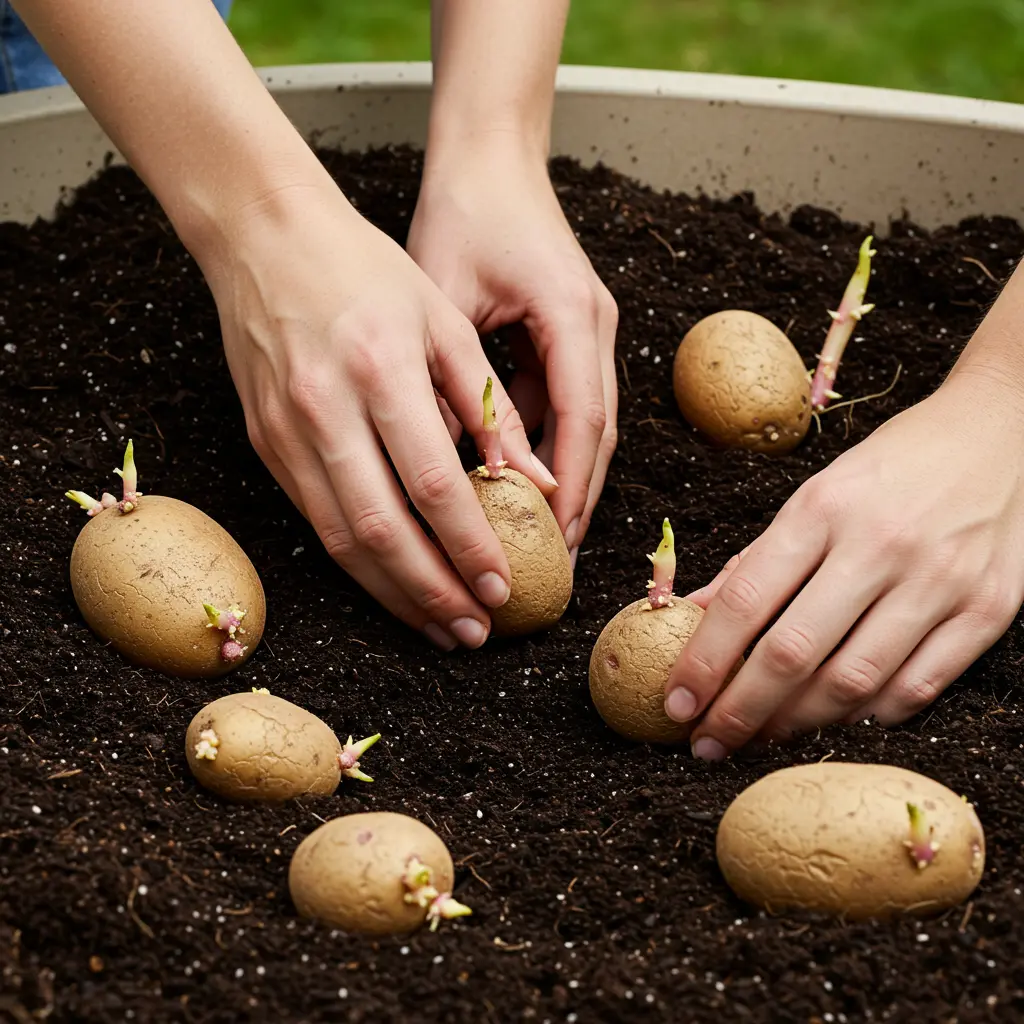
Even if your potatoes are already sprouted, the concept of “chitting” or pre-sprouting is still relevant. Chitting typically involves exposing potatoes to light and cool temperatures to encourage short, stocky sprouts before planting. If your potatoes already have long sprouts, that’s okay! It just means they’ve essentially chitted themselves in storage.  This image shows the difference between a seed potato with healthy, chitted sprouts and a grocery store potato with long, sometimes tangled sprouts. You can plant potatoes with long sprouts, but handle them very gently to avoid breaking them off.
Ultimately, the choice between planting sprouted store potatoes or certified seed potatoes depends on your goals and risk tolerance. Seed potatoes offer higher reliability and lower disease risk, while sprouted store potatoes offer a frugal way to experiment and use what you have on hand.
How to Prepare Your Sprouted Potatoes
Once you’ve decided which sprouted potatoes you’re going to plant, the next step is preparation. A common question is: Should I cut sprouted potatoes before planting? For larger potatoes, cutting them into smaller pieces is a great way to get more plants from a single spud. However, planting a whole sprouted potato is also an option.
If you choose to cut, the goal is to create “seed pieces.” Use a clean, sharp knife to cut larger potatoes into chunks about the size of an egg or slightly larger. Each piece must have at least one, ideally two, healthy eyes or sprouts. This illustration shows how to properly cut a potato into seed pieces, ensuring each piece has sprouts.
After cutting, it’s crucial to “cure” the pieces. Simply leave the cut pieces out in a dry spot away from direct sun for a day or two. This allows the cut surfaces to dry and form a protective layer, which helps prevent rot once they are planted.
What happens if you plant a whole sprouted potato? Planting a whole potato is perfectly fine, especially for smaller ones. The main difference is that a whole potato might produce a denser cluster of stems in one spot, potentially leading to more potatoes but perhaps smaller ones due to competition. Cutting spreads out the growth and can yield more individual plants, potentially with larger potatoes per plant, but introduces the risk of rot if not cured properly.
If your potatoes have developed very long or tangled sprouts, handle them with extra care during this preparation phase. Try not to break the sprouts off, as these are the beginnings of your new plant’s stems.
With your potato pieces (cut and cured, or whole) ready, you’re now prepared for the main event: getting them into the ground.
How to Plant Sprouted Potatoes: Step-by-Step Guide
Now for the exciting part – getting those prepared spuds into the soil or container! Follow these simple steps for planting in the ground or pots, tailored for beginners. Whether you’re using a backyard plot or limited patio space, planting sprouted potatoes is a straightforward process that offers a rewarding harvest.
How to Plant Sprouted Potatoes in the Ground (Step-by-Step)
Planting potatoes directly into the ground is a classic method, perfect for growing larger quantities if you have the space. Here’s a simple guide to get your sprouted potatoes started:
- Choose the Right Spot: Select a location that receives at least 6-8 hours of direct sunlight daily. The soil should be well-drained; potatoes don’t like soggy feet!
- Prepare the Soil: Loosen the soil to a depth of about 8-10 inches using a shovel or garden fork. Remove any large rocks or weeds. If your soil is heavy clay or very sandy, mixing in some compost can improve drainage and fertility.
- Dig Trenches or Holes: Dig trenches about 6-8 inches deep, or individual holes for each seed piece.
- Determine Planting Depth: How deep should you plant sprouted potatoes? Aim for your seed pieces to be covered by about 4-6 inches of soil initially.
 This image shows a good visual reference for the correct planting depth, ensuring the sprouts are covered but not buried too deeply.
 - Space Your Plants: Proper potato spacing is crucial for good air circulation and growth. Place your potato seed pieces (sprout side up) about 12-15 inches apart within the trench or row. If planting multiple rows, space the rows about 2-3 feet apart.
- Cover with Soil: Gently cover the seed pieces with the soil you removed. Don’t compact the soil heavily.
- Watering: Water the newly planted area lightly but thoroughly to settle the soil and provide initial moisture.
 This image shows a good visual reference for the correct planting depth, ensuring the sprouts are covered but not buried too deeply.
These steps provide a solid foundation, but remember that tips for planting potatoes in specific regions might require slight adjustments to planting depth or timing based on your local climate and soil conditions. tips for planting potatoes in specific regions
How to Plant Sprouted Potatoes in Containers (Step-by-Step)
Don’t have garden beds? Planting potatoes in containers is a fantastic alternative, perfect for patios, balconies, or even growing potatoes indoors. It’s a great way to use sprouted potatoes from the grocery store in a contained space.
- Select Your Container: Choose appropriate container types and sizes. Options include large pots, buckets, or specialized grow bags designed for potatoes. The key is size – aim for containers that are at least 10-15 gallons for best results, though a minimum of 5 gallons can work for 1-2 seed pieces. Larger containers allow for more plants and better yields.
- Use the Right Mix: Fill the bottom 6-8 inches of your container with a high-quality, well-draining potting mix, not garden soil which can compact too much in pots.
- Planting Depth & Initial Soil: Place 1-3 sprouted seed pieces (depending on container size) on top of the soil, sprouts facing up. Cover them with only about 3-4 inches of potting mix initially. This shallower start is key for container growing.
- Spacing in the Container: If planting multiple pieces in one large container, space them relatively evenly, ensuring they aren’t touching the sides.
- Initial Watering: Water the container thoroughly until water drains from the bottom.
- Prepare for Hilling: As the potato plant grows taller (about 6-8 inches), you will add more soil or potting mix, covering the lower part of the stem. This process is called hilling and encourages the plant to produce more potatoes along the buried stem. You’ll repeat this a few times as the plant grows, eventually filling the container.
This method works well for growing potatoes in various container types and sizes, offering flexibility for different spaces. You can see a visual guide to the technique in this video:
. It often shows the initial shallow planting and how to add soil later. This image illustrates a typical successful potato container garden setup. Container growing is also a popular method when considering growing potatoes indoors, though light requirements are crucial. growing potatoes indoors This method is even effective when using self-watering containers, using self-watering containers as they help maintain consistent moisture levels critical for potato growth.
Once your sprouted potatoes are tucked into their new homes, it’s time to focus on helping them grow strong and healthy plants.
Caring for Your New Potato Plants & Troubleshooting
Planting is just the beginning! Once those sprouted potatoes are in the ground or container, your job shifts to nurturing them. Learn how to care for your growing potato plants and tackle common questions or issues that might arise, especially when using pantry spuds.
Caring for Your Potato Plants After Planting
Consistent care is key to a good potato harvest. One of the most important tasks is ensuring your plants get enough water. Potatoes need steady moisture, especially as they grow and develop tubers. While general watering guidelines apply, check the soil moisture regularly by sticking your finger about an inch or two deep. If it feels dry, it’s time to water. Avoid letting the soil completely dry out, but also don’t let it become waterlogged.
Another crucial technique for growing potatoes is called “hilling.” As your potato plants grow taller (reaching about 6-8 inches), you’ll gradually add more soil or compost around the base of the stems, covering the lower leaves. This creates a mound or “hill” around the plant. 
Why is hilling so important? Firstly, it protects the developing potato tubers from sunlight. If tubers are exposed to sun, they turn green and can become toxic (solanine). Hilling keeps them safely buried underground. Secondly, hilling encourages the plant to produce more tubers along the buried stem. You should hill your potatoes every time the plant grows another 6-8 inches, repeating the process two or three times until the plant is flowering or the foliage is quite dense.
Troubleshooting Common Issues & FAQ
It’s natural to have questions when growing potatoes, especially if you’re using pantry sprouts! Here are some common concerns and how to handle them:
Can you plant potatoes that have sprouted in the bag?
Yes, absolutely! As covered in the preparation section, potatoes that have sprouted in your pantry are perfectly viable for planting. The sprouts are simply the plant’s signal that it’s ready to grow.
Is it OK to plant potatoes with long sprouts?
Yes, you can plant potatoes even if they have long, perhaps slightly fragile sprouts. The main challenge with planting potatoes with long sprouts is avoiding breaking them off during handling and planting. Be extra gentle when placing them in the soil. Dig a slightly wider or deeper trench to accommodate the sprouts if necessary, and carefully cover them with soil, ensuring the sprout tips are pointing upwards or sideways towards the surface. Don’t worry too much if a sprout breaks; the potato often has other “eyes” that can still grow. Addressing these long/weird sprouts is a common concern, but with a gentle touch, it’s easily manageable.
How many potatoes grow from one sprouted potato?
The yield from a single sprouted potato (or seed potato piece) varies widely depending on factors like variety, soil quality, sunlight, water, and hilling. However, you can generally expect to harvest anywhere from 5 to 10 potatoes from each plant.
Sometimes, beginner gardeners might notice yellowing leaves. This could be due to inconsistent watering (too much or too little), nutrient deficiency, or occasionally, early signs of disease. For a beginner, ensuring consistent watering is the easiest first step. If leaves yellow lower down, it might just be natural aging, but widespread yellowing often points to a watering issue.
Next, we’ll look forward to the most exciting part: harvesting your homegrown potatoes!
So, there you have it – turning those forgotten pantry potatoes into a potential harvest is absolutely doable! We’ve walked through how to prepare them, whether they’re store-bought or have super long sprouts, and covered the simple steps for planting them successfully in the ground or containers. It’s a rewarding way to reduce waste and experience the joy of growing your own food, even starting with something you already had on hand. Don’t be intimidated; giving those sprouted spuds a chance is easier than you think and can yield surprising results.
Ready to try growing potatoes in containers? Check out our guide to growing potatoes indoors.
