Table of Contents
Dreaming of those vibrant crepe myrtle blooms gracing your garden? Growing these beautiful trees from seed offers a unique sense of accomplishment, allowing you to nurture a plant from the very beginning. However, starting crepe myrtles from seed might seem a little intimidating, especially if you’re new to the process. You might wonder where to find viable seeds, if they need special treatment to sprout, or what to do if they don’t germinate right away.
Don’t worry – while it requires a bit of patience and specific steps, growing crepe myrtles from seed is absolutely achievable for beginner gardeners. This comprehensive guide is designed to walk you through every stage, ensuring you have the knowledge and confidence to succeed. We’ll cover everything from sourcing or collecting the best seeds and preparing them properly (including essential techniques like stratification) to the step-by-step planting process and what to expect during germination. We’ll also equip you with troubleshooting tips for common issues, helping you overcome potential hurdles.
Ready to start your journey and grow your own stunning crepe myrtle from seed? Let’s begin by understanding how to get the best possible start.
Getting Started with Crepe Myrtle Seeds
Before diving into the planting process, let’s explore why growing crepe myrtles from seed is a rewarding endeavor and address common concerns about its difficulty. Starting these beautiful trees from seed offers a unique connection to the plant’s life cycle and can be a deeply satisfying project for any gardener.
Why Grow Crepe Myrtle From Seed? (And Is It Hard?)
Choosing to grow crepe myrtle from seed allows you to experience the full journey of this stunning plant, from a tiny speck to a vibrant tree. There’s immense personal satisfaction in nurturing something from its very beginning. Many beginner gardeners wonder, “Is it hard to grow crepe myrtles from seed?” The straightforward answer is no, it’s not inherently difficult, but it does require patience and following specific steps.
While you won’t see a mature tree overnight, success with growing crepe myrtle from seed is absolutely achievable, even for those new to gardening. This guide is designed to walk you through each stage, making the process clear and manageable. We’ll cover everything from how to source or collect your crepe myrtle seeds, the important preparation they need (like stratification), the actual planting steps, caring for them during germination, and how to tackle any common issues that might arise along the way.
Now that we understand the ‘why’ and the feasibility, let’s look at how to get your hands on viable seeds and prepare them properly.
Sourcing and Preparing Your Seeds
Success starts with good seeds and proper preparation. This section covers how to obtain viable crepe myrtle seeds and the crucial step of stratification, ensuring your efforts begin on the right foot.
Sourcing Your Crepe Myrtle Seeds: Buying vs. Harvesting
When you decide to grow crepe myrtles from seed, your first step is acquiring the seeds themselves. You have two main options: purchasing them from a reputable supplier or harvesting them from an existing plant.
Buying seeds offers convenience and access to specific varieties. If you choose this route, look for suppliers with good reviews and a focus on seed freshness. Ask about their storage practices to ensure you’re getting viable seeds. Knowing where to buy crepe myrtle seeds from a trusted source can save you frustration later.
Alternatively, you can harvest seeds directly from mature crepe myrtle plants. To do this, you need to identify ripe crepe myrtle seed pods. These pods form after the flowers fade and mature throughout the summer and fall. You’ll know they’re ready for collection when they turn brown, become dry, and often begin to split open. 
When should I collect crepe myrtle seeds? The ideal time is typically in the fall, after the leaves have dropped and the seed pods are completely dry and brown. Carefully snip or break off the dry pods. Inside each pod, you’ll find small, winged seeds. You can extract these by gently breaking open the dry pods and shaking or picking the seeds out.
Before planting, it’s wise to test crepe myrtle seed viability. A simple method is the float test: Place the seeds in a container of water. Viable, healthy seeds tend to sink, while non-viable seeds (often hollow or damaged) will float. Discard the floaters. Starting with viable seeds significantly increases your chances of successful germination.
Essential Seed Preparation: Cold Stratification Explained
Once you have your seeds, proper preparation is key. For most crepe myrtle seeds, this means undergoing a process called cold stratification crepe myrtle. This isn’t just an optional step; Do you need to stratify crepe myrtle seeds? Yes, it is essential for breaking the seed’s natural dormancy, mimicking the cold period they would experience outdoors over winter. This signals to the seed that it’s time to germinate when warmer conditions arrive.
Here’s how to perform cold stratification:
- Mix your crepe myrtle seeds with a slightly moist medium. Options include sand, vermiculite, peat moss, or even a damp paper towel. The medium should be damp, not soaking wet.
- Place the mixture in a sealed container or a resealable plastic bag.
- Label the container with the date and seed type.
- Place the container in your refrigerator (typically in a vegetable crisper drawer). The temperature should remain consistently cold, ideally between 32-40°F (0-4°C).
The typical duration required for stratification is around 30 to 60 days. Research from sources like university extension offices confirms the necessity and effectiveness of this cold period for successful germination. cold stratification requirements
While relatively simple, beginners should watch out for potential pitfalls during stratification. Ensure the medium doesn’t dry out completely; if it does, add a tiny bit more moisture. Conversely, too much moisture can lead to mold growth. If you see mold, discard the affected seeds and medium, clean the container, and start over with fresh materials and less moisture. Proper crepe myrtle seed preparation through stratification is a critical step towards germination success.
With your seeds sourced, tested for viability, and properly stratified, you’re now ready for the next exciting step: planting them.
Planting and Germinating Crepe Myrtle Seeds
With your seeds prepared, it’s time for planting! Following the correct steps now is crucial for giving your crepe myrtle seeds the best chance at optimal germination and healthy early growth. This chapter will guide you through the planting process and the essential care needed during the critical germination phase.
How to Plant Crepe Myrtle Seeds: Step-by-Step
This section walks you through the core process of how to plant crepe myrtle seeds, providing clear, actionable steps designed for beginners.
Step 1: Choose Containers and Mix
Select suitable containers for your seeds. Seed trays, small pots, or even repurposed containers work well, as long as they have drainage holes. Good drainage is absolutely vital to prevent waterlogging, which can quickly lead to fungal diseases and rot. Use a quality seed-starting mix, which is typically lighter and more sterile than regular potting soil or garden soil.
Step 2: Prepare the Soil
Fill your chosen containers with the seed-starting mix. Gently level the surface, but avoid compacting the soil too much. Pre-moisten the mix thoroughly before sowing the seeds. It should be consistently damp, like a wrung-out sponge, but not soggy.
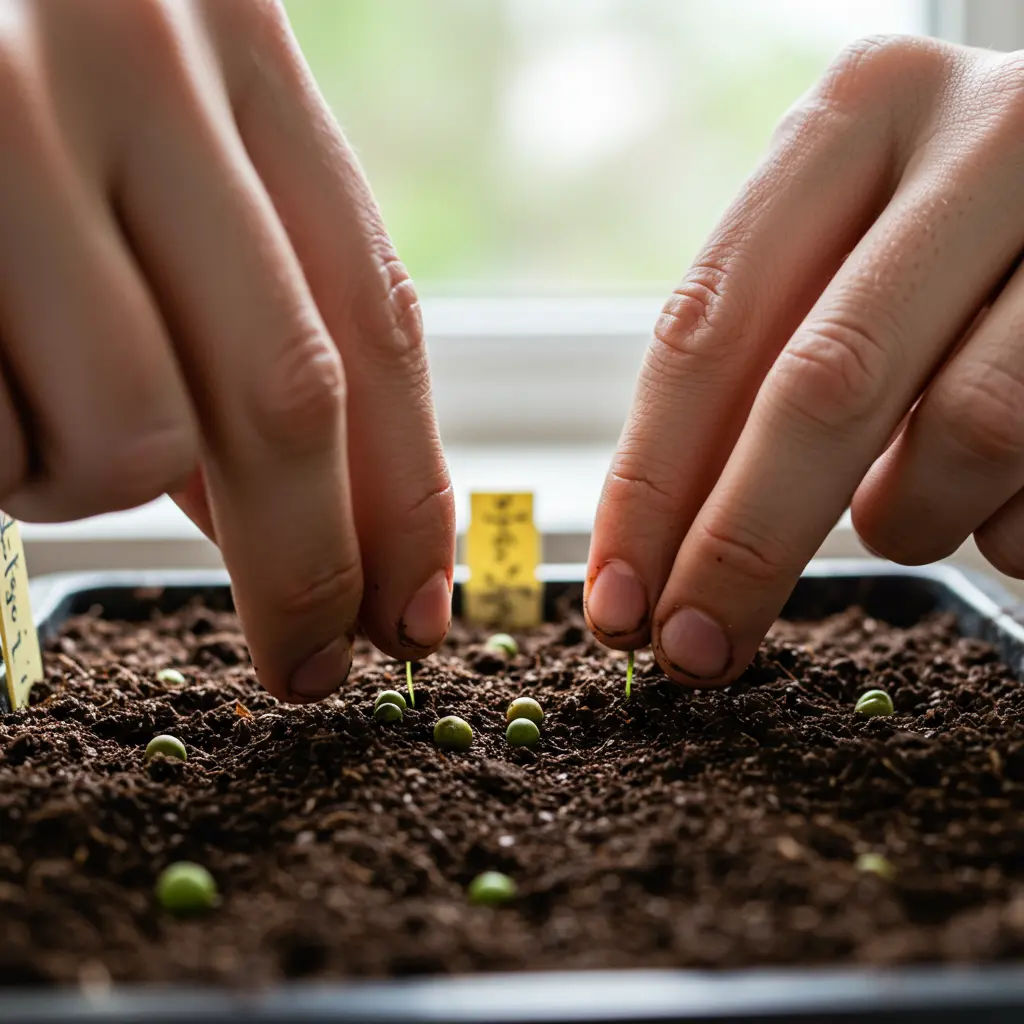
Step 3: Sow the Seeds
Carefully sow your stratified crepe myrtle seeds onto the surface of the pre-moistened soil. What is the optimal crepe myrtle seed depth? Crepe myrtle seeds need light to germinate, so they should not be buried deeply. Simply press them gently onto the surface of the soil or cover them with a very thin layer (no more than 1/8 inch) of the seed mix or fine vermiculite.
Step 4: Water Gently
After sowing, water the containers gently to settle the seeds into the mix without dislodging them. A mister or a watering can with a fine rose attachment works well. Alternatively, you can use bottom watering by placing the containers in a tray of water and letting the soil absorb moisture from the bottom until the surface is damp. 
Many beginners wonder, “Can you plant crepe myrtle seeds directly in the ground?” While it is technically possible in suitable climates, starting seeds indoors or in containers offers much better control over environmental conditions, moisture, and protection from pests or washout, significantly increasing success rates for beginners.
For a visual guide to this process, be sure to watch our planting crepe myrtle seeds video tutorial
. Pay close attention to how the seeds are placed on the soil surface and the gentle initial watering technique demonstrated.
Caring for Seeds During Germination
Once planted, providing the right environment is key to successful crepe myrtle seed germination. Your seeds will need consistent moisture, warmth, and appropriate light.
Maintain consistent moisture in the soil – it should remain damp, but never waterlogged or dry. Using a humidity dome or covering the container with plastic wrap can help retain moisture and create a humid microclimate. When watering crepe myrtle seeds, misting the surface or continuing with bottom watering is often the best approach to avoid disturbing the tiny seeds or fragile sprouts.
How long does it take for crepe myrtle seeds to sprout? The typical crepe myrtle germination time is usually between 2 to 4 weeks, though it can sometimes take longer depending on the specific seed batch, stratification success, and environmental conditions.
You’ll know germination has been successful when you see tiny sprouts emerging from the soil surface. These first leaves are called cotyledons. As soon as you see these signs of life, it’s crucial to provide adequate light. Move the containers to a location with bright, indirect light, or place them under grow lights. This prevents the seedlings from becoming “leggy,” which means they stretch weakly towards the light source.
With your seeds now planted and cared for through germination, you’re ready to tackle the next phase: dealing with potential issues and nurturing your young seedlings.
Troubleshooting and Seedling Care
Sometimes things don’t go exactly as planned when starting seeds. It’s a natural part of gardening, and encountering issues is how we learn. This section is designed to address common problems you might face when starting crepe myrtle seeds, offering practical solutions. We’ll also guide you on the essential first steps for caring for your new seedlings once they successfully sprout.
Troubleshooting Common Crepe Myrtle Seed Starting Issues
It can be disheartening if your crepe myrtle seeds aren’t germinating or your young seedlings look unhealthy. Don’t worry; many common issues have straightforward explanations and solutions. This troubleshooting guide is here to help beginner gardeners navigate these potential setbacks.
One of the most frequent frustrations is when crepe myrtle seeds are not germinating. Several factors can contribute to this. The seeds might not be viable, meaning they weren’t collected properly or stored too long. Ensure you start with fresh, viable seeds from a reliable source. Another common reason is incomplete or incorrect stratification. Crepe myrtle seeds require a period of cold and moisture to break dormancy; if this process wasn’t done correctly or long enough, they won’t sprout. Improper temperature or moisture levels are also critical; seeds need consistent warmth (usually around 70-80°F) and steady moisture, but not soaking wet conditions. Planting too deep can also prevent tiny seedlings from reaching the light. Ensure you’re planting at the shallow depth recommended earlier in this guide.
Once your seeds sprout, you might encounter crepe myrtle seedling problems. Damping-off is a fungal disease that causes seedlings to collapse at the soil line. This is often caused by overwatering, poor air circulation, or contaminated soil. To prevent damping-off, use sterile potting mix, avoid overwatering, and ensure good airflow around your seedlings. Etiolation is another issue, characterized by weak, leggy, pale growth. This happens when seedlings don’t get enough light and stretch desperately towards a light source. Move etiolated seedlings to a brighter location immediately. Nutrient deficiency signs, such as yellowing leaves, can occur if seedlings stay in seed-starting mix (which has few nutrients) for too long.
For each of these problems, the solution lies in correcting the environmental factors. Ensure proper stratification from the start. Provide consistent, warm temperatures and maintain even, but not excessive, moisture in the soil. Use a sterile seed-starting mix and ensure good air circulation to prevent fungal issues. Most importantly, provide adequate light – a sunny windowsill supplemented with grow lights or grow lights alone are often necessary for strong seedling growth.
Crepe Myrtle Seed FAQs
Here are answers to some frequently asked crepe myrtle seed questions, providing quick clarity on common concerns about growing crepe myrtle from seed.
- How long does it take for crepe myrtle seeds to sprout? Germination times can vary, but typically, crepe myrtle seeds will begin to sprout within 2-4 weeks after planting, provided they have been properly stratified and are kept at the correct temperature and moisture levels.
- Do you need to stratify crepe myrtle seeds? Yes, cold stratification is essential for breaking the dormancy of crepe myrtle seeds and encouraging successful germination.
- Is it hard to grow crepe myrtles from seed? Growing crepe myrtles from seed is not inherently difficult, but it does require attention to specific steps like stratification, temperature, and light. Following a clear guide makes the process much more manageable for beginners.
- Can you plant crepe myrtle seeds directly in the ground? While possible in some climates, planting directly in the ground is generally not recommended for reliable germination. Starting seeds indoors or in a controlled environment provides better conditions for successful sprouting and early seedling development.
- What is the fastest way to germinate crepe myrtle seeds? There isn’t really a “fastest” shortcut. The most effective way is to optimize the conditions: ensure proper cold stratification, use a sterile seed-starting mix, maintain consistent warmth (70-80°F), and keep the soil evenly moist. Focusing on these optimal conditions yields the best results.
Next Steps: Caring for Your Crepe Myrtle Seedlings
Once your crepe myrtle seeds have successfully germinated and grown their first set of true leaves (the leaves that appear after the initial seed leaves), they need attentive crepe myrtle seedling care to grow into healthy young plants.
The most crucial element at this stage is light. If you started seeds under lower light conditions, it’s time to move them to a location where they receive abundant light. A south-facing windowsill is good, but supplemental grow lights positioned just a few inches above the seedlings will produce much stronger, stockier growth and prevent etiolation.
Proper crepe myrtle seedling care also involves careful watering. Young seedlings are susceptible to both drying out and being overwatered. The soil should remain consistently moist, but never waterlogged. Ensure your containers have drainage holes. Learn more about proper watering techniques to avoid common mistakes.
After a few weeks, once seedlings have a few sets of true leaves, you can begin introducing a very diluted liquid fertilizer (like a half-strength balanced liquid fertilizer) to provide them with necessary nutrients for growth. Follow the fertilizer instructions carefully to avoid burning the delicate roots.
Before transplanting crepe myrtle seedlings outdoors permanently, they need to be ‘hardened off’. This is a critical process of gradually acclimating them to outdoor conditions (sun, wind, temperature fluctuations) over a week or two. Start by placing them outside in a sheltered spot for a few hours a day, gradually increasing the time and exposure to direct sunlight.
Once hardened off, select a suitable final planting location outdoors that receives full sun. While long-term crepe myrtle care involves pruning and occasional feeding, the initial focus is on establishing a healthy root system in their new home. 
With your seedlings now growing strong, you’re ready to consider their permanent home.
You’ve now unlocked the secrets to growing beautiful crepe myrtles right from seed. We’ve covered everything from finding viable seeds and giving them the crucial chill they need through stratification, to the hands-on steps of planting and nurturing those first delicate sprouts. While it might seem daunting at first, armed with this comprehensive guide, you have the clear, practical steps needed to overcome common hurdles and successfully bring new crepe myrtle life into your garden. Watching your efforts sprout into thriving seedlings is one of gardening’s most rewarding experiences.
Ready to grow your gardening skills even further? Subscribe for more beginner-friendly guides and tips!
