Table of Contents
Are you dreaming of a lush, green Bermuda grass lawn but feel intimidated by the planting process? Perhaps you’ve heard stories of seeds that just won’t sprout, leaving you with frustratingly bare patches. You’re not alone; many first-time planters face these exact worries, fearing they’ll waste time and money on seeds that don’t germinate. Learning exactly how to plant Bermuda grass seed correctly is the key to avoiding these common pitfalls and achieving the vibrant lawn you envision.
This guide is designed specifically for beginners, walking you through every essential step – from preparing your soil and selecting the right seeds to mastering the perfect planting depth and watering techniques. We’ll also tackle those tricky germination issues head-on, sharing proven tips to boost your success rate and help you troubleshoot if things don’t go as planned. Ready to turn bare dirt into a beautiful Bermuda carpet? Let’s start by understanding the ideal conditions Bermuda grass needs to thrive.
Getting Started: Understanding Bermuda Grass & Optimal Timing
Understanding Bermuda grass’s fundamental needs, such as sunlight and warmth, and why timing your planting is critical for success are the first steps toward a thriving lawn. We’ll also briefly compare using seed versus sod to help you make an informed initial decision.
What Makes Bermuda Grass Thrive? (Sun, Heat, Growth Habits)
Bermuda grass thrives in specific conditions. It demands full sun, meaning at least 6-8 hours of direct, unobstructed sunlight daily.  As a warm-season grass, it actively grows in warm temperatures, enters dormancy in cooler weather, and prefers well-drained soil. Its vigorous spread through underground stems called rhizomes and above-ground runners called stolons creates a dense, resilient turf.
learn more about Bermuda grass needs
Why Planting Time is Key for Bermuda Seed Success
Many new gardeners underestimate timing’s impact, but for Bermuda grass, getting it right is crucial. Knowing when to plant bermuda grass seed ensures soil is warm for germination and provides a long growing season for strong seedlings before harsh weather. Planting too early risks poor germination in cold soil; too late offers little time for establishment. As PlantMD horticultural expert notes, “Timing is everything with Bermuda grass seed. Planting when soil is consistently warm gives your new lawn the best possible start to establish strong roots before seasonal stresses hit.”
The Ideal Soil Temperature for Germination (Consistently 70°F+)
Plant when the soil temperature needed for Bermuda grass—distinct from air temperature—is consistently 70°F (21°C) or higher, as this dictates the best time to plant. Use a soil thermometer to check at 1-2 inches deep for 3-5 consecutive days before seeding. PlantMD’s expert confirms, “Don’t guess your soil temperature; verify it! Aiming for that consistent 70°F or higher mark is a non-negotiable for successful Bermuda seed germination. A simple soil thermometer is a gardener’s best friend here.”
Best Seasons to Plant Bermuda Grass Seed (Late Spring/Early Summer)
The best season for planting Bermuda grass seed is late spring to early summer. This period, after the last frost, ensures the soil is warm and provides sustained warmth and longer daylight hours for seedlings. Check local frost dates for precise timing in your region. A PlantMD expert confirms, “Late spring to early summer is the sweet spot for planting Bermuda grass seed. This window typically ensures the soil is warm enough for quick germination and gives the young grass plenty of time to mature before cooler weather arrives.”
Bermuda Seed vs. Sod: Making an Informed Choice (Pros & Cons)
Deciding between bermuda grass seed vs sod involves weighing key differences. Seed is cheaper with more variety options but needs longer to establish. Sod offers an instant lawn and quicker use, but costs more. Your budget, desired timeline for a usable lawn, and willingness to wait for establishment will guide your choice. With these basics covered, you’re ready for Step 1: Preparing the Perfect Seedbed for Bermuda Grass.
Step 1: Preparing the Perfect Seedbed for Bermuda Grass
Meticulous soil preparation is crucial for creating optimal conditions and giving your future lawn the best possible start.
1. Clear the Planting Area
Your first step in clearing ground for grass seed is to remove all existing vegetation, including old grass and weeds, along with any debris like rocks or roots.  This creates a clean, bare surface, which is essential because it reduces competition for vital nutrients and sunlight, ensuring good seed-to-soil contact for your new Bermuda seedlings. You can achieve this through manual removal for smaller spots or by using a sod cutter for larger areas. As a PlantMD horticultural expert advises, “Starting with a completely clean slate by removing all old grass, weeds, and debris is paramount. Any lingering vegetation will compete with your new Bermuda seedlings for vital resources, hindering their establishment.”
2. Test Your Soil
Next, conduct a soil test to understand your soil’s pH (acidity/alkalinity) and nutrient levels. Bermuda grass thrives in a soil pH of 6.0-7.0. These factors are critical for nutrient absorption and healthy growth. For accurate soil testing for Bermuda grass, collect samples 4-6 inches deep from several spots. Use home kits or send samples to a lab; check for find a local soil testing lab. Amending without a test can be counterproductive. A PlantMD expert emphasizes, “Soil testing… allows you to amend intelligently, giving your Bermuda grass exactly what it needs to thrive from the start.”
3. Till or Loosen the Soil
Now, it’s time for tilling soil for grass seed. Tilling means breaking up and loosening the top 4-6 inches of soil. This improves aeration for roots, enhances drainage, and eases root penetration. For larger areas, a rototiller is efficient , while a garden fork suits smaller patches. Be careful not to over-till, as this can damage soil structure. A PlantMD horticultural expert confirms, “Properly tilling or loosening the soil to about 4-6 inches creates a welcoming environment for new roots. This step is critical for good drainage and aeration, which are foundational for healthy Bermuda grass growth.”
4. Amend the Soil
After tilling, improve the soil by incorporating amendments. Mix in organic matter like compost to enhance soil structure (water retention in sand, drainage in clay) and fertility. benefits of compost Based on your soil test results, apply a starter fertilizer to provide essential nutrients for young seedlings. Using these soil amendments for Bermuda grass guided by tests ensures targeted nutrition. A PlantMD expert states, “Amending your soil with compost is like giving your future lawn a superfood boost… a starter fertilizer, ideally chosen based on your soil test, provides the initial nutrients for vigorous seedling growth.”
5. Grade and Level the Seedbed
The final preparation step is leveling soil for grass seed. Rake the area to create a smooth, even surface, removing rocks or clumps. A level surface ensures even seed distribution, prevents water pooling, promotes uniform germination, and simplifies future mowing. Crucially, ensure proper drainage by gently sloping the ground away from foundations to prevent water issues. A PlantMD expert notes, “The final grading step ensures your seeds have the best chance for uniform germination… Proper leveling also prevents water pooling.” This careful preparation creates the ideal foundation for planting the seeds.
Step 2: Planting Your Bermuda Grass Seed Correctly
With the seedbed prepared, the next focus is the actual seeding process, from choosing quality seed to ensuring correct planting depth and coverage.
1. Select Quality Seed
Start by choosing Bermuda grass seed carefully. Select certified seed appropriate for your area; this ensures quality. On the label  understanding seed labels, look for high purity (more desired seed) and germination rates (seeds likely to sprout). Hulled seed germinates faster; unhulled is more protected. A PlantMD horticultural expert advises, “Investing in quality, certified Bermuda grass seed significantly impacts your success. Look for high purity and germination rates on the label, and choose a variety suited to your specific climate for the best results.”
2. Calculate Seed Amount
Calculate your seed needs by measuring the planting area for total square footage. Follow the Bermuda grass seed rate on the package , often 1-2 lbs per 1000 sq ft for new lawns. The right amount prevents thin lawns (too little seed) or weak, overcrowded seedlings (too much). Double-check your math. As a PlantMD expert says, “Calculating the right amount of seed is crucial. Too little seed results in a thin lawn, while too much leads to overcrowding and weak seedlings. Always follow the recommended rate on your seed package for your specific area.”
3. Spread the Seed Evenly
For even spreading Bermuda grass seed, use a broadcast (wide coverage) or drop spreader (precise) . Broadcast types suit large areas; drop spreaders are good for smaller lawns. For uniform coverage and to prevent stripes, divide seed in half. Apply one half walking one direction, the other perpendicularly. A PlantMD expert notes, “Even seed distribution is key to a uniform lawn. Using a spreader and applying half the seed in one direction, then the other half perpendicularly, helps avoid bare spots and clumps, ensuring every part of your lawn gets a good start.”
4. Ensure Proper Seed Depth
Ensure correct planting Bermuda grass seed depth: 1/8 to 1/4 inch is critical. Lightly rake the seed into the soil to achieve this depth and good soil contact. This shallow depth allows light for germination while offering protection. Planting too deep is a common error hindering germination; shallow is better for Bermuda. A PlantMD expert stresses, “Seed depth is a make-or-break factor for Bermuda grass. Planting too deep prevents germination, while too shallow leaves seeds exposed. That 1/8 to 1/4 inch range, achieved by lightly raking, is the sweet spot for success.”
5. Lightly Cover and Roll Seed
Should you cover Bermuda grass seed? Yes. Ensure seeds are lightly covered with 1/8 to 1/4 inch of soil after raking. This protects from birds and drying, improving soil contact. Then, gently roll the area with a lawn roller. Rolling presses seeds firmly into soil, crucial for moisture absorption and germination. A PlantMD expert confirms, “Yes, lightly covering and then rolling your Bermuda grass seed is highly recommended. Covering protects the seeds from drying out and birds, while rolling ensures crucial seed-to-soil contact, which significantly boosts germination rates.”
With your Bermuda grass seed correctly planted, you’re now ready to focus on the critical next phase: watering and early care for your new seedlings.
Step 3: Watering and Early Care for New Bermuda Seedlings
Critical watering and initial care are essential once your Bermuda seeds are planted. Understanding germination timelines and seedling needs will set you up for success.
1. Water Consistently and Gently
Proper watering new bermuda grass seed is essential. Water lightly 2-3 times a day; this keeps shallow seeds and the topsoil consistently moist without dislodging them or causing rot.  A PlantMD horticultural expert states, “Consistent, gentle moisture is the lifeline for germinating Bermuda seeds. Aim to keep the top inch or two of soil damp like a wrung-out sponge, watering lightly multiple times a day, especially during warm, dry periods.” The goal is consistently moist, not saturated soil—avoid puddles. It’s a delicate balance for beginners.
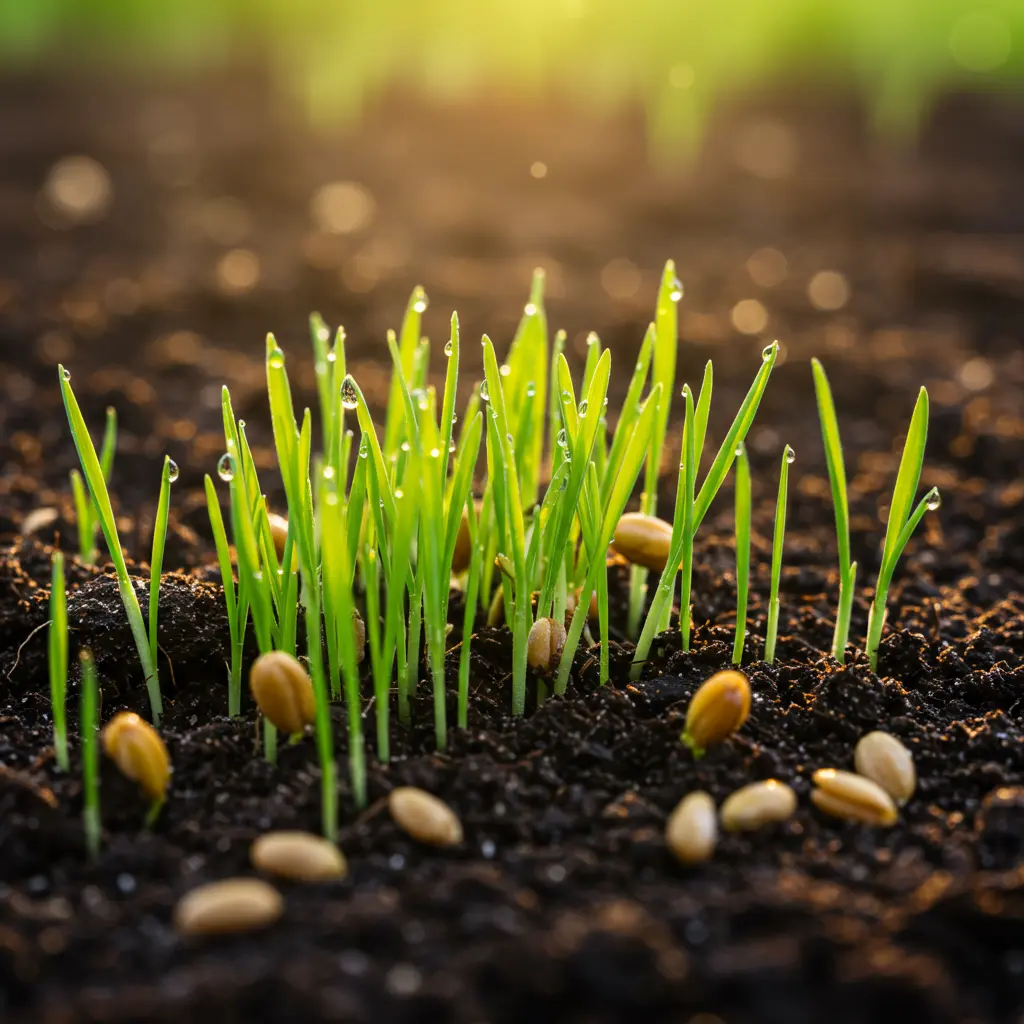
Bermuda grass seed typically germinates—meaning sprouts—within 7 to 21 days; this bermuda grass germination time depends on soil temperature and moisture. Look for fine, bright green shoots. A PlantMD horticultural expert advises, “Patience is key after planting Bermuda seed. You’ll typically see the first sprouts in 7 to 21 days, but this can vary with soil warmth and moisture. Keep an eye out for those first tiny green shoots – it’s a rewarding sight!”
Healthy Bermuda seedlings appear as bright green, upright shoots. Don’t worry if your new lawn looks a bit thin at first; this is normal for healthy grass sprouts. With continued proper care, these young plants will spread and thicken over time, gradually creating the dense turf you’re aiming for. Patience is key as your lawn establishes.
2. Protect Young Seedlings from Traffic and Weeds
Protecting grass seedlings is vital. Minimize foot traffic to prevent crushing shoots. Gently hand-pull weeds; avoid herbicides until grass is established. A PlantMD expert states: “Young Bermuda seedlings are incredibly delicate. Keep foot traffic to an absolute minimum to avoid damage, and gently hand-pull any competing weeds. Patience with these protective measures now will lead to a much stronger lawn later.”
3. Your New Lawn’s First Mowing
For the first mowing new bermuda grass, a PlantMD expert advises: “That first mow is a significant milestone for your new Bermuda lawn! Wait until the grass is about 2-3 inches tall, then mow at a high setting – around 2 inches. Sharp mower blades are absolutely essential to ensure a clean cut and avoid damaging the young plants.” This careful first cut protects the young plants as they establish.
Troubleshooting Common Bermuda Grass Seeding Problems
Even with careful planning, you might encounter some common planting pitfalls or germination problems. These actionable troubleshooting tips can help beginners overcome challenges like poor germination or patchy growth.
Why Aren’t My Bermuda Seeds Germinating? (Common Causes & Checklist)
It can be frustrating when bermuda seeds not germinating leaves you staring at bare soil.  Often, it’s due to common, correctable issues. Review this checklist:
- Soil Temperature: Too cold (needs 70°F+).
- Moisture: Too wet or too dry.
- Planting Depth: Too deep or shallow.
- Seed Quality: Old or poor-quality.
- Timing: Planted too early or late.
A PlantMD horticultural expert notes, “If your Bermuda seeds aren’t germinating, don’t despair! Systematically review the basics: Was the soil consistently warm enough? Was watering adequate but not excessive? Was the seed depth correct (not too deep)? Often, a small adjustment based on this checklist can make all the difference.”
Addressing Patchy Growth: Solutions for Bare Spots in New Lawns
Patchy lawn? First, find the cause (e.g., uneven seeding, poor drainage) to prevent repeat issues. To fix bare spots in your bermuda lawn: lightly rake, add thin topsoil or compost if needed, re-seed, and keep consistently moist. A PlantMD horticultural expert says, “Patchy growth in a new lawn is common and often fixable. The key is to identify why it happened – perhaps uneven seeding or a drainage issue in that spot – then gently re-prepare and re-seed those bare areas, ensuring good seed-to-soil contact and consistent moisture.”
Managing Weeds in Newly Seeded Bermuda Grass Areas
Got weeds in new bermuda grass? Hand-pull them carefully. Avoid most herbicides until the lawn is mowed 3-4 times, as seedlings are vulnerable. A PlantMD horticultural expert advises, “Weeds will inevitably try to compete with your new Bermuda grass. Gentle and careful hand-pulling is your best defense in a young lawn. It’s crucial to avoid most herbicides until your grass is mature enough – usually after several mowings – to prevent damaging your new turf.”
Watering Woes: Identifying and Correcting Over/Under-Watering
Dry soil and wilting seedlings often indicate under-watering. If soil is constantly soggy or shows algae, you may be overwatering bermuda seedlings. Always check moisture 1-2 inches deep by feel, not just visually, then adjust watering. A PlantMD horticultural expert explains, “Finding the watering sweet spot for new seedlings can be tricky. If seedlings are wilting and the soil is dry to the touch, you’re likely under-watering. Conversely, if the ground is constantly soggy or you notice algae, ease up. Adjust based on what the soil and plants are telling you.”
Next Steps: When to Re-seed or Adjust Your Seeding Strategy
If you observe minimal widespread growth after 3-4 weeks despite diligent care, it might be time for re-seeding bermuda grass. Before you do, re-evaluate your initial soil preparation, timing, and seed quality. An expert from PlantMD notes, “Sometimes, despite our best efforts, a re-seed or a strategic adjustment is necessary. If you see minimal widespread growth after 3-4 weeks of diligent care, take a step back, review your initial preparation and ongoing care, and don’t be afraid to try again with fresh insights and perhaps different timing or seed.”
Encountering some seeding challenges is a normal part of learning. With these troubleshooting tips, you’re better prepared to address issues and successfully establish your Bermuda grass.
Successfully planting Bermuda grass from seed is within your reach. This guide has walked you through crucial stages: understanding optimal conditions, meticulously preparing your soil, employing precise seeding techniques, and providing vital early watering and care. We’ve focused on empowering you to sidestep common beginner pitfalls and address germination challenges, ensuring you feel confident from the start. With this foundation, you’re well-equipped to cultivate that lush Bermuda lawn you envision. What are your biggest takeaways or remaining questions as you begin your planting adventure? Share your experiences in the comments below!
