Table of Contents
You see milkweed pods bursting open in the summer, releasing fluffy seeds. But then you hear you need to ‘cold stratify’ them in the fridge for months? It’s easy to feel confused when you just want to help monarch butterflies by growing milkweed from seed. Many new gardeners wonder, “how do I plant milkweed seeds successfully?” and get stuck on the jargon and different methods.
Don’t worry, you’re not alone. Understanding seed dormancy and choosing the right planting method can seem daunting. This guide is designed specifically for you. We will demystify cold stratification, explain why it’s necessary for most native milkweed, and walk you through the easiest ways to get your seeds started. You’ll learn about indoor methods like fridge stratification and outdoor options such as winter sowing or fall direct sowing. We will break down each step and help you pick the best approach for your garden, making growing milkweed straightforward.
Let’s begin by exploring why milkweed seeds have this unique requirement and what dormancy truly means.
Understanding Milkweed Seeds: Why They’re Special & What They Need to Sprout
This section explains the crucial role of milkweed for monarch butterflies and demystifies seed dormancy and cold stratification, clarifying why seeds need winter conditions even if pods open in summer.
Why Milkweed Matters: A Quick Look at Monarch Conservation
Milkweed is absolutely vital for the survival of monarch butterflies, serving as their sole larval host plant.  When you grow milkweed from seed, you directly support monarchs by providing essential habitat for their caterpillars. This simple act contributes to broader monarch conservation efforts and supports local ecosystems. Learn more about monarch conservation efforts Planting milkweed makes a tangible difference for these iconic pollinators.
Decoding Seed Dormancy: Nature’s Waiting Game for Milkweed Seeds
Why don’t milkweed seeds sprout immediately? Many employ a clever survival strategy: seed dormancy. Think of milkweed seed dormancy as nature’s snooze button, a natural adaptation ensuring seeds patiently wait for spring’s ideal conditions before germinating. This prevents them from sprouting too early. As a PlantMD horticultural expert explains, “Understanding that milkweed seed dormancy is nature’s intelligent way of ensuring survival is key. It’s not a hurdle, but a natural process we work with for successful germination.”
Cold Stratification Explained: What It Is and Why Milkweed Seeds Need It
To overcome dormancy, most native milkweed seeds need cold stratification. What is cold stratification? It’s a required period of cold, moist conditions that mimics a natural winter. This essential process signals to the seed that winter has ended, making it safe to sprout. Without this cue, germination for many native milkweeds often fails. There are various milkweed cold stratification methods to achieve this. A PlantMD horticultural expert states, “Cold stratification isn’t just a suggestion for most native milkweeds; it’s a crucial environmental cue that signals to the seed that winter has passed and it’s safe to sprout. Skipping this step is a common reason for germination failure.”
The Summer Pod Paradox: Why Milkweed Seeds Need Winter After a Summer Release
It might seem puzzling: why do milkweed seed pods open in summer or fall if their seeds need a cold period to sprout? This is “The Summer Pod Paradox,” but it’s all part of nature’s perfect milkweed seed timing. The pods release seeds before winter, allowing them to disperse. Then, the cold, moist winter conditions naturally provide the necessary cold stratification. So, seeds are perfectly primed to germinate in spring when conditions are favorable. This ensures the best chance for survival, answering why milkweed pods open summer even with winter needs.
Now that you understand why milkweed seeds are special and what they need to sprout, you’re ready to explore which milkweed planting method is right for you.
Which Milkweed Planting Method is Right for You? A Clear Comparison
This section helps you choose the best milkweed planting method by comparing direct fall sowing, indoor stratification for spring planting, and winter sowing, considering pros, cons, effort, and timing.
Overview: Common Milkweed Planting Strategies
Choosing the right approach from several milkweed planting methods can feel empowering. Options like direct fall sowing, indoor stratification for spring planting, or winter sowing each suit different gardener needs, considering your available time, space, and desired control.  A comparison table later in this section will help you pick your best fit.
Method 1: Direct Fall Sowing (Nature’s Way) – Pros, Cons & Effort
Direct fall sowing mimics nature’s cycle. While scattering milkweed seeds in the fall is an option, preparing your site improves success when you direct sow milkweed this way. To mitigate variable germination or seed predation, sow extra seeds or use a light cover.
- Pros: Mimics nature, less hands-on.
- Cons: Variable germination, seed predation.
- Effort: Low.
- Timing: Fall.
Method 2: Indoor Cold Stratification & Spring Planting (Controlled Start) – Pros, Cons & Effort
For more control, consider indoor cold stratification followed by spring planting. This approach to indoor stratification milkweed often yields higher germination. Popular milkweed cold stratification methods include the accessible paper towel/sand technique in your refrigerator. While it involves more steps and uses fridge space, even small batches can be successful if space is tight.
- Pros: More control, potentially higher germination.
- Cons: More steps, requires fridge space.
- Effort: Medium.
- Timing: Stratify in winter, plant in spring.
Method 3: Winter Sowing in Containers (Low-Effort Outdoor Method) – Pros, Cons & Effort
Consider winter sowing milkweed in containers, a low-effort outdoor method using items like milk jugs. It cleverly provides natural stratification, mimicking winter to protect seeds. As PlantMD horticultural expert confirms, “Winter sowing is a fantastic, low-fuss method that many gardeners swear by. It cleverly uses nature’s freeze-thaw cycles to stratify seeds right in their mini-greenhouses, often leading to very robust seedlings in spring.”
- Pros: Low effort, natural stratification, protects seeds.
- Cons: Needs containers, outdoor space.
- Effort: Low-Medium.
- Timing: Sow in winter.
Quick Comparison Table: Choosing Your Best Method
To help you decide, here’s a quick comparison. This table summarizes the key differences in effort, timing, and typical success considerations for each milkweed planting strategy. It aims to guide you towards the best fit for your situation, whether you’re looking for the easiest way to grow milkweed from seed, have limited space, or are a complete beginner. Scan the options to find what works for you.
| Feature | Direct Fall Sowing | Indoor Stratification & Spring Planting | Winter Sowing in Containers |
|---|---|---|---|
| Effort Level | Low | Medium | Low-Medium |
| Timing | Sow in Fall | Stratify Winter, Plant Spring | Sow in Winter |
| Success Considerations | Variable germination, seed predation | Higher control, good germination | Natural process, protects seedlings |
| Best For | Mimicking nature, less hands-on | Gardeners wanting more control | Beginners, low effort, limited indoor space |
Now that you’ve compared these methods and can choose the best one for your needs, you’re ready to move on to the detailed steps for planting your milkweed.
Planting Your Milkweed: Step-by-Step Instructions for Success
This section provides detailed, step-by-step instructions for the main milkweed planting methods, including direct fall sowing, indoor stratification with spring sowing, and winter sowing, to ensure successful germination.
Gathering Your Milkweed Planting Toolkit: Essential Supplies
Getting ready to plant your milkweed is exciting! Having the right milkweed planting supplies on hand makes the process smooth and successful. Here’s what you’ll generally need:
- Milkweed seeds: The star of the show!
- Seed starting mix: For indoor or winter sowing, this sterile, fine-textured mix provides excellent drainage, crucial for delicate new roots, unlike heavier garden soil.

- Containers: Options include pots, trays, or even milk jugs. We’ll cover specific container choices, like milk jugs for winter sowing, in each method’s details.
- Labels: To keep track of your varieties.
- Water: For gentle hydration.
Specific needs may vary slightly by method, but these basics will set you up well.

Method 1: How to Direct Sow Milkweed Seeds in the Fall (Step-by-Step)
Direct fall sowing is a straightforward way to plant milkweed, letting nature do the cold stratification for you over winter. The best time for planting milkweed seeds in the fall is after a few light frosts but before the ground freezes solid. Here’s how to direct sow milkweed fall for great results:
- Choose Your Spot: Select a sunny location with well-draining soil.
- Prepare the Bed: Clear the area of weeds and grass. Loosen the top few inches of soil.
- Sow the Seeds: Plant seeds about 1/4 inch deep. While scattering is the simplest approach, following these site preparation steps significantly boosts germination success.
- Space Appropriately: Consider the mature size of your chosen milkweed species for spacing.
- Water Lightly & Mark: Gently water the seeded area. Mark the location so you remember where you planted.
- Protect from Predation: To protect seeds from being eaten by birds or squirrels, consider covering the area lightly with straw or fine netting.
Nature will take care of the rest until spring!
Method 2: Indoor Cold Stratification (Refrigerator Method) & Spring Sowing (Step-by-Step)
If you prefer more control or missed fall planting, indoor cold stratification followed by spring planting milkweed is an excellent choice. This method mimics winter conditions to break seed dormancy, giving you a head start.
Stratification Steps (Refrigerator Method):
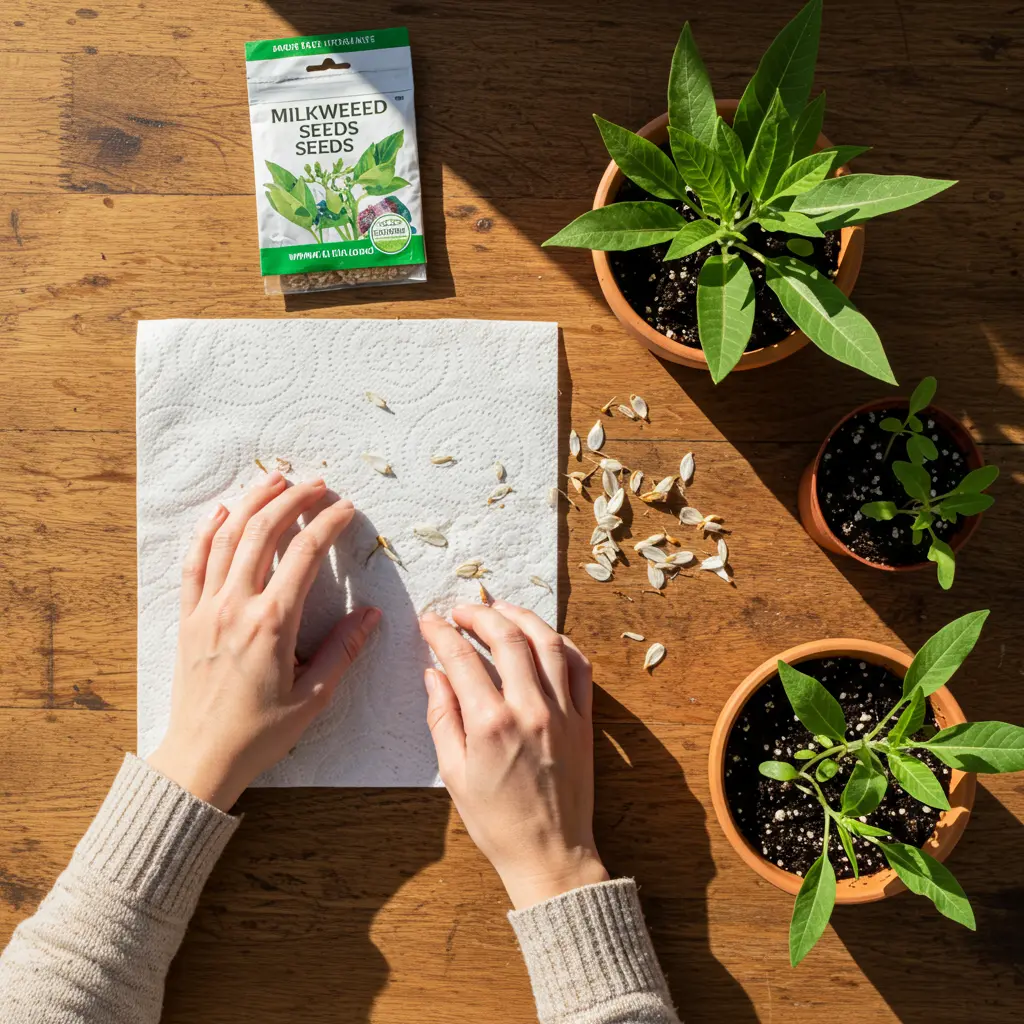
- Many ask, “What is the easiest way to cold stratify milkweed seeds at home?” The paper towel stratification milkweed method is simple and effective. Lightly moisten a paper towel (damp, not soggy).
- Spread seeds on one half, fold it over, and place inside a sealable plastic bag or container. Alternatively, you can mix seeds with a small amount of moist, sterile sand or vermiculite in a bag.
- Crucially, label your bags with the seed type and stratification start date to avoid mix-ups!
- Place the bag in your refrigerator (not the freezer) for 30-60 days, depending on the milkweed species. Check periodically for mold; if minor mold appears, gently rinse the seeds and use a fresh moist paper towel.
Spring Sowing Steps:
- After the stratification period, fill small pots or trays with moist seed starting mix.
- Plant stratified seeds about 1/4 inch deep.
- Place pots in a warm, sunny windowsill or under grow lights. Keep the mix consistently moist but not waterlogged.
Soon, you’ll see your seedlings emerge, ready for eventual transplanting!
Method 3: Easy Winter Sowing in Containers (e.g., Milk Jugs) Outdoors (Step-by-Step)
Winter sowing milkweed in containers is arguably the easiest way to grow milkweed from seed, offering another fantastic, low-effort solution to the PAA “What is the easiest way to cold stratify milkweed seeds at home?” This method uses natural outdoor temperature fluctuations. Milk jugs are particularly popular for this method because they create mini-greenhouses, protect seeds from pests, and provide excellent drainage when modified. For details on creating effective DIY containers like modified milk jugs, see our guide.
Here’s how to do it:
- Prepare Your Containers: Clean translucent milk jugs or similar plastic containers. Cut them around the middle, leaving a small section intact to act as a hinge. Punch several drainage holes in the bottom.
- Add Soil: Fill the bottom half with 3-4 inches of pre-moistened potting mix or seed starting mix.
- Sow Seeds: Scatter milkweed seeds on the soil surface and gently press them in. Don’t overcrowd them.
- Water & Seal: Water thoroughly until it drains from the bottom holes. Tape the milk jug closed along the cut, but leave the cap off for ventilation and moisture entry.
- Place Outdoors: Set your containers outside in an exposed location where they’ll receive sun, rain, and snow throughout the winter.
Then, just wait for spring germination!
General Planting Tips: Soil, Depth, Spacing, and Initial Watering
Once your milkweed seeds are sown or have sprouted, these general tips will help ensure their continued success.
- Soil: Opt for well-draining milkweed soil. In containers, a quality seed starting mix is crucial; it prevents compaction and rot, promoting healthy root development, unlike heavy garden soil.
- Depth: A general milkweed seed depth is about 1/4 inch.
- Spacing: Milkweed species vary in mature size. Always check specific plant information for final transplant spacing.
- Initial Watering: Keep soil consistently moist, not soggy. Our general guidelines for watering young plants offer more help.
As PlantMD horticultural expert wisely notes, “One of the simplest yet most crucial tips for success with any seeds, including milkweed, is patience and consistent, gentle care. Don’t overwater, provide the right conditions post-sprouting, and trust the natural process you’ve initiated.”
With these step-by-step instructions for planting milkweed, you’re well-equipped for success. Now, let’s address some common milkweed seed starting issues and their solutions you might encounter.
Help! Common Milkweed Seed Starting Issues & Solutions (FAQ)
This FAQ section addresses common problems beginners face when starting milkweed from seed, such as germination failures and seedling care, and answers specific questions like swamp milkweed needs.
Why Aren’t My Milkweed Seeds Sprouting After Stratification?
It can be disheartening when your milkweed seeds don’t germinate after cold stratification. Don’t worry, let’s explore common reasons. Perhaps stratification was incomplete; were seeds kept consistently moist and cool? Old or non-viable seeds, incorrect sowing depth (too deep or shallow), or soil that’s too dry or wet can also be culprits.  Temperature fluctuations post-sowing might also play a role. Double-check these factors; often a small adjustment helps.
How Do I Care for Young Milkweed Seedlings (Water, Light, Hardening Off, Transplanting)?
Proper milkweed seedling care is key. Keep soil consistently moist; find guidance on watering seedlings helpful. Provide ample light using grow lights or a sunny window. Before transplanting, harden them off by gradually increasing outdoor exposure over a week to prevent shock. Transplant when they have 2-3 sets of true leaves and are sturdy enough for their new home.
How Can I Identify Milkweed Sprouts and Distinguish Them from Weeds?
Milkweed seedling identification can be tricky. Look for their initial cotyledon leaves, then the first true leaves. Common milkweed often has broader initial true leaves. Marking planting spots carefully helps avoid accidental weeding. Taking photos of suspected sprouts to compare with an online visual guides for identifying milkweed seedlings can also be very useful.
Does Swamp Milkweed Need Cold Stratification Like Other Types?
Yes, Swamp Milkweed (Asclepias incarnata) generally requires cold stratification, much like many other native milkweeds. This cold, moist period helps break dormancy. A typical stratification duration for these seeds is around 30 days before you plant them. This process significantly improves their germination rates.
How Can I Protect My Seeds and Seedlings from Pests and Critters?
To protect milkweed seeds sown directly, use a light mulch or fine netting. For young seedlings, simple row covers or cloches can deter many critters. Monitor for milkweed seedling pests; see tips for managing common garden pests like aphids. Planting a few extra seeds is also good insurance.
What If My Stratification Conditions Weren’t Perfect?
Don’t give up hope if you encounter milkweed stratification problems! If too short, germination might be slower. If too dry, it may not have worked effectively. For minor mold, rinse seeds and plant. It’s still worth trying to plant them; some may surprise you. As PlantMD horticultural expert notes, “Gardening, especially when starting from seed, is often about experimenting and learning as you go. If your stratification wasn’t textbook perfect, don’t despair. Give those seeds a chance – nature can be surprisingly resilient and forgiving!”
With these common issues addressed, you’re now better equipped to navigate the rewarding journey of growing milkweed from seed and supporting vital pollinators.
You came looking for clarity on how do i plant milkweed seeds, and now you’re equipped with the knowledge to succeed. By understanding what your milkweed seeds need to break dormancy, comparing practical planting methods like direct sowing or winter sowing, and following clear steps, you can confidently nurture these vital plants from seed to sprout. Even common hurdles have been demystified, making success achievable.
This guide aimed to cut through the confusion, especially around concepts like cold stratification, by offering straightforward comparisons to help you pick the best approach for your garden and skill level. With these insights, you are ready to transform those tiny seeds into thriving milkweed havens for monarch butterflies. Your efforts make a real difference! We would love to hear about your planting journey—share your successes and tips in the comments below.
