Table of Contents
You planted basil seeds, or maybe brought home a lush supermarket pot, only to realize… it’s a jungle in there! All those tiny seedlings are packed together, and a question forms: should I plant a lot of basils in one pot? Seeing that crowded clump probably fills you with worry – will they all survive like this, or will they grow weak and leggy? And the thought of trying to untangle and separate those delicate roots feels downright terrifying.
You’re not alone in feeling this uncertainty. Overcrowding is a common beginner mistake that can stifle growth and lead to unhealthy plants. This guide is designed to take the fear out of the process, helping you determine the ideal number of basil plants for your pots and providing a clear, beginner-friendly roadmap for safely separating and repotting seedlings. We’ll even help you weigh the pros and cons of thinning versus transplanting, drawing on community wisdom to show you just how resilient basil can be.
Let’s start by understanding why giving your basil plants adequate space is crucial for their success.
Why Too Many Basil Plants in One Pot Spells Trouble
Overcrowding basil leads to poor growth and can even kill your plants. Recognizing the signs and understanding the consequences helps set the stage for finding effective solutions.
Signs Your Basil is Too Crowded
It’s common for beginner gardeners to wonder if their basil pot is too full. Spotting the early signs of overcrowded basil is key to helping your plants thrive. If you notice your basil isn’t doing well, it might be too cramped. Look out for these common indicators:
- Yellowing leaves
- Stunted, slow growth
- Leggy stems, where plants stretch tall and thin for light
- Wilting, even with regular watering
- Visible, dense roots at the soil surface or drainage holes

Identifying these issues quickly allows you to take action.
The Downside of Overcrowding: Competition and Stress
When basil plants are packed too tightly, they experience significant stress. The limited soil volume in a pot means there’s only so much water, nutrients, and light to go around. Your plants essentially have to compete for light, water, and nutrients to survive. This constant battle for resources weakens them. Basil needs adequate space for both its roots to spread and its foliage to develop fully, making understanding these overcrowded basil problems crucial for healthy growth.
Long-Term Risks: Stunted Growth, Disease, and Poor Yields
If overcrowding continues, the long-term risks become more serious. Your plants will likely remain stunted and fail to reach their full potential. Furthermore, poor air circulation between cramped plants creates a welcoming environment for problems, leading to an increased susceptibility to diseases/pests. Ultimately, these issues mean a much smaller basil harvest, directly impacting your goal of enjoying abundant, healthy leaves. Recognizing these dangers encourages timely intervention.
Understanding these pitfalls underscores the importance of proper spacing. Now that you know why too many plants are a problem, let’s explore the golden rule for plant density.
The Golden Rule: How Many Basil Plants Per Pot?
Following clear, actionable guidance on the optimal number of basil plants per pot and appropriate pot sizes helps prevent overcrowding and supports healthy growth from the start.
General Guideline: Plant Density Per Pot
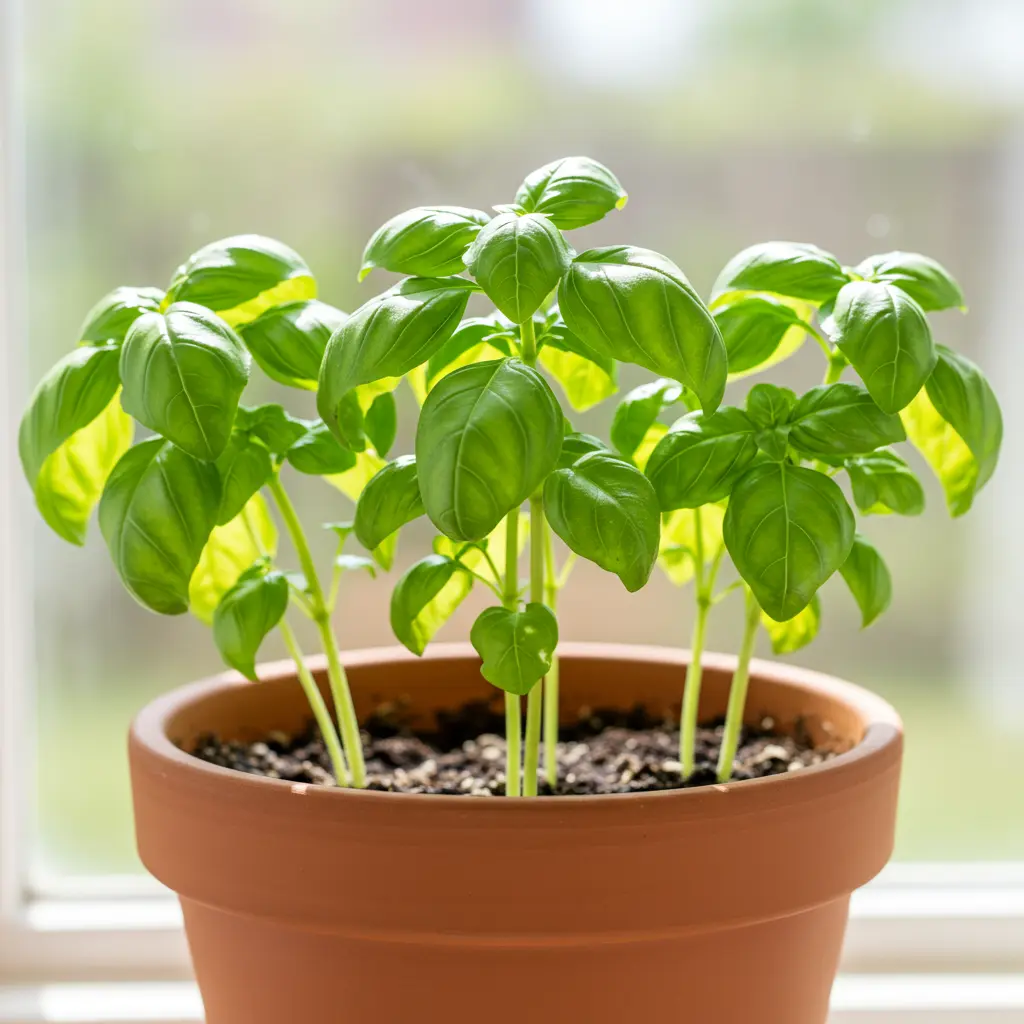
When figuring out how many basil plants per pot, aim for a simple rule: one to three plants. A single mature basil plant generally needs a pot that is at least 6-8 inches in diameter to thrive.  If you want to grow more, you’ll need a correspondingly larger pot. This spacing is crucial because it gives each plant adequate room for healthy root and foliage development, preventing competition for nutrients and light.
Choosing the Right Pot Size
Selecting the right container is key for your basil’s success. This basil pot size guide offers helpful, experience-based recommendations. Select pot size based on how many plants you intend to grow:
- One plant: A pot 6-8 inches in diameter is usually sufficient.
- Two to three plants: Opt for a larger pot, around 10-12 inches in diameter.
Crucially, ensure any pot you choose has excellent drainage holes; poor drainage is a common misstep for beginners leading to root problems.
Pot Size Progression: From Seedlings to Mature Plants
Understanding pot size progression for basil is also important. It’s often best to start basil seedlings in smaller pots or seed trays. This approach helps prevent the risk of overwatering in a large pot and makes young plants easier to handle. As they grow, you’ll transplant them into their final, larger pots. Mature basil plants require ample space for robust root development, so don’t skimp on the final container size.
Basil Varieties and Spacing Needs
The specific basil variety spacing needs can also influence your pot choice. like Genovese typically grow bigger and may require more individual space than compact types. Always check the plant tag or seed packet for information on the mature size of your chosen variety. This practical step helps ensure each plant has enough room to flourish.
Dealing with Supermarket Basil Clumps
Can you save supermarket basil that’s planted too closely? Often, yes! These pots usually contain many seedlings crowded for quick sale, not long-term vitality. For better, healthier growth, carefully separating supermarket basil is your best bet.
As a PlantMD horticultural expert notes, “Don’t be intimidated by those dense supermarket basil pots! Basil is surprisingly tough. Gently separating those crowded seedlings gives each one a much better chance to thrive in the long run.”
With these golden rules for basil plant density and pot sizes in mind, you’re better equipped for success. Now, let’s tackle what to do if your plants are already too close.
Too Close for Comfort? Deciding Between Separating Seedlings or Thinning by Culling
When faced with overcrowded basil, you have choices. Explore the two main approaches – separating or culling – to help you decide what’s best for your plants and goals.
Understanding Thinning: Your Options for Basil Seedlings
Thinning basil seedlings simply means reducing overcrowding so each plant gets enough light, water, and nutrients. This prevents weak, leggy growth. Your main options are separating, which involves carefully dividing and transplanting individual seedlings, or culling, which means snipping weaker seedlings at the soil line, leaving the strongest. The best method depends on your preferences and gardening goals.
Option 1: Separating and Transplanting
Separating involves gently teasing roots apart and moving individual seedlings to new pots or garden spaces. This method aims to save as many plants as possible, potentially leading to a larger harvest if successful. However, it requires more time and careful handling to avoid transplant shock. Consider these pros and cons:
| Pros | Cons |
|---|---|
| Saves more individual plants | More time-consuming |
| Potential for a larger overall harvest | Higher risk of root damage/transplant shock |
| Gives each seedling its own space to grow | Requires extra pots and soil |
Option 2: Thinning by Culling
Culling involves selectively removing weaker or smaller seedlings by snipping them off at the soil line with clean scissors. This method is quicker and causes less root disturbance to the remaining, chosen seedlings, effectively selecting for vigor. The main drawback is sacrificing potentially viable plants. Evaluate the pros and cons:
| Pros | Cons |
|---|---|
| Quicker and easier than separating | Sacrifices potentially healthy seedlings |
| Minimal root disturbance to remaining plants | Fewer total plants survive |
| Selects for the strongest, most vigorous | Feels wasteful to some gardeners |
Making the Choice: What’s Best for You and Your Basil?
So, is it better to thin basil by cutting (culling) or by transplanting (separating)? The answer depends on your situation. Culling is faster and less disruptive if you’re short on time or dealing with many seedlings. Separating saves more plants, ideal if you want the maximum number, but requires more effort and care. Consider your time, space, and goals when deciding.
Don’t Worry: Basil’s Natural Resilience
Whichever method you choose, don’t worry too much! Basil resilience is well-known among gardeners; these plants are surprisingly tough. With proper care after thinning, whether separating or culling, your chosen seedlings will likely recover well and thrive. Don’t fear making a mistake.
Now that you’ve weighed the options for handling crowded seedlings, let’s explore the gentle steps involved in separating and repotting basil if you decide that’s the best approach.
Your Gentle Guide to Separating and Repotting Basil Seedlings (Without the Tears!)
Ready to give your basil seedlings more room? This step-by-step guide shows you how to gently separate and repot them, minimizing stress and setting them up for success. It might seem daunting, but with a little care, you’ll see it’s easier than you think!
Step 1: Gather Your Tools and Materials
Getting your tools for repotting basil ready is simple. You’ll need just a few common items. Here’s what to gather to make the process smooth:
- Small pots for your seedlings.
- Fresh potting mix – this provides essential nutrients and ensures good drainage for healthy roots.
- A tray to catch any mess.
- Water.
- Optional: A dibber, small stick, or even an old pencil for teasing roots.


Step 2: Prepare Your Basil Seedlings
Next, let’s prepare basil seedlings for transplanting. About an hour before you begin, water your seedlings well. This hydrates their roots, makes the soil easier to work with, and helps reduce transplant shock, giving them the best start. Then, very gently run a thin knife or your fingers around the inside edge of the current pot to loosen the soil. Being gentle is key here!
Step 3: Gently Separating the Seedlings
Now for the crucial part: separating basil seedlings. To gently separate basil seedlings without damaging roots, carefully slide the entire soil ball out of the pot and lay it on its side. You’ll see the tiny roots. Instead of pulling, very gently tease apart individual seedlings or small clumps using your fingers or a small tool. Always handle them by their leaves or the root ball, never the delicate stems, as these can easily break. Some root disturbance is okay, but the primary goal is to minimize damage as you gently separate basil roots. Take your time; it’s not a race!
Step 4: Handling with Care
To help minimize transplant shock basil experiences, remember these extra tips. It’s all about gentle handling to protect those delicate young plants:
- Always hold seedlings by their leaves or the root ball, never the fragile stem. This is the most important tip!
- Work as quickly as you can, but don’t rush the gentle teasing process.
- If separating takes a while, keep the exposed roots lightly moist with a spray of water.
Step 5: Repotting Your Separated Basil
It’s time for repotting basil seedlings into their new homes! Fill your small pots with fresh, moist potting mix. Make a hole in the center large enough for the seedling’s roots. Place the seedling in, ensuring it’s at the same depth it was growing previously – this is a critical detail for success. Gently firm the soil around the roots to remove air pockets, which helps roots make good contact, but don’t pack it down hard. Finish by watering lightly to settle the soil.
Step 6: Immediate Aftercare
Great job! For proper basil care after transplanting, place your newly repotted seedlings in a spot with bright, indirect light for a few days. This helps them recover from stress before facing intense sun. Keep soil consistently moist, but not soggy, as their roots settle in. Hold off on fertilizing for a week or two, as their recently disturbed roots are sensitive and need time to establish. You’ll see, your gentle technique works wonders!
With your basil seedlings now happily separated and repotted, you’re well on your way to a bountiful harvest.
Beyond Repotting: Tips for Lush, Bushy Basil Growth
Once your basil is repotted, a little ongoing care will ensure it thrives. Learn essential tips for watering, light, harvesting, and preventing common issues for a bountiful basil harvest.
Post-Transplant Care: Watering and Light Needs
Now that your basil is repotted, focus on its needs. Provide consistent moisture by watering when the top inch of soil feels dry. Ensure it receives at least 6 hours of direct sunlight daily after it settles. Meeting these basic basil watering light needs is key for healthy, thriving plants.
Harvesting for Bushier Growth
Encourage abundant basil through smart harvesting. Regularly pinch or snip the top set of leaves just above a leaf node to promote branching. This technique leads to bushier growth . As a PlantMD horticultural expert notes, “Regular harvesting isn’t just about getting leaves for your kitchen; it’s the secret to a bushier, more productive basil plant. Pinching those top leaves tells the plant to send out side shoots, giving you more basil over time.”
Preventing Bolting for a Longer Harvest Season
To prolong your harvest, prevent basil bolting. Pinch off any flower buds as soon as you see them. Bolting means the plant is flowering, which changes the leaf flavor and reduces production. Consistent harvesting, as described above, helps delay this process, keeping your basil productive longer.
Monitoring Your Basil’s Health Post-Repotting
Keep an eye on your basil for healthy basil signs like vibrant green leaves. Yellowing or wilting could indicate watering or nutrient issues needing attention. Consistent, simple care is the path to abundant basil after repotting.
Following these simple care tips ensures your repotted basil grows lush, bushy, and productive.
Figuring out if you should plant a lot of basils in one pot no longer needs to be a gardening puzzle. You’re now equipped with the knowledge to sidestep overcrowding, confidently determine the ideal number of plants for your container, and decide whether to gently separate or thin your seedlings. This guide has demystified the process of untangling roots and repotting, empowering you to transform that once-crowded pot into a source of thriving, bushy basil. With these skills, a bountiful harvest is well within reach. We’d love to hear your basil success stories or any questions you still have in the comments below!
