Table of Contents
Eager to grow something truly unique in your garden this year? Cassava, also known as yuca, might be just the crop you’re looking for. While often associated with tropical climates, with the right techniques, even gardeners in some cooler regions of the USA can successfully cultivate this starchy root vegetable.
This ultimate beginner’s guide breaks down everything you need to know about how to grow cassava. We’ll cover selecting the right variety, preparing your cuttings for planting, and understanding the specific climate and soil conditions cassava needs to thrive. You’ll also learn practical tips for growing cassava in containers, a great option for those in non-tropical zones, plus how to troubleshoot common problems and safely harvest your crop.
Ready to get started? Let’s dive into the fascinating world of cassava and explore what makes it such a rewarding plant to grow at home.
Understanding Cassava: The Basics and Ideal Conditions
Before planting, let’s explore what cassava is and the specific environmental conditions it needs to flourish, especially considering US climates. Understanding these fundamentals will set you up for success.
Cassava, scientifically known as Manihot esculenta, is a vital root crop globally. It’s often referred to by common names like yuca or manioc. This starchy tuber is a primary food source for millions, particularly in tropical regions, providing essential carbohydrates. It’s valued for its versatility in cooking and its ability to grow in challenging conditions.
A mature cassava plant typically grows as a shrub, reaching heights of 6-8 feet. It features distinctive large, palmate leaves resembling hands. The edible part is the large, tuberous root that develops underground. While native to South America, cassava is now cultivated widely across tropical and subtropical areas.  The plant has a distinctive look with its woody stems and large, segmented leaves, making it relatively easy to identify once established.
Ideal Climate and Soil for Growing Cassava
So, what is the best climate to grow cassava? Cassava thrives in warm, tropical and subtropical environments. It prefers consistent high temperatures, usually between 75°F and 85°F (24°C-29°C), high humidity, and ample rainfall (around 40-80 inches annually, well-distributed). It is a perennial in these ideal conditions.
Can cassava be grown in the US? Yes, absolutely! While it’s a tropical plant, cassava can be successfully grown as an annual crop in warmer parts of the United States. It is typically suited for USDA hardiness zones 8 through 11, where the growing season is long enough. Research on USDA plant hardiness zones confirms its potential in these warmer US regions, highlighting specific areas where the climate supports its growth, at least for a single season.
A key concern for beginner gardeners is temperature tolerance. Cassava is highly sensitive to cold. Minimum temperature tolerance is crucial; temperatures consistently below 50°F (10°C) will halt growth, and frost is detrimental, often killing the plant back to the ground. This is why it’s usually grown as an annual in zones with winter frosts.
What soil is best for cassava? The ideal soil type for cassava is well-drained, loose, and sandy loam. This type of soil allows the roots to expand easily and prevents waterlogging. Good drainage is paramount to prevent root rot, which is a common issue if soil holds too much moisture. While sandy loam is best, cassava is quite adaptable and can grow in a range of soil types, including less fertile ones, as long as drainage is adequate. An acceptable soil pH range for cassava is slightly acidic to neutral, typically between 5.5 and 7.0. Understanding these cassava soil type and climate requirements is essential for determining if cassava is suitable for your location.
Now that you understand the basic needs of the cassava plant, let’s look at how to get started with planting.
Planting and Caring for Your Cassava Plant
Now that you understand the ideal conditions, let’s walk through the practical steps of planting cassava cuttings and providing the necessary care for healthy growth. Getting these initial steps right is crucial for establishing strong plants that will yield a good harvest.
Planting Cassava Cuttings: A Step-by-Step Guide
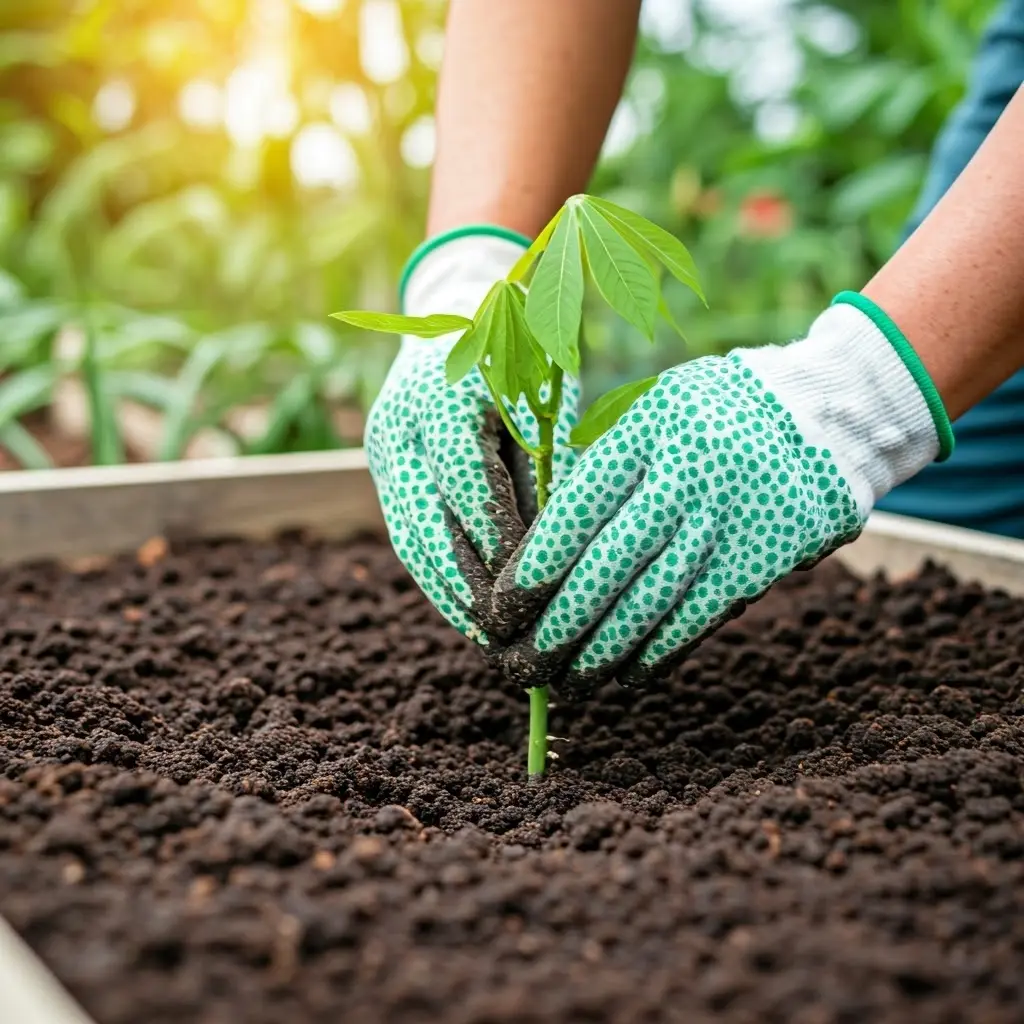
Growing cassava starts with selecting the right planting material. You’ll use stem sections, often called setts or stakes, rather than seeds. Look for healthy, mature stems from a vigorous plant – they should be firm, woody, and disease-free.
How do you prepare cassava stems for planting? Once you have healthy stems, cut them into sections about 8 to 12 inches long. Make sure each cutting has several nodes (the bumps where leaves or branches grew). It’s important to identify which end is the top and which is the bottom before planting. You can usually tell by the direction of the leaf scars or buds – they point upwards.
Here is a simple guide for planting cassava cuttings:
Step 1: Prepare the Planting Site
Choose a sunny location with well-draining soil, as discussed in the previous chapter. Clear the area of weeds and loosen the soil to a depth of at least 6-8 inches. This helps the cuttings root easily.
Step 2: Plant the Cuttings
Insert the prepared cuttings into the soil. You can plant them vertically or at an angle, but ensure the buds are facing upwards.
How deep do you plant cassava cuttings? Bury approximately half to two-thirds of the cutting length into the soil. This usually means planting them about 4 to 8 inches deep, depending on the cutting length.
Step 3: Space Appropriately
Space the cuttings about 3 to 4 feet apart in rows, with rows spaced 3 to 4 feet apart. This gives the plants enough room to grow and for the roots (tubers) to develop underground.
Step 4: Initial Watering
After planting, water the soil gently but thoroughly. This helps settle the soil around the cutting and provides initial moisture for rooting.
For a visual guide on selecting and planting cuttings, watch our . The key takeaway is ensuring proper cutting placement with buds facing up and good initial contact with moist soil for successful rooting.
Cassava Plant Care: Watering, Fertilizing, and Maintenance
Once your cassava cuttings are in the ground, consistent care is essential for vigorous growth. Watering needs depend heavily on your climate and rainfall. Cassava plants need consistent moisture, especially during dry periods, but they are very sensitive to waterlogging. Overly wet soil can lead to root rot.
Understanding how often to water plants is a fundamental gardening skill. As we explain in our guide on general watering principles, the best way to know when to water is to check the soil moisture a few inches down. If it feels dry, it’s time to water.  This image shows soil that is moist but not saturated, which is ideal for cassava.
Cassava plants benefit from fertilization, particularly in less fertile soils. A balanced fertilizer (like 10-10-10) or one slightly higher in potassium can encourage good tuber development. Apply fertilizer a few weeks after planting and then periodically throughout the growing season, following product instructions.
Weed control is also vital, especially when the plants are young. Weeds compete for water, nutrients, and sunlight. Mulching around the base of the plants can help suppress weeds and retain soil moisture. Regularly remove any dead or yellowing leaves to keep the plants tidy and healthy. Consistent cassava care (also known as yuca plant care) involves monitoring your plants and responding to their needs.
Growing Cassava in Pots: A Guide for Non-Tropical Climates
While cassava thrives in warm, tropical climates, it is possible to grow it in containers, making it accessible even if you live outside the ideal cassava climate requirements. Growing cassava in pots offers benefits like portability, allowing you to move plants to protect them from cold, and control over soil conditions.
When growing cassava in pots, choose large containers, ideally at least 15-20 gallons, with excellent drainage holes. Cassava develops extensive root systems and needs room. Use a well-draining potting mix, perhaps amended with some compost for nutrients.
Potted cassava plants may require more frequent watering than those in the ground, as containers dry out faster. Check soil moisture regularly. Fertilize more often as nutrients leach out of pots over time. In cooler climates, you’ll need to overwinter container-grown cassava. Before the first frost, cut back the stems to about 6 inches and move the pot to a sheltered, frost-free location like a garage or basement. Water sparingly during this dormant period. This picture illustrates a suitable container size and a healthy cassava plant growing in a pot.
Troubleshooting Common Cassava Growing Problems
Even with the best care, you might encounter some issues when growing cassava. Knowing how to identify and address common problems is part of successful cassava care.
Pests like spider mites, mealybugs, and hornworms can sometimes bother cassava plants. Spider mites cause stippling on leaves, mealybugs appear as cottony masses, and hornworms can rapidly defoliate plants. For organic control, insecticidal soap or neem oil can be effective against mites and mealybugs. Handpicking hornworms is often the best approach.
Diseases such as cassava mosaic virus (causing distorted, yellow-patterned leaves), bacterial blight (leading to leaf spots and dieback), and root rot (resulting from waterlogged soil) can also occur. This image shows typical symptoms of cassava mosaic virus on leaves. Prevention is key – use disease-free cuttings, maintain good sanitation, and ensure proper drainage to avoid root rot. There are no cures for viral diseases; affected plants should be removed and destroyed to prevent spread.
Environmental issues like yellowing leaves can sometimes indicate nutrient deficiency, but they can also be a sign of overwatering or poor drainage. Assess your watering practices and consider a balanced fertilizer application if drainage is good.
With careful planting and attentive care, your cassava plants should flourish. The next step is knowing when and how to harvest these valuable tubers safely.
Harvesting and Handling Cassava Safely
After months of care, it’s time to reap the rewards. Learn the right time and technique for harvesting your cassava roots, along with crucial safety information to ensure your homegrown bounty is safe to enjoy.
Harvesting Cassava: When and How
One of the most common questions is, “How long does it take to grow cassava?” The answer varies depending on the variety and your local conditions, but typically, cassava roots are ready for harvest between 8 and 18 months after planting. Signs of maturity often include the plant reaching its full height and, in some varieties, a noticeable yellowing or dropping of the lower leaves.
Harvesting cassava requires a bit of care to avoid damaging the valuable roots. Start by preparing the area around the base of the plant. Gently loosen the soil around the main stem using a shovel or fork. This makes it easier to extract the heavy roots. Next, carefully lift the entire plant from the ground. You might need to rock it gently or use a tool to help pry it up, minimizing breakage of the roots attached below. Once the plant is out, you can detach the individual roots from the main stem. It’s important to harvest the roots before they become overly woody, which can happen if left in the ground for too long past maturity.
The technique involves carefully pulling the plant upwards while the soil is loosened, allowing the cluster of roots to emerge.  This image illustrates the process of carefully extracting the roots from the soil. Proper
 harvesting cassava ensures you get the best yield and quality from your cassava care efforts.
Safety and Toxicity Considerations When Growing Cassava
It’s crucial to address a key point when growing cassava: cassava toxicity. Cassava roots naturally contain compounds called cyanogenic glycosides. These compounds can release hydrogen cyanide, a toxic substance, if not properly processed. This is a significant concern that beginner gardeners must be aware of.
There’s a difference between sweet and bitter cassava varieties. Sweet varieties generally have lower levels of these glycosides, concentrated mostly in the peel. Bitter varieties, however, contain much higher levels throughout the root. Regardless of the variety, proper preparation is absolutely essential to remove these toxins before consumption. This involves thorough peeling (as most toxins are in the skin) and cooking the cassava thoroughly by boiling, baking, or frying. The heat and water help break down and evaporate the toxic compounds.
During harvest and preparation, practice safe handling. Avoid ingesting any raw parts of the plant, especially the peels. Understanding the potential risks and following simple mitigation steps like peeling and cooking are vital for safely enjoying your homegrown cassava.
Now that you know how to harvest and safely handle your cassava, let’s look at some common questions that might arise.
Frequently Asked Questions About Growing Cassava
Let’s answer some common questions beginner gardeners have about cultivating cassava at home.
FAQ: Growing Cassava
Is cassava easy to grow at home?
For beginner gardeners in suitable climates, growing a cassava plant is generally considered relatively straightforward, but it certainly requires patience and attention to its specific needs. It’s not quite as effortless as some common garden vegetables, but it’s far from impossible.
Successful cassava cultivation involves understanding its requirements. It propagates readily from stem cuttings, making starting new plants simple. Once established, it can be quite resilient in the right conditions. However, challenges include its strict demand for warm, frost-free climates and the long growing season required before you can harvest the roots – often 8 to 18 months. Paying attention to soil type and providing consistent warmth are key to success.
With the right conditions and a little patience, you can successfully grow your own cassava, even outside of traditional tropical climates. This guide has walked you through everything from selecting the right cuttings and preparing the soil to troubleshooting common issues and harvesting your crop. We’ve also addressed safety concerns, ensuring you can enjoy this rewarding plant responsibly. Remember, even if you’re in a cooler region, container gardening offers a viable solution. By following these steps and adapting to your local environment, you can cultivate this versatile and nutritious staple right in your own backyard.
For more tips on maintaining a healthy garden, check out our guide to watering plants effectively.
