Table of Contents
Want to grow your own pumpkins next year from the pumpkins you have now? Saving pumpkin seeds is a rewarding way to connect with nature and reduce waste, but it’s vital to dry them properly. Many beginner gardeners worry about their seeds molding or simply not sprouting when spring rolls around.
This guide will walk you through a simple, step-by-step method to dry pumpkin seeds, even those from store-bought pumpkins, ensuring they’re ready for planting. We’ll focus on preventing common problems like mold, so you can confidently save and plant your seeds. With clear instructions and helpful visuals, you’ll learn exactly how long to dry your seeds, how to store them, and how to check if they’re viable.
Ready to get started? Let’s dive into the process of preparing your pumpkin seeds for drying.
Why Dry Pumpkin Seeds Before Planting?
Before diving into the how-to, let’s understand why properly drying pumpkin seeds is a crucial first step for successful planting. Many beginner gardeners wonder, “Do pumpkin seeds need to be dried before planting?” The simple answer is yes, absolutely.
Planting fresh, wet pumpkin seeds directly into soil carries significant risks. The moisture can easily lead to the seeds rotting before they even have a chance to sprout. This results in low germination rates and disappointment.
Drying pumpkin seeds prepares them for future planting by significantly improving their viability and storage life. This process removes excess moisture, preventing mold and decay, which are common concerns for those new to saving seeds. Properly dried seeds are essentially put into a dormant state, ready to awaken and grow strong seedlings when planted next season. Drying ensures your efforts today pay off with successful pumpkin plants tomorrow.
Step-by-Step Guide to Drying Pumpkin Seeds
Here’s our simple, visual guide designed for beginner gardeners to successfully dry pumpkin seeds for planting. This section walks you through the essential steps, from cleaning the seeds to ensuring they are perfectly dry and ready for storage. We’ll cover cleaning, the air-drying process, how long it takes, how to prevent common issues like mold, and finally, how to check if your seeds are truly dry.
For many beginner gardeners, knowing the right way to dry pumpkin seeds for planting feels like a critical step that could make or break next year’s harvest. This method is straightforward and effective, making it the best approach for those new to seed saving. To help visualize each stage, the video tutorial below demonstrates the entire process, showing you exactly what to do at each step. We’ll follow this section using a clear, step-by-step format to make it easy to follow along.
1. Cleaning the Seeds
The very first step after scooping out those seeds from your pumpkin is to give them a thorough cleaning. You’ll notice the seeds are usually covered in stringy pulp and slimy residue. It’s crucial to remove all of this.
Wash the seeds under cool running water. A colander works perfectly for this, allowing the water and pulp to drain away. Rub the seeds between your fingers or against the colander mesh to dislodge any clinging bits. Rinse repeatedly until the seeds feel smooth and are completely free of any pulp or strings. This step is vital for preventing mold later on, a common concern for beginner gardeners trying to dry pumpkin seeds for planting. Clean seeds are the foundation for successful drying and storage. Clean seeds, like those shown here  , appear separate and smooth, unlike those still covered in fibrous pumpkin goo.
2. Drying Time: How Long to Dry Pumpkin Seeds?
Once your pumpkin seeds are sparkling clean, it’s time to dry them. We recommend the simple air-drying method, which is ideal for home gardeners. Spread the clean seeds out in a single layer on a non-stick surface. Good options include paper towels, newspaper, a baking sheet lined with parchment paper, or even a fine-mesh screen. Avoid stacking them, as this hinders airflow.
Place your seeds in a cool, dry location with good air circulation. A spare room, a countertop away from direct sunlight, or even a screened-in porch (if the weather is dry) can work. So, how long should pumpkin seeds dry before planting? The typical timeframe is between one to two weeks. However, this can vary significantly. Factors like the humidity in your drying location, the size of the seeds, and the amount of airflow will influence how quickly they dry. Check on your seeds every couple of days and gently turn them to ensure even drying. It requires a little patience, but rushing the drying process can lead to issues with seed viability, meaning they might not sprout when you plant them.
3. Preventing Mold During Drying
A major worry when drying seeds, especially for beginners, is the potential for mold. So, how do you keep pumpkin seeds from molding when drying? Mold occurs primarily due to excess moisture and poor air circulation.
Here are specific, actionable tips to prevent mold on your drying seeds:
- Ensure Seeds Are Spotlessly Clean: As mentioned, any residual pulp can hold moisture and encourage mold growth.
- Spread in a Single Layer: Never pile seeds up. A single layer maximizes exposure to air.
- Ensure Good Airflow: Choose a location that isn’t damp or stuffy. Opening a window nearby (if it’s dry outside) or using a small fan on a low setting (not blowing directly onto the seeds) can help.
- Turn Regularly: Gently stirring or flipping the seeds every other day helps expose all sides to the air.
If you spot any mold developing on a few seeds (it often looks like fuzzy or discolored patches), isolate and discard them immediately to prevent it from spreading to the others. Look out for fuzzy or discolored patches, like those shown here – don’t try to save these! Following good mold prevention techniques is crucial for successful seed saving. mold prevention techniques
4. Checking for Dryness
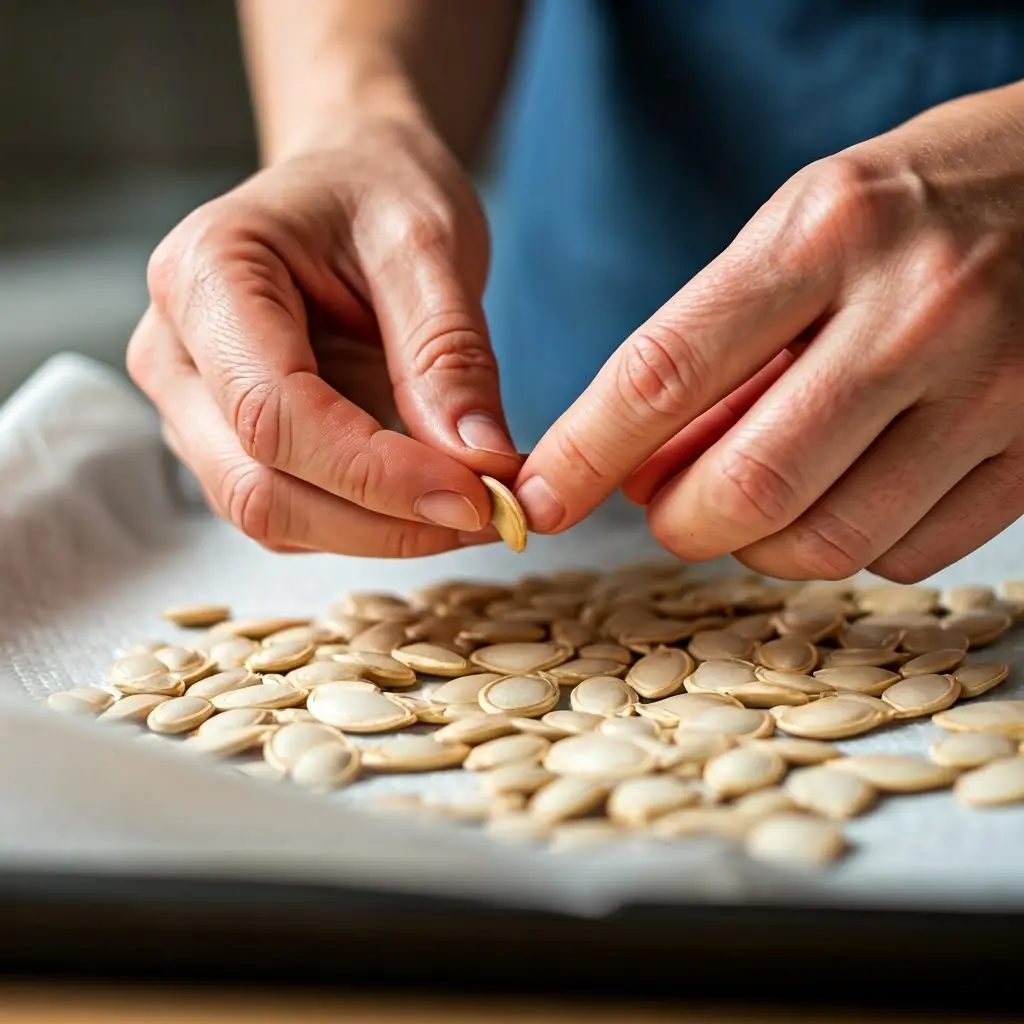
After a week or two, your pumpkin seeds should be nearing completion. How do you know they are fully dried and ready for storage or planting? Properly dried pumpkin seeds will feel hard and brittle, not flexible or rubbery.
A simple test beginners can perform is the “snap test.” Pick up a seed and try to bend it. If it bends easily, it needs more time. If it snaps cleanly in half with little resistance, it’s likely dry. They should no longer feel cool or damp to the touch. It’s absolutely critical that seeds are completely dry before storing them. Storing damp seeds is the fastest way to invite mold and ruin their viability for planting next season, a common mistake beginners want to avoid. The goal is hard, flat seeds with a consistent texture, as illustrated here .
With your pumpkin seeds successfully cleaned and dried using this step-by-step guide, you’re now ready to think about keeping them safe until planting time.
Common Questions About Drying Pumpkin Seeds
Let’s address some common questions beginner gardeners have about drying pumpkin seeds, especially regarding those from pumpkins bought at the store. It’s natural to wonder if those seeds are just as good as ones saved from your own garden patch.
Can You Dry and Plant Seeds from Store-Bought Pumpkins?
A very common question is, “Will seeds from a store-bought pumpkin actually grow?” The direct answer is: potentially, yes, but success isn’t guaranteed. Several factors affect the viability of seeds from pumpkins you buy at the grocery store.
These factors include the specific variety of pumpkin (some are bred more for eating than seed saving), whether it might be a hybrid (seeds from hybrids often don’t grow true to the parent plant, or may not grow at all), and how mature the seeds were when the pumpkin was harvested. While it is possible to save seeds from store bought pumpkin varieties, they often don’t perform as reliably as seeds saved from known, open-pollinated varieties specifically grown for seed saving or planting.
If you’re unsure about the potential of your store-bought pumpkin seeds, you can perform a simple pumpkin seed viability test. A common method is the float test: put seeds in water; those that sink are more likely to be viable than those that float. For a more definitive test, you can attempt a germination test by sprouting a few seeds on a damp paper towel. Checking viability helps beginner gardeners avoid planting seeds that won’t sprout. Setting realistic expectations for seeds from store-bought pumpkins helps manage potential disappointment while still encouraging the rewarding practice of seed saving.
Now that you know about potential viability, let’s look at how to keep your successfully dried seeds ready for planting next season.
Storing Your Dried Pumpkin Seeds for Next Season
Once your pumpkin seeds are perfectly dry, proper storage is key to maintaining their viability until planting time. Taking a few simple steps now ensures your hard work pays off with healthy seedlings next spring.
Best Practices for Storing Dried Seeds
Knowing how to store pumpkin seeds after drying is crucial for success. The goal is to keep them dormant and protected from conditions that could cause them to sprout prematurely or become non-viable. Proper storage ensures your saved seeds are ready to go when you are.
Choose suitable containers for your dried seeds. Paper envelopes or small paper bags are excellent as they allow a tiny bit of air circulation, which helps prevent any residual moisture from causing mold. If you are absolutely certain your seeds are bone dry, airtight glass jars or plastic containers can also work, providing protection from pests and humidity.
Store your containers in a cool, dark, and dry location. Ideal spots include a closet, pantry, or basement. Avoid areas with fluctuating temperatures or high humidity, like garages or sheds, as heat and moisture are the enemy of seed viability. These conditions can quickly kill the embryo inside the seed.
Always label your containers clearly. Include the pumpkin variety you saved (if known) and the date you saved them. This helps you keep track of which seeds you have and their age, which is important because while pumpkin seeds can remain viable for several years when stored correctly, their germination rate might decrease over time. Aim to use them within 1-2 years for the best results.
Successfully storing your seeds after drying brings you one step closer to planting pumpkin seeds next season!
Properly drying your pumpkin seeds is the key to successfully growing your own pumpkins next year, and it’s easier than you might think! By following these simple steps, even store-bought pumpkin seeds can transform into thriving plants. We’ve walked you through the entire process, from carefully cleaning your seeds to ensuring they’re completely dry to prevent mold. Remember, patience is key – allowing your seeds to dry thoroughly is crucial for their viability. Plus, you’re not just saving seeds; you’re preserving a piece of your harvest and setting the stage for a rewarding gardening experience next season. This detailed guide, complete with visual aids, helps ensure you avoid common pitfalls and confidently nurture your seeds for future planting.
Now that you’ve dried your seeds, learn how often to water your cucumbers once you’ve planted them!
