Table of Contents
You’ve got seed potatoes ready, the sun is shining, and you’re eager to plant. But then you look at your garden soil. Is it too wet and muddy, or is it hard as a rock? Facing less-than-ideal soil is a common challenge for aspiring potato growers and can leave you wondering if your harvest is doomed before it even starts. Planting potatoes in the wrong conditions – whether it’s soggy ground where tubers might rot or compacted earth that stunts growth – is a real concern.
The good news is that you don’t need perfect soil to grow a great crop of potatoes. We understand the frustration of dealing with tricky earth and the uncertainty of knowing how to proceed. This guide is here to help you diagnose exactly what’s happening underground and provide practical, community-tested solutions for both overly muddy and hard, compacted soil. You’ll learn how to prepare challenging beds, adjust your planting technique, and master essential skills like hilling to ensure your potato plants thrive.
Ready to turn problematic soil into potato-growing success? Let’s first figure out if your soil is leaning towards “too muddy” or “too hard.”
Soil Check: Is Your Garden Too Muddy or Too Hard for Potatoes?
Before planting, let’s determine if your soil is waterlogged or compacted, as this affects how potatoes grow and dictates the best approach. Understanding your starting point is the first step to a great harvest. Let’s diagnose your soil type together.
What is Ideal Potato Soil?
The goal is to provide the best conditions for potatoes: loose, well-drained, and slightly acidic soil (pH 5.0-6.5). “Loose” means it crumbles easily and isn’t packed hard. “Well-drained” means water soaks in rather than pooling.  This ideal texture allows tubers to expand without struggle and prevents waterlogging, a common cause of rot which can be heartbreaking for new growers. You can check your soil’s acidity through testing your soil pH. This benchmark helps you assess your own garden.
Signs Your Soil is Too Wet (Muddy/Waterlogged)
It can be frustrating to find your soil is constantly soggy. If you’re considering planting potatoes in wet ground, look for these tell-tale signs of muddy, waterlogged conditions:
- Water pooling on the surface after rain.
- Soil staying soggy or squelchy days after watering.
- A sour or unpleasant smell.
- Soil clumping together like sticky clay when squeezed.
What happens if potato soil is too wet or muddy? Primarily, the seed pieces you plant are very likely to rot before they can sprout. As an experienced gardener notes: “Many a beginner has lost their first potato crop to overly wet soil before the plants even get a chance. Recognizing those tell-tale signs of sogginess early is key to saving your spuds.”
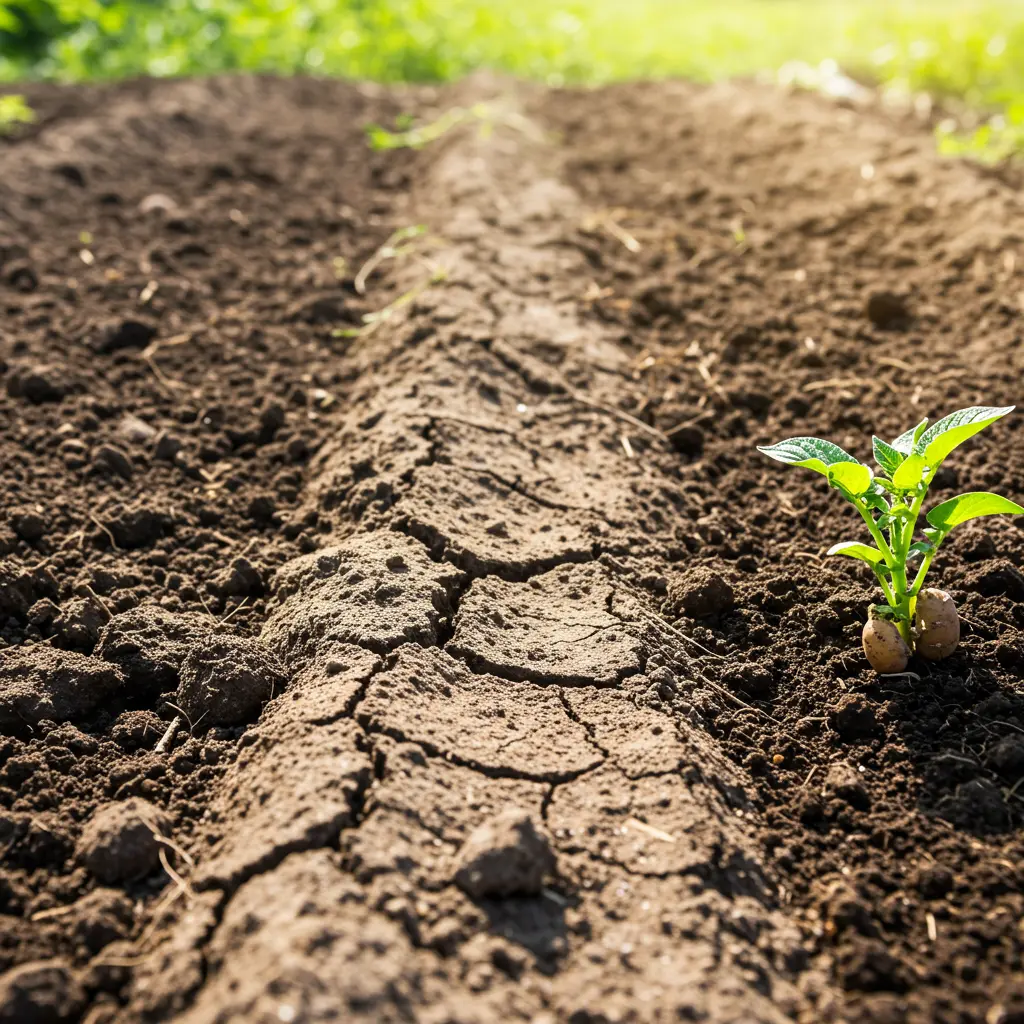
Signs Your Soil is Too Hard (Compacted)
Dealing with hard, compacted ground is another common challenge. Is it okay if your potato plants are growing in hard soil? No, it’s detrimental. Hard soil significantly restricts root and tuber growth, leading to poor yields. Signs your soil falls into this ‘hard dirt’ category include:
- Difficulty digging – your shovel may even bounce off.
- Water running off the surface instead of soaking in.
- Soil forming deep cracks when it dries out.
- Very few earthworms present.
Planting potatoes in hard soil like this makes it tough for tubers to develop properly.
Why Problem Soil Harms Potatoes (Rot & Poor Growth)
Understanding why these soil issues hurt potatoes helps clarify the need for action. Muddy, waterlogged soil essentially suffocates the potato roots and seed pieces because there’s no air space, leading directly to rot. Conversely, hard, compacted soil acts as a physical barrier. It prevents the developing tubers from expanding easily, often resulting in frustratingly small or misshapen potatoes and a much lower overall yield. Identifying your specific soil problem (muddy or hard) is crucial because it dictates the right fix.
Now that you can identify whether your soil is too wet or too hard and understand the problems these conditions cause, you’re ready to explore specific solutions.
Tackling Muddy Mayhem: Solutions for Waterlogged Soil
If your soil stays too wet, here are practical ways to improve drainage or plant potatoes successfully anyway, turning muddy mayhem into potato potential.
Quick Fixes: Improving Drainage Before Planting
When your garden soil remains overly wet, several quick fixes can help improve it for potatoes before you plant. Incorporate bulky organic matter like compost or well-rotted manure  into the top 6 to 12 inches. This material enhances soil structure by creating air pockets, which significantly improves drainage how organic matter helps. Be careful not to over-till wet soil, as this can worsen compaction and damage its structure. As another immediate step, consider shaping the soil into slightly raised rows or mounds. These are effective pre-planting adjustments.
Raised Beds & Containers: Bypassing Wet Ground
If improving your existing soil’s drainage proves too challenging, don’t despair. Raised beds or large containers offer a reliable alternative for growing potatoes. Opt for raised beds at least 12 inches deep, or choose large containers like grow bags or pots with a capacity of 10 gallons or more planting in large containers. Fill these with a well-draining soil mixture, such as a blend of 50% compost and 50% topsoil. This approach bypasses problematic ground conditions entirely and guarantees good drainage for your potato crop.
When planting potatoes in wet ground, particularly in heavy clay or persistently damp conditions, a crucial adjustment is planting depth. Instead of the standard 3-4 inches, plant your seed potatoes shallower, only 2-3 inches deep. This specific adaptation for wet soil keeps the seed piece in slightly drier and warmer soil, significantly reducing the risk of rot before sprouting. As an Experienced Gardener Tip advises, “Don’t be afraid to plant a bit shallower in soggy soils; it’s a simple trick many gardeners swear by to give seed potatoes a fighting chance against rot. You’ll make up for it with hilling later.” You will indeed build up soil around the growing plants during the hilling process.
For persistent, boggy soil issues, consider more long-term solutions. Consistently amending the soil with substantial amounts of organic matter each year will gradually improve its structure and drainage over time. For more severe waterlogging, installing French drains installing French drains or constructing permanent raised beds can provide lasting relief. Alternatively, if the area remains stubbornly wet, you might embrace the conditions by choosing moisture-loving plants better suited to that specific garden spot. These strategies require more effort but offer enduring improvements for challenging soil.
With these strategies for managing waterlogged conditions, you’re better equipped to handle muddy soil. Next, we’ll explore how to tackle the opposite challenge: breaking ground in hard and compacted soil.
Breaking Ground: Fixing Hard & Compacted Soil
Don’t let hard, compacted soil stop your potato dreams! Here’s how to loosen it up before planting and, crucially, how to amend it even around growing potatoes.
Preparing Hard Ground Before Planting
Tackling hard ground before planting is key for successfully growing potatoes in compacted soil. The best approach involves deeply working organic matter like compost, well-rotted manure, or shredded leaves into the top 8-12 inches of your soil. This improves structure and aeration. Techniques like double digging are very effective for breaking up compaction but are admittedly labor-intensive.  Using a broadfork can be a less strenuous way to achieve similar deep loosening.
Once you’ve prepared the bed, remember to avoid walking on it to prevent re-compacting your hard work. This preparation gives your potato roots the best possible start.
Fixing Hard Soil After Potatoes Sprout (The ‘Add-Around’ Trick)
What if your potatoes are already growing and you realize the soil is too hard? Don’t panic or try to dig near the delicate roots! Instead, use the ‘Add-Around’ trick, a key community-tested technique. Gently add loose materials like compost, quality bagged garden soil, or straw around the base of the emerged plants. This method helps improve soil for potatoes after planting by providing a loose medium for the developing tubers to expand into during the hilling process, without disturbing the existing root system. As Community Wisdom notes, “The ‘add-around’ trick is a lifesaver for many gardeners who realize their soil is too hard after planting. Instead of disturbing roots, just bringing in the good stuff for hilling works wonders for tuber formation.”
Best Amendments for Hard Soil
When amending soil for potatoes, focus on materials that add bulk and improve aeration in hard ground. Excellent choices include:
- Well-finished compost
- Aged or well-rotted manure
- Shredded leaves
- Straw
- Grass clippings (use thin layers to avoid matting)
- Good quality bagged garden soil or potting mix
These materials help break up dense soil structure, allowing roots and tubers to grow more easily. Mixing several types often provides the best results, creating a rich, workable medium over time. Remember, consistency is key when improving challenging soil conditions.
Hilling Potatoes in Hard or Clay Soil: Add, Don’t Just Scrape
The best way to hill potatoes in hard or clay soil involves a simple but crucial adjustment: bring in loose material instead of trying to scrape up the dense, compacted soil from around the plants. This is vital for successful potato hilling hard soil. Mound amendments like compost, straw, bagged soil, or a mix of these around the growing stems as they get taller. This approach gives developing tubers the easy-to-penetrate medium they need to expand properly, which compacted soil prevents. As one Experienced Gardener Tip advises, “When hilling potatoes in tough, clay-like soil, think ‘add, don’t scrape.’ Bringing in fluffy compost or straw makes all the difference for tuber growth, much more than fighting with compacted earth.” This ‘add, don’t scrape’ strategy is the most effective way to manage hilling potatoes in compacted soil.
With your hard soil now amended or a plan in place for hilling, you’re ready to focus on the essential planting and hilling techniques adapted for your specific conditions.
Potato Planting & Hilling Essentials (Adapted for Your Soil)
Now that your soil is prepped or you have a plan, let’s cover the essential steps for planting and hilling potatoes, adjusting techniques based on your specific soil conditions.
Choosing and Preparing Seed Potatoes
Begin with certified disease-free seed potatoes; avoid grocery store spuds as they risk diseases or may have growth inhibitors. ‘Chitting’, or pre-sprouting your seed potatoes in a cool, bright spot, gives them a strong start.  If cutting larger tubers, ensure each piece has 1-2 ‘eyes’ (sprouts). Let cut surfaces dry for a few days before planting sprouted potatoes to prevent rot and ensure healthy growth.
Planting Depth: Standard and Soil Adjustments
The standard planting depth for potatoes is typically 3-4 inches deep. However, adjust this based on your soil. For those dealing with wet or heavy clay soil, planting potatoes in wet ground is riskier, so plant shallower, about 2-3 inches deep, to prevent rot. Conversely, if you have loose, sandy soil or are using a trench method, you can plant slightly deeper, around 4-6 inches. Space your seed potato pieces about 12 inches apart in the row, giving each plant room to develop.
Why Hilling (‘Earthing Up’) is Non-Negotiable
Hilling, also known as ‘earthing up’, involves mounding soil or loose organic material around the base of your growing potato plants. This practice is crucial for successful potato cultivation. Proper hilling potatoes prevents developing tubers near the surface from sunlight exposure, which causes them to turn green and produce toxic toxic solanine. It also encourages more tubers to form along the buried stems on specialized shoots called stolons, and provides essential physical support for the plant as it grows taller.
How to Hill Potatoes: Step-by-Step (Materials & Timing)
Hilling is an ongoing process. Here’s how to do it effectively:
- Timing: Begin hilling when your potato plants are about 6-8 inches tall.
- Material: Use loose garden soil, compost, straw, or shredded leaves. For potato hilling hard soil or compacted clay, it’s best to bring in lighter materials to mound around the plants rather than trying to draw up heavy earth.
- Action: Gently draw your chosen material up around the base of each plant, covering the lower part of the stem and some of the lower leaves. Leave the top cluster of leaves exposed to sunlight.
- Repeat: You’ll need to repeat the hilling process 2-3 more times, typically every 2-3 weeks, as the plants continue to grow. Aim for a final hill that’s about 12-18 inches wide at the base and 6-8 inches high.
Watering Your Potato Patch
Potatoes need consistent moisture, especially when tubers form, usually starting when plants flower. Aim for about 1 inch of water per week, including rain; check general watering guidelines. Water deeply to encourage deeper root growth. Avoid letting soil completely dry out or stay constantly soggy, as this stresses plants. Mastering these key planting and care steps, from seed to hilling to watering, sets you up for success.
With your soil prepared and these planting, hilling, and watering essentials understood, you’re well-equipped to cultivate a rewarding potato harvest even in challenging garden conditions.
Navigating the question of whether potatoes can thrive in loose mud or compacted earth no longer needs to be a barrier to your gardening success. You’ve learned to diagnose if your soil is truly too muddy or too hard, and discovered practical, community-tested fixes for each. From improving drainage in waterlogged spots to carefully amending and hilling compacted ground, the right techniques make all the difference.
This guide has shown that even less-than-ideal soil can yield a rewarding potato harvest. With these insights on soil preparation and essential hilling practices, you’re now equipped to confidently plant and nurture your potatoes, transforming tricky patches into productive ones. We’d love to hear your own experiences—share your tips for conquering challenging soil in the comments below!
