Table of Contents
The vision of your own garden filled with breathtaking peony blooms, grown right from seed, is incredibly rewarding. But let’s be honest: learning how to plant peony seeds can seem intimidating. You might worry about the seeds molding, failing to germinate, or the famously long wait – often years – before you see any flowers.
This guide cuts through the confusion, offering a comprehensive, step-by-step walkthrough specifically for the patient gardener. We’ll show you exactly how to plant peony seeds, providing crucial tips to maximize germination success and, importantly, how to tackle common issues like mold and understand seed viability. We’ll also give you an honest look at the multi-year timeline so you know exactly what to expect.
Let’s begin by understanding the realistic timeline and challenges you might face.
Before You Plant: Understanding the Peony Seed Journey
Embarking on the adventure of growing peonies from seed requires a blend of enthusiasm and realism. It’s crucial to set realistic expectations about the multi-year timeline and the inherent difficulties you might encounter. Understanding these aspects upfront will better prepare you for the rewarding, albeit patient, process ahead.
How Many Years Does It Really Take for Peonies to Bloom from Seed?
Managing expectations about the peony seeds flowering time is key.  Based on shared gardener experience, it realistically takes 3-5 years, sometimes even longer, for peonies to bloom from seed. This extended period allows the plant to prioritize establishing a strong root system before dedicating energy to flowers. As PlantMD horticultural expert advises, “Growing peonies from seed is a true exercise in patience, often taking 3-5 years or more for that first rewarding bloom. Focus on nurturing the plant’s foundation; the flowers will come.” Patience is truly essential.
Is Growing Peonies from Seed Actually Hard?
Yes, growing peonies from seed presents notable challenges. You might face germination issues like mold or poor seed viability, alongside the significant wait time. This journey demands patience and specific knowledge because success isn’t guaranteed, partly due to factors like double dormancy and their overall sensitivity. Acknowledging these common hurdles helps set realistic expectations from the start.
Why Fresh Peony Seeds Matter
The viability of fresh peony seeds is significantly higher, making freshness paramount. Ideally, you should plant seeds as soon as possible after collecting them from the seed pod. This is because the seed coat hardens over time, and viability diminishes, meaning older or poorly stored seeds often have very low germination rates. Prioritizing fresh seeds dramatically increases your chances of success.
The Unique Satisfaction of Seed-Grown Peonies
Despite the lengthy commitment and potential hurdles, successfully growing a peony from seed offers a truly unique satisfaction. Many gardeners share that nurturing a plant from its very beginning to its first bloom provides an unparalleled sense of accomplishment. Plus, there’s the exciting possibility that your seed-grown peony could display genetically unique flowers, a truly personal reward for your dedication.
With these foundational insights into the peony seed journey, you’re now better prepared to move on to sourcing and preparing your seeds.
Getting Started: Sourcing and Preparing Your Peony Seeds
Obtaining viable peony seeds, whether by collecting them yourself or purchasing them, and preparing them correctly for planting are crucial first steps. Getting good seeds and treating them right from the start significantly boosts your chances of success on this rewarding journey.
How to Collect and Handle Fresh Peony Seeds
Collecting peony seeds directly from your garden can be exciting. Follow these steps for the best results:
- Wait until the leathery ‘seed pod’ on the plant begins to dry and crack open, usually in late summer or early fall.
- Gently remove the mature, dark seeds from the opened seed pod. Gardener best practices emphasize careful handling to avoid damage.

- Clean off any remaining pod fragments or debris.
- Use the fresh seeds immediately for planting or prepare them right away for stratification. This is crucial to maintain peony seed viability, as they can lose their ability to germinate quickly if allowed to dry out completely.

Tips for Buying Peony Seeds Online and Locally
Are peony seeds bought online less likely to grow? Not necessarily. While buying peony seeds locally might let you assess freshness more easily, online sources can be perfectly viable. Success hinges more on seed freshness, proper storage by the seller, and the specific cultivar’s fertility rather than just where you bought them. Community experience highlights that old or improperly stored seeds are a common reason for failure. To increase your chances, seek out reputable sellers specializing in peonies and don’t hesitate to ask about the seed collection date. Proper handling by both the seller and you is key to peony seed viability.
Are Some Peony Cultivars Easier to Grow from Seed?
Yes, seed fertility varies significantly among peony types. Generally, species peonies (the wild forms) and some older, less complex hybrid cultivars tend to be more fertile and produce viable seeds more reliably. Many modern, complex hybrids, especially doubles and Itoh peonies, may be sterile or produce few viable seeds. This often happens because breeding efforts focused intensely on flower characteristics rather than seed production, impacting their genetics. So, if maximizing your chances of germination is the goal, starting with seeds from known fertile peony cultivars is a wise approach.
Do Peony Seeds Need Stratification? (Explaining the Process)
Absolutely. Most peony seeds require a process called stratification to germinate successfully. This is because they have a ‘double dormancy,’ a biological safeguard requiring specific temperature cues. Peony seed stratification involves mimicking nature: first, a period of warm, moist conditions (around room temperature) encourages root development. This is followed by a period of cold, moist conditions (refrigerator temperature) which triggers the shoot (leafy growth). Skipping this essential horticultural practice is why many attempts to grow peonies from seed fail; the seeds simply won’t sprout without both temperature signals.
With your seeds sourced and understood, you’re now ready to tackle the actual planting process detailed in the next chapter.
Planting Your Peony Seeds: A Step-by-Step Guide
This chapter provides clear, actionable instructions for planting your prepared peony seeds, covering essential aspects like containers, soil, depth, and initial care. Successfully navigating this stage sets your seeds up for the best chance at germination.
Step 1: Choose Containers and Soil
Selecting the right containers and soil mix for peony seeds is crucial for preventing common issues like mold and damping-off. Here’s what you need:
- Clean Pots: Use small pots (3-4 inches) that have been thoroughly cleaned to remove any lingering pathogens.
- Drainage Holes: Ensure your pots have ample drainage holes at the bottom. Good drainage is vital to prevent waterlogging, a primary cause of root rot and fungal problems.
- Sterile Seed Starting Mix: Choose a high-quality, sterile, well-draining seed starting mix. Avoid using garden soil, which can be too dense and contain weed seeds or disease organisms. A sterile mix minimizes the risk of damping-off, a fungal disease fatal to young seedlings.

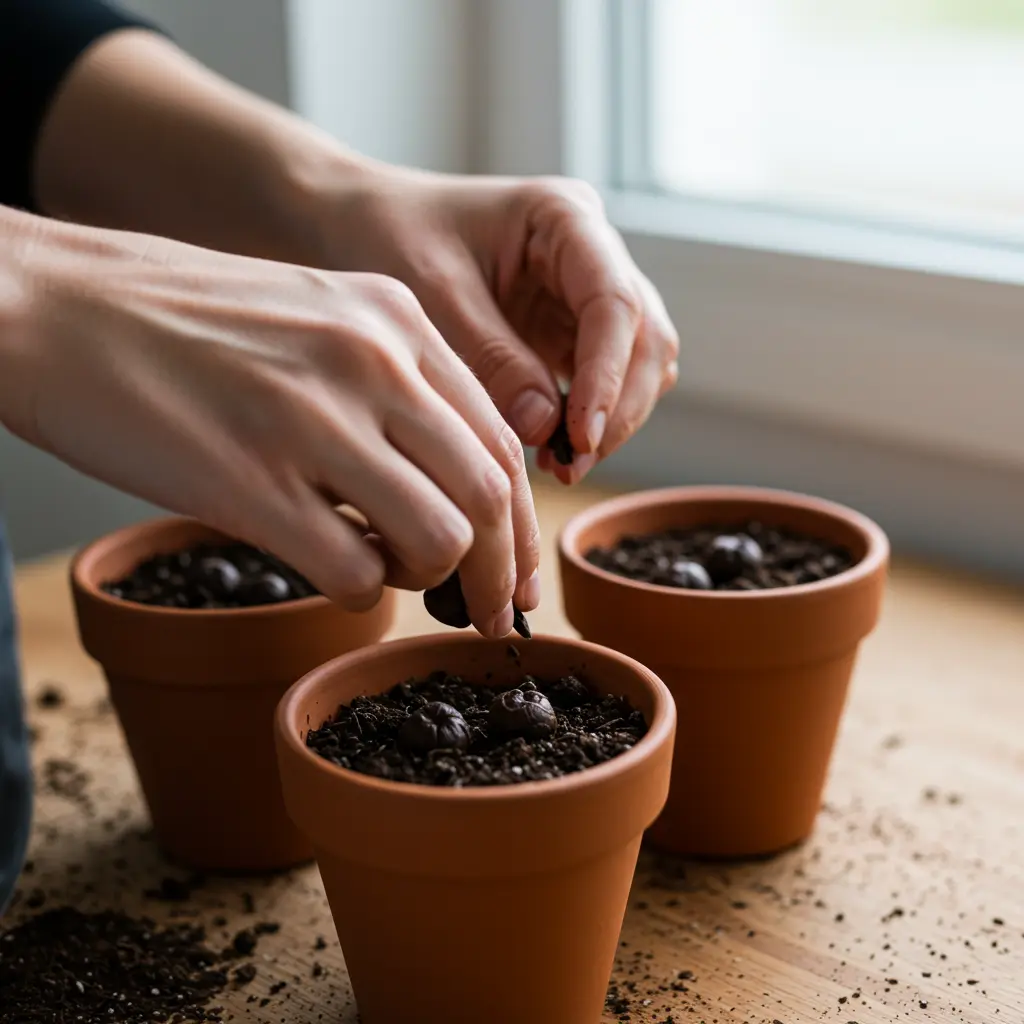
Step 2: Plant the Seeds
Proper planting technique helps ensure your peony seeds have the best environment for germination. Follow these steps for how to plant peony seeds indoors:
- Fill your prepared pots with the moistened seed starting mix, leaving about an inch of space at the top.
- Gently press one or two prepared peony seeds into the soil surface of each pot. If planting two, space them apart.
- Push the seeds down so they are covered by about 1/2 to 1 inch of soil mix. This depth provides enough cover to maintain moisture while allowing the seedling sufficient energy to emerge.
- Lightly firm the soil mix over the seeds.
- Remember, this step initiates the potential for peony seed germination, a process that often begins with a required warm stratification period, followed by cold stratification, before sprouting occurs.
Step 3: Initial Watering
After planting, gentle watering settles the soil around the seeds and provides necessary moisture. Proper watering technique is essential from the start.
Carefully water the pots immediately after planting, using a gentle stream or spray bottle to avoid dislodging the seeds. The goal is to thoroughly moisten the soil mix without making it soggy. Going forward, focus on keeping the medium consistently moist but not waterlogged. Overwatering is a common mistake that encourages mold growth and fungal diseases like damping-off, which thrive in overly wet conditions. Always ensure excess water can drain freely from the pot bottoms. Consistent, careful watering peony seeds supports healthy development.
Step 4: Understanding Germination
Peony seed germination is a unique, two-stage process known as hypogeal germination, and understanding the timeline helps manage expectations. Unlike many seeds where the leaves appear first, peony germination starts below ground.
First, during a period of warmth (warm stratification), the seed develops and sends out a root. You won’t see anything above the soil yet. Only after experiencing a subsequent period of cold (cold stratification), followed by warmth again, will the first shoot or leaf emerge above the soil line. This entire peony seed germination timeline can take several months, sometimes even longer, demanding significant patience from the gardener.
With your seeds planted and the germination process understood, you’re now equipped to handle potential issues that may arise, which we cover next when troubleshooting common problems.
Troubleshooting Common Problems: Mold, Failures, and Fixes
This section addresses common issues like mold and germination failure head-on, offering practical solutions based on gardener experiences. Encountering problems is part of the learning process, especially with the unique challenges of growing peonies from seed. Let’s look at how to tackle them.
Why Do My Peony Seeds Keep Getting Moldy? (Causes and Prevention)
It’s incredibly frustrating when you check on your carefully planted peony seeds only to find fuzzy mold. Why does this happen? Peony seed mold is usually caused by a combination of factors common in the moist environment needed for stratification. Key culprits include excessive moisture in the planting medium, using a non-sterile mix that harbors fungal spores, poor air circulation around the seeds, or starting with seeds that were already contaminated.

To prevent peony seed mold, start clean and stay balanced. Use a sterile seed-starting mix to minimize existing fungal spores. Ensure your container or bag has adequate drainage to prevent waterlogging, and avoid overwatering – the medium should be consistently damp, not soaking wet. Providing some air circulation, even if it’s just opening the bag occasionally, can help. Finally, gently cleaning seeds before planting might remove surface contaminants. As a PlantMD horticultural expert advises, “Preventing mold on peony seeds starts before you even plant. Using a sterile mix and managing moisture carefully are your best defenses against this common frustration.” Learning how to stop peony seeds from molding often involves adjusting these conditions.
What to Do If Your Peony Seeds Get Mold
Seeing mold doesn’t always mean disaster, especially if caught early. Don’t panic! Here are a few steps you can try for peony seed mold treatment:
- Carefully Remove: If the mold is just on the surface, try gently scraping it off the medium or the affected seed coat without disturbing the seed too much.
- Try Cinnamon: Lightly dusting the surface with cinnamon, a natural antifungal, might help inhibit further growth.
- Consider Fungicide: As a last resort, a very cautious application of a fungicide labeled for seeds/seedlings could be used, following instructions precisely.
- Adjust Conditions: Immediately improve air circulation and reduce moisture levels if they seem excessive.
- Discard If Necessary: If mold is extensive and has penetrated the seeds or medium deeply, it’s often best to discard them and start over with fresh, sterile materials.
Troubleshooting: When Peony Seeds Fail to Germinate
Waiting patiently only to find your peony seeds not germinating is a common disappointment. Several factors can cause germination failure. Poor seed ‘viability’ is a primary suspect – the seeds might be old, improperly stored, or simply infertile. Incorrect ‘stratification’ is another major hurdle; not providing the necessary warm and cold periods, or maintaining the wrong temperatures during these phases, will prevent sprouting.
Other potential issues include improper moisture levels (too wet or too dry), deep embryo dormancy requiring longer or repeated stratification cycles, or planting the seeds too deep or too shallow. If you’re facing persistent peony seed germination problems, carefully reassess your stratification process, moisture control, and the quality or source of your seeds. Sometimes, adjusting one key element can make all the difference.
How to Assess Peony Seed Viability
Determining peony seed viability before planting is tricky, as visual inspection alone isn’t reliable. Unlike some seeds, a simple float test is also generally ineffective for peonies. Instead, focus on the most reliable indicators based on experience. Freshness is key; seeds collected recently from a healthy plant have the best chance. Proper storage before stratification (cool and dry) helps maintain viability.
Consider the source: seeds from a known ‘fertile cultivar’ or a reputable peony nursery are more likely to be viable than randomly collected ones. While there’s no foolproof peony seed viability test you can easily perform at home, starting with fresh seeds from a good source that have been stored correctly gives you the best odds.
Dealing with Pests or Diseases Affecting Seedlings
Once your peony seeds finally sprout, the young seedlings are still vulnerable. Keep an eye out for common peony seedling problems. Damping-off is a frequent fungal issue, causing seedlings to rot at the soil line; it’s often linked to overwatering and poor airflow. Fungus gnats, tiny black flies whose larvae feed on roots and fungi, also thrive in consistently moist soil.
Prevention is your best defense. Using a sterile planting mix significantly reduces the risk of soil-borne diseases like damping-off. Carefully managing watering to keep the soil moist but not saturated, and ensuring good air circulation around the seedlings, will make conditions less favorable for both fungi and fungus gnats. These preventative steps echo the best practices for avoiding mold during germination.
With these troubleshooting tips in hand for common issues like mold and germination failure, you’re better equipped to navigate the early stages. Now, let’s focus on the next phase: the long haul of caring for your young seedlings and cultivating the necessary patience.
The Long Haul: Caring for Seedlings and Cultivating Patience
After successful germination, the journey shifts to nurturing your young peony seedlings. This stage requires careful attention and, perhaps most importantly, a healthy dose of patience. Growing peonies from seed is a multi-year commitment, but watching your tiny sprouts mature into flowering plants is incredibly rewarding. Let’s cover how to care for them and what to expect along the way.
When and How to Safely Transplant Peony Seedlings
Knowing when and how to move your delicate seedlings is key to their survival. Follow these steps for successful transplanting peony seedlings:
- Check for True Leaves: Wait until your seedlings develop their first set of true leaves, which look different from the initial seed leaves (cotyledons). They should also be large enough to handle gently.
- Prepare New Pots: Select individual pots (3-4 inches) with drainage holes and fill them with a quality potting mix suitable for seedlings.
- Loosen Gently: Carefully loosen the soil around the seedling’s roots using a small tool or label stick.
- Lift with Care: Handle the seedling by a leaf, never the fragile stem, to minimize stress and potential damage.
- Replant Promptly: Place the seedling in its new pot, ensuring roots aren’t bent or broken. Backfill gently with soil, firming lightly. Careful handling minimizes root shock, giving your seedling the best start in its new home.


Caring for Young Peony Plants (Water, Light, Feed)
Proper peony seedling care during the first year or two is vital for establishing strong plants. Focus on these essentials:
- Light: Provide bright, indirect sunlight. A spot near a window that doesn’t receive harsh afternoon sun is often ideal. Too much direct sun can scorch tender leaves.
- Water: Keep the soil consistently moist but avoid letting it become waterlogged, which can lead to root rot. Ensure good drainage in your pots.
- Feeding: Once seedlings are established (several weeks after transplanting), you can begin feeding very lightly. Use a balanced liquid fertilizer diluted to quarter-strength to avoid burning the delicate young roots.
- Protection: Shield young plants from extreme heat or cold snaps. Keep an eye out for common pests like aphids or fungus gnats.
Years 2-5: What to Expect as Your Peonies Mature
Patience truly becomes a virtue after the first year. Growth above ground can seem slow because the plant prioritizes developing a robust root system, essential for long-term health and flowering. Expect to see a gradual increase in leaf size and the number of stems produced each spring. While variable, the typical peony seeds flowering time, based on collective gardener experience, falls between the third and fifth year after germination, though sometimes it can take longer.
The Hardest Part: Embracing the Wait for Flowers
What’s the hardest part about growing peonies from seed? Most gardeners agree: it’s the multi-year wait for those first flowers. Patience is crucial when growing peonies from seed. It’s easy to get discouraged, but try to focus on providing excellent care and celebrating small milestones like vigorous leaf growth each year. Acknowledging this shared challenge, a PlantMD horticultural expert advises, “The long wait is undoubtedly the biggest hurdle… but the unique satisfaction of seeing your seedling finally bloom makes every year worthwhile.” Embrace the process!
With this guidance on nurturing your young plants and embracing the wait, you’re well-equipped to see your peony seed-starting journey through to its rewarding conclusion.
Learning how to plant peony seeds successfully is a journey of patience and discovery, and you’re now well-equipped to begin. From understanding the multi-year timeline and sourcing viable seeds, to the detailed planting process and tackling potential setbacks like mold, this guide has provided a clear path. We’ve focused on honest advice for common challenges, drawing on real gardening experiences to help you manage expectations. The key takeaway is that while demanding, nurturing a peony from seed to bloom offers an immense reward. We invite you to share your own tips and stories below – let’s grow our peony knowledge together!
