Table of Contents
Ever picked up a coconut at the grocery store and wondered, “Could this actually grow?” Perhaps you’re fascinated by the idea of nurturing a tropical plant or curious about harvesting the sweet “coconut apple” hidden inside a sprouting one. For many gardeners, especially those starting out or finding only husked coconuts, the path to sprouting can seem confusing.
You might worry about wasting time on a coconut that won’t sprout or struggle to find reliable instructions that don’t assume you have a husk-on fruit straight from the tropics. Don’t let conflicting advice hold you back. This guide walks you through how to plant a coconut tree from a coconut, focusing specifically on the common challenges and methods for store-bought, husked varieties.
We provide clear, actionable steps, covering everything from selecting the right coconut to successful germination and care. Whether your ultimate dream is a mature coconut tree or simply experiencing the unique flavor of the sprouted pulp, we’ve got you covered.
Ready to begin your tropical growing adventure? Let’s dive into selecting the best possible coconut.
Coconut Planting 101: Understanding Your Coconut & Goal
Before starting, let’s clarify the different types of coconuts you might encounter and the two main goals people have when sprouting them: growing a tree or harvesting the ‘coconut apple’. Understanding this difference is key to success.
Husked vs. Unhusked: What’s the Difference for Planting?
Unhusked coconuts retain their thick, fibrous outer layer, while husked ones are the smooth, brown shells typically seen in stores.  Though planting husked coconut is possible, community experience suggests it’s often trickier. They can sprout, but the missing husk offers less protection, and the germination ‘eyes’ might be damaged, potentially hindering success without careful handling.
Defining Your Goal: Tree vs. ‘Coconut Apple’
What’s your aim? Are you hoping to nurture a coconut palm tree long-term, or are you curious about harvesting the unique ‘coconut apple’? This edible, spongy mass is the sprouted cotyledon inside. Knowing your objective is crucial because the steps for how to grow a coconut apple differ significantly from cultivating a tree, impacting the process and the expected outcome.
Can Store-Bought Coconuts Really Sprout? (Understanding Viability)
Can you sprout a coconut from the grocery store? Yes, it’s possible, but success isn’t guaranteed. Many are simply too old or treated to prevent sprouting. However, don’t lose hope. As one PlantMD horticultural expert confirms, “While not all store-bought coconuts will sprout due to age or processing, many can with the right selection and care. The key is looking for signs of freshness and avoiding any treatments that inhibit germination.” Learning how to sprout a store bought coconut starts with careful selection; the ‘shake test’ (discussed next) is vital.
What Exactly is the Edible ‘Coconut Apple’?
What is the white ball inside a sprouting coconut? That’s the sought-after ‘coconut apple’, known biologically as the haustorium or cotyledon. It’s a spongy mass that forms by absorbing the coconut water and meat (endosperm) to nourish the growing sprout. Many find this coconut apple edible, enjoying its unique, slightly sweet taste and marshmallow-like texture. For some experimenters, harvesting this delicacy is the primary goal, highlighting the different motivations for sprouting.
Now that you understand the types of coconuts and your potential goals, let’s focus on choosing a viable candidate.
Selecting Your Champion: How to Choose a Viable Coconut
With your goal in mind, the crucial first step is picking a coconut with the best chance of sprouting. Here’s how to select a winner, especially when dealing with store-bought, husked varieties.
Best Places to Find Coconuts for Sprouting
Finding a fresh coconut is key when learning how to sprout a store bought coconut. Look for these sources:
- Grocery Stores: Common, but freshness and viability can vary greatly.
- Asian or Farmers’ Markets: Often have faster turnover, potentially offering fresher options.
- Online Retailers: Some specialize in coconuts specifically selected for sprouting viability.
The Crucial Shake Test: Listening for Water
Before anything else, pick up the coconut and shake it vigorously near your ear.
You must hear water sloshing inside. This liquid nourishes the embryo and is essential for germination. No water means the coconut has dried out and won’t sprout. As a PlantMD horticultural expert advises, “The shake test is your first and most reliable friend when picking a coconut for sprouting. If you don’t hear water sloshing inside, the chances of germination are virtually zero, regardless of how good it looks externally.” This simple test is the most critical indicator of freshness and viability.
Visual Inspection: What to Look For (and Avoid)
After the shake test, give the husked coconut a good look-over. Pay close attention to the three dark circles at one end, often called ‘eyes’. Successful planting husked coconut depends on these being healthy.
Look For:
- A heavy feel for its size (suggests ample water).
- Overall firmness with no soft spots.
- Intact, dry ‘eyes’ without any breaks or fuzz.


Avoid:
- Visible cracks or dents in the shell.
- Soft, spongy areas when pressed.
- Mold, especially white, green, or black fuzzy growth, particularly around the eyes. Mold indicates decay has begun.
- Liquid weeping from the eyes, suggesting it’s starting to spoil.
- Excessive dryness or lightness, indicating water loss.
Why Freshness Matters More Than You Think
Think of a coconut not just as fruit, but as a large seed packed with finite resources – primarily water and the white flesh (endosperm) that feeds the sprout. As it ages, water evaporates, and the internal energy depletes, drastically reducing sprouting chances. Many store-bought coconuts endure long storage times, and some might even be treated to prevent sprouting for longer shelf life. While checking expiration dates can help, the shake test and visual inspection remain your most reliable guides. Choosing carefully significantly boosts your odds of success.
With your carefully selected coconut in hand, you’re ready for the specific steps to encourage sprouting.
Sprouting Secrets: Step-by-Step Guide for Husked Coconuts
You’ve chosen your coconut! Now for the exciting part: sprouting it. This guide focuses on the specific steps for husked, store-bought coconuts, incorporating tips for success.
Materials You’ll Need
To begin planting husked coconut, gather these essentials:
- A viable husked coconut.
- A container like a pot or sturdy plastic bag.
- Sprouting medium: Sphagnum moss
 (retains moisture), perlite (provides aeration), or coco coir.
 - Water.
- Plastic wrap or a dome (optional, for humidity).
- A consistently warm location.
This setup prepares you for successful sprouting.
 (retains moisture), perlite (provides aeration), or coco coir.
Step 1: Soak Your Coconut
Begin by soaking your coconut to soften its shell and signal germination. This rehydration process is key. Submerge the coconut in warm water for 24 to 72 hours. Remember to change the water daily to keep it fresh. Some community members suggest adding a small amount of rooting hormone to the water, though this is an optional step that may encourage faster root development.
Step 2: Choose Your Sprouting Medium
Select a suitable sprouting medium that balances moisture retention with good aeration. Options include sphagnum moss, which holds moisture well, or perlite, excellent for drainage. Coco coir is another popular choice. For a simple method, some growers use a sealed plastic bag with damp paper towels. Consider the pros and cons of each; your goal is a consistently damp, but not waterlogged, environment for the coconut.
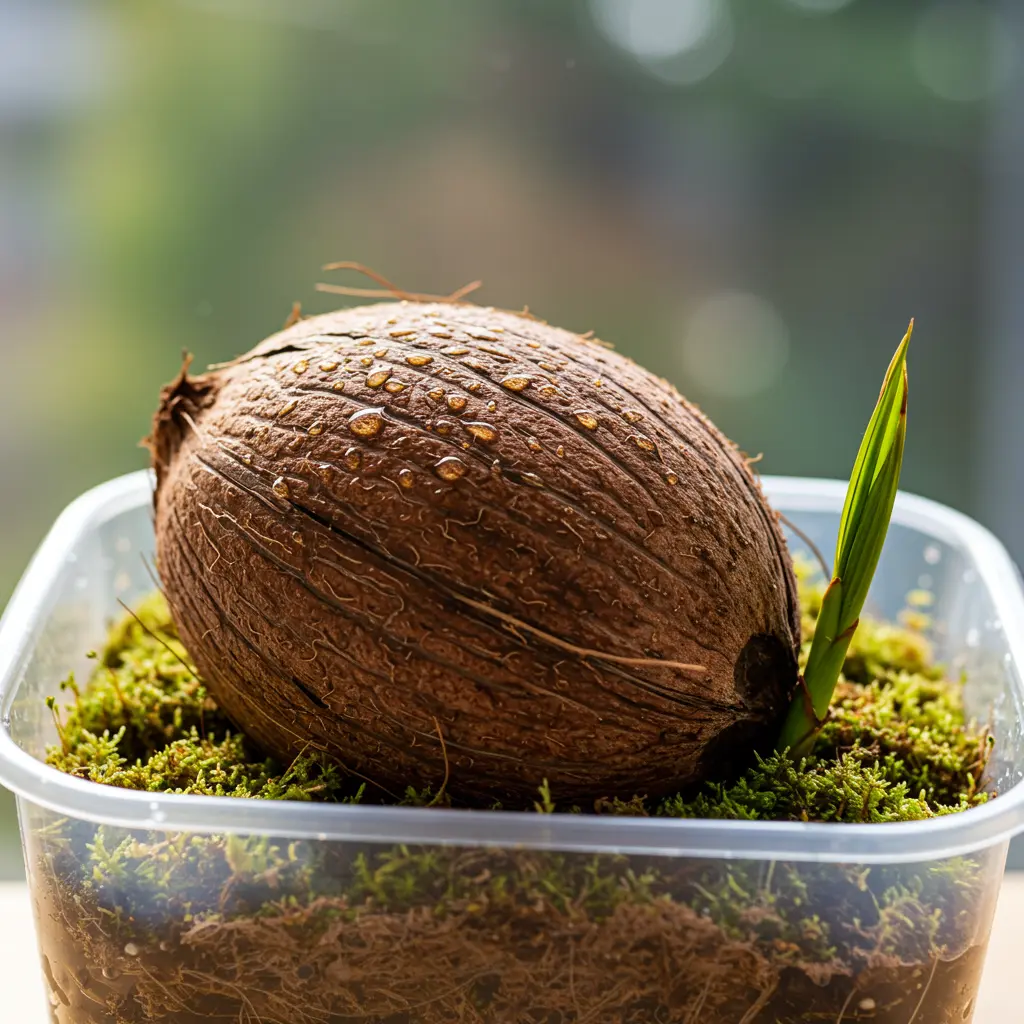
Step 3: Position Your Husked Coconut
Proper orientation is crucial when planting husked coconut. Place the coconut on its side in your container. Many find success laying it with the three “eyes” parallel to the ground, or with the largest eye pointing slightly downwards. A PlantMD horticultural expert advises, “For husked coconuts, orientation can be tricky. Laying it on its side with the three eyes parallel to the ground, or slightly pointing the largest eye downwards, often yields good results by allowing the sprout to emerge naturally.” Bury it about half to two-thirds deep in your damp sprouting medium. Ensure the medium is consistently moist, but never soaking wet, to prevent rot.
Step 4: Maintain Warmth and Humidity
Coconuts need consistent warmth and high humidity to germinate, mimicking their tropical origins. Aim for a temperature range of 77-82°F (25-28°C). You can achieve this by placing the container on a seedling heat mat , near a radiator (but not touching it), or in a warm closet. To maintain humidity, loosely cover the pot with plastic wrap or use a plant humidity dome . Crucially, ensure some airflow to prevent mold growth, a common issue if conditions are too stagnant. This balance is vital for success.
Step 5: Monitor for Sprouting (and Be Patient!)
Keep a close eye on your coconut, but prepare to be patient. The first sign of life will be a small sprout emerging from one of the “eyes.” This process can take anywhere from one to six months, sometimes even longer, so don’t be discouraged by a slow start. Regularly check the moisture level of your sprouting medium, ensuring it remains damp. Also, continue to watch for any signs of mold and address it promptly if it appears.
Do You Really Need the Husk?
Many wonder: do you need the husk to plant a coconut? Traditionally, the husk provides protection and retains moisture. However, community experience shows that planting husked coconut can be successful if you carefully manage warmth, humidity, and the sprouting medium. This guide focuses on husked coconuts as they are commonly available. As a PlantMD horticultural expert confirms, “While the husk offers natural protection and moisture retention, successful sprouting of husked, store-bought coconuts is absolutely achievable. The key is to meticulously replicate the warm, humid conditions the husk would normally provide.” Thus, sprouting a husked coconut is certainly viable with the right approach.
With these sprouting secrets understood, you’re well-prepared for the next exciting phase: transplanting and caring for your seedling.
From Sprout to Tree: Transplanting and Caring for Your Seedling
Success! Your coconut has sprouted. If your goal is to grow a majestic coconut palm, here’s how to transition your sprout into a pot and provide the care it needs to thrive.
When is Your Sprout Ready for a Pot?
Your sprouted coconut is ready for a pot when the sprout reaches a few inches tall and proudly displays its first leaf or two. You should also see some roots emerging from the coconut.  Transplanting too early can shock the delicate seedling, hindering its progress. This step is crucial if you aim to grow coconut indoors from grocery store finds.
Selecting the Best Container and Soil
Choosing the right home for your young palm is vital. Select a deep pot, at least 10-12 inches, to accommodate its developing taproot. Good drainage holes are essential to prevent waterlogging. For soil, use a well-draining mix; sandy loam or a specialized cactus/palm blend works well. Avoid heavy potting soils, as these can retain too much moisture and lead to root rot, a common issue when caring for indoor palm plants. Proper soil helps ensure healthy root development.
How to Safely Transplant Your Coconut Sprout
Moving your sprout requires a gentle touch to avoid stress.
- Carefully remove the sprouted coconut from its current medium. Handle the young roots with extreme care to minimize disturbance, as this is critical for success.
- Position the coconut in its new, deeper pot. Ensure it sits at a similar depth as before, with about one-third to one-half of the coconut itself remaining above the soil line.
- Fill the pot around the coconut with your chosen well-draining soil mix.
- Water gently but thoroughly to settle the soil around the roots.
Watering Your Young Coconut Tree Correctly
Proper watering is key to your young palm’s health. Aim to keep the soil consistently moist, but never soggy or waterlogged, as this can lead to devastating root rot. A good rule of thumb for proper watering techniques for palms is to allow the top inch of soil to dry out slightly between waterings. Excellent drainage in the pot is absolutely crucial for prevent root rot and ensuring your seedling thrives.
Sunlight Requirements for Healthy Growth
Coconut palms are sun-lovers. To successfully grow coconut indoors from grocery store sprouts, provide as much bright light as possible. Place your palm near your sunniest window, ideally a south-facing one if you’re in the Northern Hemisphere. If grown outdoors (once established), they prefer full sun. Indoors, if natural light is insufficient, you may need to use supplemental grow lights to ensure your young tree gets the energy it needs for healthy development.
Growing Indoors vs. Outdoors: Managing Expectations
When you grow coconut indoors from grocery store nuts, it’s important to have realistic expectations. Indoors, your palm will likely remain a manageable, albeit large, houseplant and is very unlikely to fruit. For outdoor growing, coconut palms thrive only in tropical or subtropical climates, generally USDA Zone 10+ climates. While a fun project, understand that achieving a mature, fruit-bearing tree indoors is not a typical outcome for these majestic plants.
Patience is Key: Coconut Tree Growth Rate
Patience is a virtue when growing a coconut tree. These palms grow relatively slowly, especially when cultivated indoors or outside their native tropical environment. Fruiting, if it occurs at all with store-bought nuts grown potted, can take 5-10+ years. Nurturing your seedling into a tree is a rewarding long-term commitment.
Now that you understand how to nurture your sprout into a young palm, let’s explore another exciting outcome: harvesting the ‘coconut apple’.
Harvesting the Prize: Enjoying the ‘Coconut Apple’
If your goal wasn’t a towering palm but rather the unique treat inside a sprouting coconut, this section is for you. Learn how to identify, harvest, and enjoy the ‘coconut apple’.
What is the ‘Coconut Apple’ Exactly? (Recap)
As a reminder, the ‘coconut apple’ is the spongy white ball (cotyledon) inside a sprouting coconut.  Its purpose is to nourish the emerging sprout, converting the endosperm (meat and water) into food. Remember, harvesting this unique treat means the coconut will no longer develop into a tree.
Knowing When the ‘Coconut Apple’ is Ready
Knowing when the ‘coconut apple’ is ready involves watching the sprout. Harvest when the sprout is a few inches tall but established. The apple grows by consuming the coconut’s meat and water, so collect it before the sprout gets too large or the apple is fully used up. This timing is key for enjoying the apple.
Safely Cracking Open Your Sprouted Coconut
- Place the coconut securely on a sturdy surface, perhaps nestled in a towel to prevent rolling.
- Using the blunt side of a heavy knife (like a cleaver) or a hammer, tap firmly around the coconut’s middle circumference (its equator).
- Rotate the coconut, continuing to tap evenly until a crack forms and begins to widen all the way around.
- Gently pry the halves apart, being careful not to damage the delicate sprout and the ‘coconut apple’ nestled inside. Always protect your hands and work surface during this process.
Taste and Texture: What to Expect
What does the ‘coconut apple’ taste like? Expect a unique, spongy yet slightly crisp texture, almost like dense foam. The flavor is mildly sweet and distinctly coconut-like, sometimes with subtle savory notes developing as it matures. Many compare the refreshing bite to a water chestnut or jicama.
Simple Ways to Enjoy Your Harvested ‘Coconut Apple’
Enjoying your harvested ‘coconut apple’ is simple:
- Eat it fresh and raw for a unique snack.
- Slice it thinly and add to salads for texture.
- Lightly sauté or toss into stir-fries near the end of cooking.
- Blend it into your favorite smoothies for a subtle coconut boost.
Important Note: Harvesting Stops Tree Growth
Crucially, remember that removing the ‘coconut apple’ takes away the sprout’s dedicated energy source. Harvesting this delicacy means your coconut will not continue to grow into a tree; it’s a choice focused solely on enjoying the edible cotyledon.
Whether you aimed for a sprout or the unique ‘coconut apple’, you now have the steps to experiment with bringing a store-bought coconut to life.
You came looking for clear steps on how to plant a coconut tree, especially using one from the grocery store, and now you have a roadmap. From carefully selecting a viable, water-filled nut to mastering the specific warmth and moisture needs for sprouting a husked coconut, the process is achievable. We’ve explored the journey whether your goal is nurturing a young palm or simply tasting the unique ‘coconut apple’ inside.
This guide specifically tackled the common confusion around store-bought coconuts, offering distinct methods based on your desired outcome. Ultimately, success lies in patience and applying these techniques. That coconut on your counter holds surprising potential – give it a try, and share your own sprouting experiences or questions below!
