Table of Contents
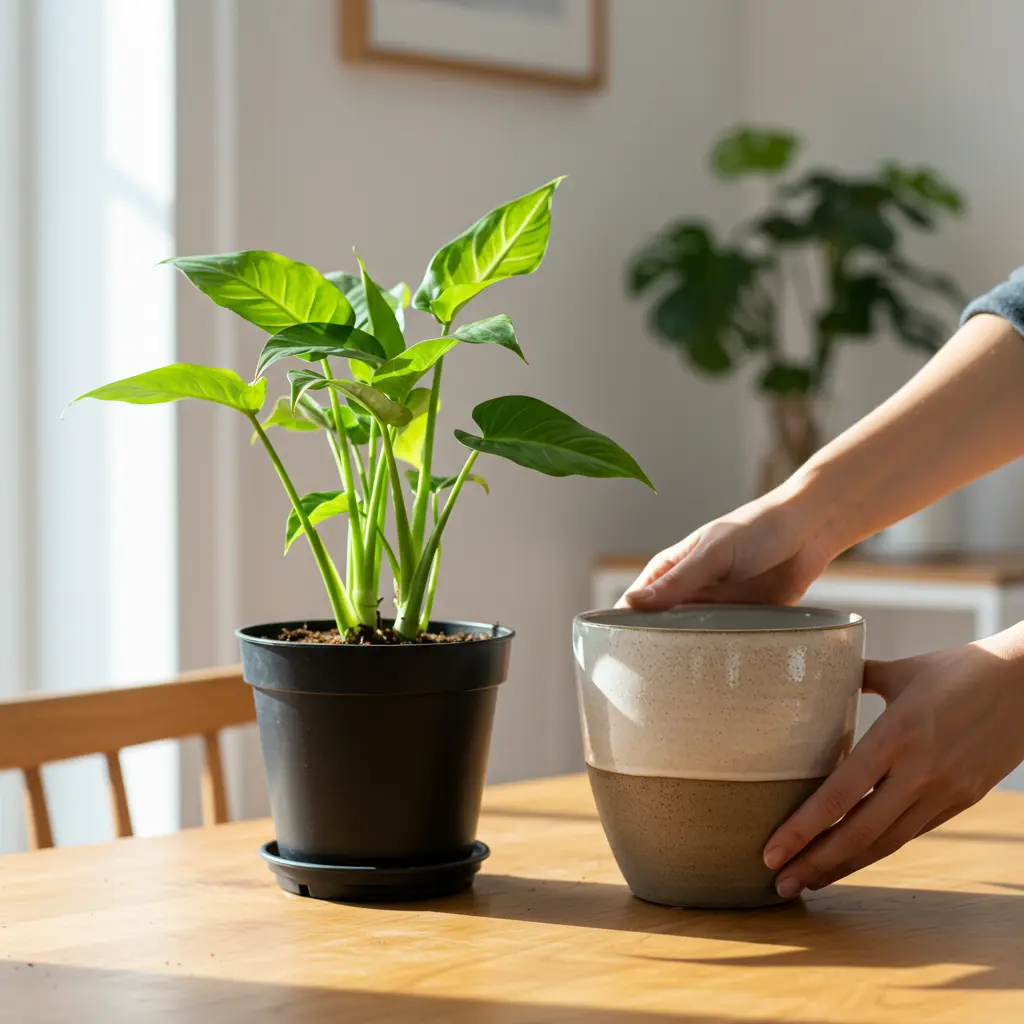
Ever bought a beautiful decorative pot, only to find your plant’s nursery pot doesn’t quite fit, or it sits way too low inside? It’s a common frustration for plant owners, especially when you’re just trying to display your plant, not necessarily repot it. Knowing how to measure plant pots correctly is key, but the process can feel confusing, particularly when figuring out the right size cache pot – the decorative one your plant’s original pot slips into.
This guide clears things up. We’ll show you the standard, simple way to measure your plant’s current nursery pot for both diameter and height. More importantly, we’ll give you a practical, community-tested rule of thumb for selecting a decorative cache pot that provides a perfect fit. Plus, we’ll share clever, easy tips for adjusting your plant’s height within its new pot so it looks just right.
Ready to solve your pot sizing puzzles and display your plants beautifully? Let’s start by understanding the basics of how to measure plant pots.
Why Measuring Matters: Cache Pots vs. Repotting Explained
Understanding why you’re measuring is key. Let’s clarify the crucial difference between fitting a plant in a decorative cache pot and repotting it for growth.
What’s a Nursery Pot vs. a Cache Pot?
First, let’s define the terms. The thin plastic pot your plant usually comes in is the nursery pot. Think of the cache pot as the decorative outer layer, often without drainage holes, primarily chosen for looks.  It simply hides the nursery pot, making your plant display more stylish and cohesive with your home decor. Understanding this distinction is essential before you measure.
Why Use a Cache Pot? (The Double Potting Method)
Why use a cache pot? This ‘double potting‘ method offers several practical advantages:
- Improves aesthetics instantly, hiding the plain nursery pot.
- Protects furniture and surfaces from water damage or soil stains.
- Makes swapping plants between decorative pots easy.
- Simplifies watering (you can lift the nursery pot out to water thoroughly).
It’s perfectly okay—often recommended—to leave your plant in its nursery pot inside the cache pot!
Cache Pot Fit vs. Repotting Space: Know the Difference
Measuring for a cache pot and repotting serve different purposes, a common point of confusion for beginners. This cache pot sizing guide focuses on finding a container to simply hold the existing nursery pot, while repotting requires selecting a larger pot to accommodate root growth. Here’s a quick comparison:
| Goal | Pot Size Needed | Why? |
|---|---|---|
| Cache Pot Fit | Just slightly larger than the nursery pot (aim for a snug fit). | To hold the existing pot neatly for aesthetics and stability. |
| Repotting | Typically 1-2 inches wider than the current pot. | To give roots adequate space to expand and grow. learn more about repotting |
Avoiding Common Pitfalls: Why Size Matters for Cache Pots
Incorrect cache pot sizing creates frustrating issues: too small and the nursery pot won’t fit; too large and the plant looks awkward or sits too low, hindering easy removal. The right size looks better, simplifies watering, and crucially, allows beneficial airflow around the nursery pot. Accurate measurement prevents these common pitfalls.
Now that you understand why precise sizing matters, let’s learn exactly how to measure your nursery pot.
How to Measure Your Nursery Pot: The Standard Method
Now that you know why you’re measuring (for a cache pot!), let’s cover the simple steps to measure your plant’s nursery pot accurately.
What You’ll Need
Gathering your tools is simple. You’ll just need a couple of things:
- Flexible tape measure or ruler
- Pen and paper, or a notes app on your phone

Step 1: Measure Top Diameter
First, measure the top diameter, which is crucial for a good cache pot fit. Lay your tape measure or ruler across the widest part of the pot’s opening, from one edge to the other. Decide if you’re measuring the inside edge or the outside edge – and stick with it for consistency. This top diameter measurement directly impacts whether your nursery pot will slide comfortably into the cache pot.
Step 2: Measure Height
Next, measure the pot’s height. Place the nursery pot on a flat surface. Place the end of your tape measure or ruler at the base and measure vertically straight up to the top rim. This plant pot measurement ensures your nursery pot won’t stick out awkwardly above the cache pot’s rim or sink too low inside. Getting the height right helps achieve a polished look for your plant display.
Quick Tip
Measuring a square or irregular pot? No problem! Always measure across the absolute widest point. Height is measured the same way as round pots – from the flat bottom to the top rim. These shapes might need slightly more wiggle room in the cache pot compared to standard round ones. Having these key measurements is essential for the next step.
With your nursery pot’s diameter and height measurements noted, you’re ready to find the perfect decorative container using the +1 Inch Rule.
The Perfect Fit: Choosing the Right Size Cache Pot (+1 Inch Rule)
Now that you have your nursery pot measurements, let’s use them to find a decorative cache pot that fits perfectly using a simple community-tested guideline.
Measure Your Cache Pot Too (Inside Diameter!)
Now that you know your nursery pot’s size, you need to measure your potential cache pot. Focus on the internal diameter of the opening – external dimensions can be misleading due to varying pot thickness.  Use a tape measure inside the rim for an accurate reading. Always measure the internal dimensions of the cache pot.
The Magic Formula
How much bigger should a decorative pot be than the nursery pot? The community-tested answer is the ‘+1 Inch Rule’, a reliable cache pot sizing guide. Aim for a cache pot with an internal diameter about 0.5 to 1 inch wider than your nursery pot’s top diameter. This small gap is key. As a Seasoned Plant Pro confirms, “I always recommend the ‘+1 inch rule’ for cache pots. That little bit of extra space, about half an inch to an inch wider than your nursery pot, makes all the difference for easy handling and crucial airflow.” – Seasoned Plant Pro. This simple rule prevents a fit that’s too tight or overly loose.
Why the Extra Inch Matters (Airflow & Removal)
This extra space isn’t just for looks; it serves vital functions for fitting nursery pot containers properly. This gap ensures:
- Easy insertion and removal without damaging roots or the plant.
- Enough finger space to lift the nursery pot out for watering checks.
- Crucial cache pot airflow around the nursery pot, reducing moisture buildup and mold risk.
- The plant doesn’t look awkwardly ‘stuck’ or visually root-bound in the cache pot.
Checking Height: Ensuring Vertical Fit
Don’t forget height! Compare the internal height of the cache pot against your nursery pot’s height. Ideally, the cache pot should be slightly taller than, or the same height as, the nursery pot. This prevents the less attractive plastic nursery pot rim from peeking over the top of your decorative pot. Getting the height right contributes to a polished look.
Tip:
Tip: Be extra careful with heavily tapered cache pots. Since the width narrows towards the base, measure the internal diameter near the bottom where the nursery pot’s base will rest, not just at the top. This ensures it won’t get stuck halfway down. Now you know how to select the perfect size!
With these measurement guidelines, you’re equipped to choose a cache pot that fits perfectly. But sometimes even the right size pot leaves your plant sitting a bit low – let’s look at easy fixes for adjusting its height.
Plant Sitting Too Low? Easy Fixes for Adjusting Height
Even with the right diameter, your plant might look ‘sunken’ in its cache pot. Don’t worry, this is a common issue with easy, community-approved fixes!
The ‘Sunken Plant’ Problem: Why Height Matters
Does your plant look like it’s sinking in its decorative pot? This “sunken” appearance, where the nursery pot sits too low inside the cache pot, is a frequent frustration.  A plant sitting too low can detract from the overall look, but thankfully, it’s simple to correct.
Solution 1: Use Fillers
How to raise a plant in its pot? A popular method is adding inert filler material to the bottom of your cache pot before placing the nursery pot inside. As Seasoned Plant Pro advises, “Don’t despair if your plant sits too low in its cache pot! A simple layer of Leca or pebbles at the bottom is a go-to trick among plant lovers to get that perfect height and a polished look.” Common choices include:
- Lightweight Expanded Clay Aggregate (Learn more about Leca)
- Pebbles or gravel
- Decorative stones
Using pebbles or other fillers effectively lifts the plant.
How to Use Fillers Safely (Drainage Check)
Ensure fillers don’t block drainage holes if your cache pot has one (most don’t). Crucially for plant health: always remove the nursery pot from the cache pot when watering. This prevents the plant from sitting in excess water trapped by the filler, avoiding root rot. Remember to follow proper watering techniques.
Solution 2: The Upside-Down Pot Trick
Another clever solution is the “upside-down pot trick”. Simply place a smaller, empty nursery pot or a sturdy plastic container upside down inside the larger cache pot. This creates a stable platform, lifting your plant to the desired height without needing extra materials. It’s a resourceful and free fix!
Solution 3: Use Risers or DIY Platforms
Purpose-made solutions exist too. Use a small, dedicated plant pot riser inside the cache pot. These are often simple plastic or metal stands designed specifically for this purpose. Alternatively, use sturdy plastic lids, small blocks, or similar waterproof items you might already have, providing a stable lift for your plant within the decorative pot.
Getting the Look Just Right
The goal is simple: adjust the height so the nursery pot rim sits just below, or level with, the cache pot rim. With these easy fixes, you can achieve that polished, professional look for your houseplants.
Finding the right decorative pot doesn’t have to be guesswork. You now know the standard way to measure your nursery pot’s diameter and height, distinguishing clearly between sizing for repotting versus finding a cache pot.
You’ve also learned the secret to perfect cache pot pairings using the community-approved “+1 inch rule.” We explored simple, practical solutions – like using fillers or small stands – to ensure your plant sits at just the right height inside its stylish new home. This tackles common challenges head-on.
With these tips, you can choose cache pots confidently and display your plants beautifully. What are your favorite tricks for getting the perfect fit?
