Table of Contents
Dreaming of turning your single, stunning rubber plant (Ficus elastica) into a whole collection without spending a dime? You’re not alone! Propagating these beautiful plants can feel intimidating for beginners, especially when worrying about common pitfalls like cuttings failing to root or simply rotting away. But rest assured, successfully propagating a rubber tree is absolutely achievable with the right guidance.
This comprehensive guide breaks down exactly how to propagate a rubber tree plant using the three most reliable methods: water, soil, and air layering. We’ll walk you through each simple step, help you choose the best method for your situation with a clear comparison, and crucially, provide expert tips to troubleshoot common problems like slow rooting or yellowing leaves. Get ready to expand your plant family with confidence!
Let’s start by gathering the essential supplies.
Getting Started: Prep for Propagation Success
Understand the basics before you begin: the benefits of propagating your rubber plant, the best timing, essential tools, and how to prepare a cutting for the best chance of success.
Benefits of Propagating Rubber Plants
Why try rubber plant propagation? It’s a rewarding way to expand your collection or share your plant love.  Key motivations include:
- Getting more plants for free!
- Sharing with friends – a truly satisfying result of successful propagation.
- Rejuvenating a leggy or overgrown plant.
- Learning a valuable new plant care skill.
When is the Ideal Time to Propagate?
For the best chance of success with rubber plant propagation, aim for the active growing season – typically spring or summer. During this time, your plant has the most energy stored up, and the warmer temperatures and increased light encourage faster rooting. Active growth processes give your cutting a helpful boost.
Gathering Your Propagation Supplies
Gathering the right supplies for rubber plant propagation is straightforward. Critically, ensure any knife or pruners you use are sharp and meticulously clean; this prevents transferring diseases to the vulnerable cutting. You’ll need:
- Sharp, clean knife or pruning shears
- Rooting medium (water or a suitable soil mix)
- A clean jar, glass, or pot
- Optional: Rooting hormone
Identifying Nodes on Your Rubber Plant Stem
Finding the node is key to successful rooting. Look for a slightly raised ring or bump on the stem, often where a leaf is or was attached – this is the rubber plant node. It’s crucial because this area contains concentrated cells and natural hormones necessary for new roots to develop.
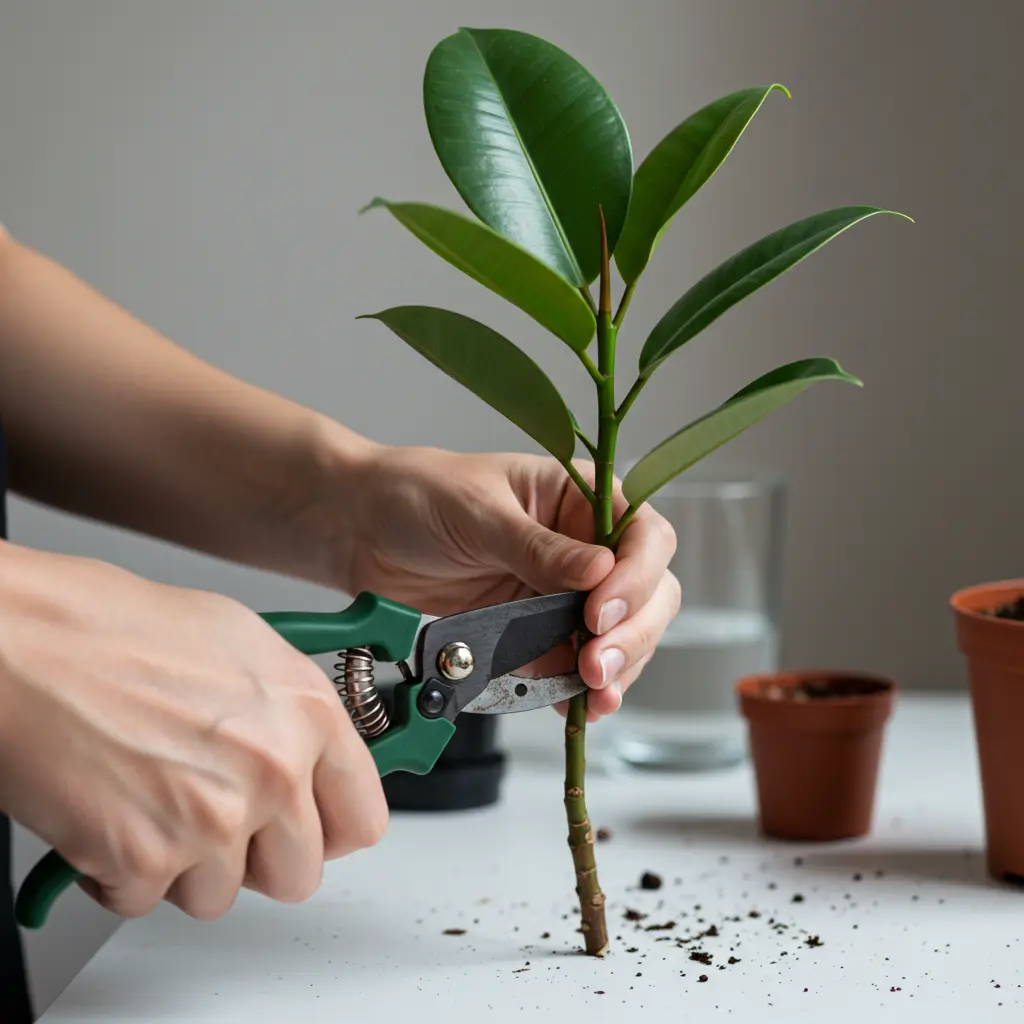
Step-by-Step: Taking the Perfect Cutting
Taking a healthy rubber tree cutting is your first active step. Follow this process carefully:
- Choose a healthy, vigorous stem tip.
- Make a clean cut about 4-6 inches long, just below a node.
- Carefully remove the lowest leaf or two.
- Ensure at least one node (preferably two) remains on the cutting.
Remember, a clean cut below the node is vital for successful rooting. With your cutting prepared, you’re ready to choose a propagation method.
With your cutting prepared and supplies ready, let’s dive into the specific techniques for Method 1: Propagating Rubber Plants in Water.
Method 1: Propagating Rubber Plants in Water
Learn the simple steps for water propagation, a popular and visually rewarding method often favored by beginners.
Step 1: Setting Up Your Cutting in Water
- Begin your rubber plant propagation water journey by placing the prepared cutting into a clean jar or vase filled with water.
 Ensure the node or nodes are fully submerged, as this is where roots will form. Critically, keep any remaining leaves above the waterline to prevent them from rotting. This simple setup gets your cutting ready for root development.
 Ensure the node or nodes are fully submerged, as this is where roots will form. Critically, keep any remaining leaves above the waterline to prevent them from rotting. This simple setup gets your cutting ready for root development.
Step 2: Choosing the Right Container and Water
Select a clear glass jar or vase for your rubber plant propagation water setup. Transparency is beneficial because it allows you to easily monitor root growth without disturbing the cutting. Use filtered water or tap water that has sat out for 24 hours to allow chlorine to dissipate. Room temperature water is best to avoid shocking the cutting.
Step 3: Placement and Light Needs
Proper placement is key for rubber tree cutting care. Position your jar in a warm location that receives plenty of bright, indirect sunlight. Avoid placing it in direct sunlight, as this can scorch the delicate leaves and encourage algae growth in the water, hindering root development. A spot near an east-facing window often works well.
Step 4: Maintenance and Monitoring
Consistent rubber plant propagation water care involves changing the water every few days, or sooner if it becomes cloudy. This is crucial to prevent bacterial growth and replenish oxygen, keeping the environment healthy for root development. Keep an eye out for the first signs of roots – small, white nubs emerging from the submerged nodes. Patience is key during this stage.
Understanding the Timeline for Water Propagation
How long does rubber plant propagation take in water? Typically, you can expect roots to develop within 4 to 8 weeks. However, be patient, as this timeframe can vary. Factors like ambient temperature, light levels, and the health of the parent plant all influence rooting speed. Don’t be discouraged if it takes a bit longer; consistent care is most important.
Step 5: Transitioning to Soil
- Once the roots are approximately 1-2 inches long, it’s time for potting your rubber plant cutting. Gently transfer it to a small pot with well-draining potting mix. Water thoroughly after planting. Remember that water roots need time to acclimatize to soil, so keep the soil consistently moist initially before adapting to regular watering. This completes the water propagation process.
Now that you understand water propagation, let’s explore another common technique: propagating rubber plants directly in soil.
Method 2: Propagating Rubber Plants in Soil
Discover how to root rubber plant cuttings directly in soil, including tips on the best mix and whether rooting hormone helps.
Step 1: Preparing Pot and Soil
Choosing the right container and soil is your first step for success. Select a small pot (around 4 inches) with good drainage holes to prevent waterlogging. What is the best soil mix for rooting rubber plant cuttings? The ideal rubber plant propagation soil mix is well-draining. You can use a standard potting mix combined with perlite or coarse sand.  This crucial drainage helps prevent the base of your cutting from rotting before it can establish roots.
Step 2: Using Rooting Hormone (Optional but Recommended)
Do you need rooting hormone for rubber plant propagation? While not strictly necessary, using rooting hormone rubber plant cuttings is highly recommended. It significantly encourages faster and more robust root development, increasing your chances of success. Applying it is simple: just dip the moistened base of the cutting into the rooting hormone powder or gel, ensuring the area around the node is covered, before planting. This extra step can make a noticeable difference.
Step 3: Planting the Cutting
Now it’s time to plant your prepared cutting. First, pre-moisten your well-draining soil mix slightly. Make a hole in the center of the soil with a pencil or your finger, deep enough for the cutting’s base. Carefully insert the cutting. Ensure at least one node (the bump where leaves were attached) is buried beneath the soil surface, as this is where roots will emerge. Gently firm the rubber plant propagation soil around the base to support the cutting.
Step 4: Watering and Environment
Proper rubber tree cutting care soil involves maintaining consistent moisture without overdoing it. Keep the soil lightly moist, but never soggy, as this can lead to rot. High humidity significantly helps reduce water loss from the leaves while roots establish. You can create a humid environment by covering the pot with a clear plastic bag or cloche, venting it occasionally. Place the pot in bright, indirect light, avoiding direct sun which can scorch the cutting.
Step 5: Checking for Roots
Patience is key during rubber plant cutting rooting. After several weeks (typically 4 or more), you can gently tug on the cutting. If you feel resistance, it means roots have formed. Be very cautious when doing this to avoid damaging delicate new roots. Alternatively, a more reliable sign of successful rooting is the emergence of new leaf growth at the tip of the cutting. This indicates the cutting is establishing itself well.
Understanding the Timeline for Soil Propagation
How long does it take for rubber plant cuttings to root in soil? Generally, expect rooting to take between 4 and 12 weeks, often longer and more variable than water propagation. Factors like temperature, light, humidity, and whether you used rooting hormone significantly influence the rubber plant propagation time. Be patient; consistent care is crucial. Environmental factors play a big role, so don’t be discouraged if it takes a while. This soil method offers a direct path to a potted plant.
With soil propagation covered, let’s explore another fascinating technique: air layering your rubber tree.
Method 3: Air Layering Your Rubber Tree
Explore air layering, a technique to root a stem while it’s still attached to the parent plant. This method is particularly useful for propagating larger stems or creating a more mature new plant faster.
Air layering involves encouraging roots to form on a stem section while it remains connected to the parent plant. This technique is ideal for larger stems or creating a more mature new plant faster.  While effective for an air layering rubber tree, consider the pros and cons:
- Pros: Higher success rate for large stems, reduced transplant shock.
- Cons: More complex setup, requires access to the parent plant.
Step 1: Gathering Supplies for Air Layering
To begin, gather your air layering supplies. You’ll need a sharp, clean knife, moistened sphagnum moss, rooting hormone (optional but recommended), clear plastic wrap, and ties or tape (like electrical tape or plant ties). Sphagnum moss is preferred because it provides excellent moisture retention and aeration, crucial for root development.
- Sharp knife or blade
- Moistened sphagnum moss
- Rooting hormone powder or gel
- Clear plastic wrap
- Twist ties, string, or tape
Step 2: Preparing the Stem
Select a healthy stem section on your rubber tree, ideally pencil-thick or slightly larger. Below a leaf node, carefully make either two parallel shallow cuts about 1 inch apart around the stem and remove the ring of bark between them, or make a single upward-slanting cut about one-third through the stem. This wounding interrupts the flow of sugars and hormones, encouraging root formation at that site. Apply rooting hormone powder or gel to the exposed wound or cut surface.
Step 3: Applying Moss and Wrapping
Take a generous handful of the pre-moistened sphagnum moss and pack it firmly around the wounded stem area, ensuring complete coverage. Wrap this moss ball securely with the clear plastic wrap. It’s crucial to wrap tightly to ensure good contact between the moist air layering sphagnum moss and the wounded stem. Seal the top and bottom edges of the plastic wrap tightly against the stem using your ties or tape to keep moisture in.
Step 4: Monitoring Root Growth
Keep the air layer in a warm, bright spot out of direct sun. Periodically check for root development through the clear plastic; this can take several weeks to a few months. Effective air layering monitoring also involves ensuring the moss stays consistently moist but not waterlogged. You can usually tell by condensation inside the plastic or by gently squeezing the ball. If it feels dry, carefully inject a small amount of water with a syringe or loosen the top tie slightly to add moisture.
Step 5: Separating and Potting
Once you see a substantial network of roots filling the moss ball (usually after 2-3 months), it’s time to separate your new plant. Using clean, sharp pruners or a knife, cut the stem cleanly just below the newly formed root ball. Carefully remove the plastic wrap, but try to leave the sphagnum moss around the roots intact to minimize disturbance. Proceed with potting the air layered plant into a container with appropriate, well-draining potting mix, handling the new root system gently. This method yields a well-developed new plant.
Mastering these propagation techniques gives you options. Next, let’s compare the methods and troubleshoot common issues.
Choosing Your Method & Troubleshooting Common Issues
Compare the propagation methods to pick the best one for you, and learn how to solve common problems like rot or lack of rooting.
Comparison: Water vs. Soil vs. Air Layering
Choosing the right propagation method depends on your preferences and experience. Don’t worry, there’s a good option for everyone! This rubber plant propagation method comparison helps you decide. Water propagation is often easiest for beginners as you can see roots form, but requires careful transplanting. Soil propagation avoids transplant shock but makes monitoring roots harder. Air layering creates a larger plant faster but is the most complex technique. Consider the difficulty, speed, and success rates below to find your best fit.
| Feature | Water Propagation | Soil Propagation | Air Layering |
|---|---|---|---|
| Difficulty | Beginner | Beginner-Intermediate | Intermediate-Advanced |
| Speed | Moderate (4-8 weeks) | Moderate-Slow (4-12+ weeks) | Slow (4-12+ weeks) |
| Success Rate | Good | Good | High (if done correctly) |
| Pros | Visible roots, simple setup | Direct planting, less shock | Larger plant faster, high success |
| Cons | Transplant shock risk | Can’t see roots, rot risk | Complex setup, slower start |
Troubleshooting: Rotting Cuttings
Q: Help! Why is my rubber plant cutting rotting and what can I do?
A: Seeing rot on your cutting can be discouraging, but it’s often fixable! Common causes include using unclean tools or containers, overwatering (in soil) or not changing the water frequently enough (in water), a cutting taken without a node, or starting with an unhealthy cutting.  If you spot mushy, brown, or black areas, act quickly. Try to salvage it by carefully trimming away all the rotted tissue with a sterile blade. Clean your container thoroughly and restart with fresh, clean water or slightly damp, well-draining soil. As a plant expert advises, “Don’t panic if you see rot! Often, if caught early, you can trim the affected part, clean everything thoroughly, and try again with fresh water or soil. Learning to spot the signs is part of the propagation journey.” – PlantMD horticultural expert. Remember, rot can sometimes happen even with the best care.
Troubleshooting: No Roots
Q: Why isn’t my cutting rooting?
A: Patience is key when propagating! If your rubber plant cutting isn’t rooting, the most common reason is simply that it needs more time – remember, it can take weeks or even months. Double-check the basics: ensure your cutting definitely has at least one node, as roots emerge from here. Also, confirm it’s receiving bright, indirect light and consistent warmth (avoiding cold drafts). An unhealthy parent plant or cutting, or propagating during the dormant season, can also slow things down. Consider trying a rooting hormone if conditions seem right but nothing’s happening after several weeks.
Troubleshooting: Leaf Issues
Q: What should I do about yellow or dropping leaves on my cutting?
A: Don’t panic immediately if you see some rubber plant cutting yellow leaves or leaf drop. It’s quite normal for cuttings to experience stress after being separated from the parent plant. They often redirect energy towards root production rather than maintaining all leaves. However, check your moisture levels – ensure soil isn’t soggy or water isn’t stagnant. Verify it’s getting enough indirect light. If leaves look mushy or brown at the base, it could signal rot starting; trim affected leaves and check the stem. If only one or two older leaves yellow and drop, patience is usually the best approach.
Common Question: Leaf Propagation
Q: Can you propagate a rubber plant from just a leaf?
A: Unfortunately, no, you generally cannot propagate a rubber plant from just a leaf, even if it includes the small stem (petiole) attached. While a leaf cutting might occasionally develop roots in water or soil, it lacks the necessary node – the crucial part containing meristematic tissue capable of producing new stems and leaves. Without a node, you’ll likely end up with just a rooted leaf that never grows into a full plant. For successful propagation, always use a stem cutting that includes at least one node.
Revisiting Timelines
Q: How long does it take for rubber plant cuttings to root?
A: As a reminder, rooting times vary. Generally, expect roots in water within 4-8 weeks. Soil propagation and air layering often take longer, typically 4-12 weeks or sometimes more. Remember that patience is crucial for successful rubber plant propagation time! Factors like the chosen method, the time of year (spring/summer is fastest), light levels, temperature consistency, and the health of the original cutting all significantly influence how quickly roots develop. Manage your expectations and focus on providing the right conditions.
With your chosen method underway and troubleshooting tips in hand, you’re now ready to learn about caring for your newly rooted rubber plant.
Caring for Your Newly Rooted Rubber Plant
Success! You’ve rooted your cutting. Follow these simple care tips to help your new rubber plant thrive in its permanent home.
Acclimatizing and Light Needs
Your new plant needs time to adjust. Gradually introduce it to its permanent spot over several days to prevent ‘transplant shock,’ which can stress young plants. This gentle transition helps it settle in smoothly. For optimal rubber tree cutting care light, provide bright, indirect sunlight. Avoid placing it in harsh direct sun or making sudden changes to its light exposure, which can cause stress. 
Watering and Feeding Schedule
Water your new rubber plant when the top 1-2 inches of soil feel dry, ensuring excess water drains freely. See general watering guidelines for more details. Wait several weeks or months to fertilize until new growth appears. Waiting prevents burning the delicate new roots. Once established, apply a light fertilizer during the growing season as part of your rubber tree cutting care water fertilizer routine.
Monitoring for Success
Watch your plant closely for signs of success like new leaf growth, firm leaves, and an overall healthy appearance. Observing your plant is a key skill; it helps you understand its needs and catch potential issues early. Be prepared to adjust your watering or light based on how your plant responds. Consistent rubber tree cutting care growth monitoring ensures your young plant continues to thrive in its new environment.
With these care tips, your successfully propagated rubber plant cutting is well on its way to becoming a beautiful, established houseplant.
Expanding your rubber plant family is now an achievable and rewarding endeavor. This guide has thoroughly explored how to propagate a rubber tree plant, detailing the straightforward steps for water, soil, and air layering—from essential preparation to nurturing your new sprouts. You’re now empowered to not only choose the ideal method with our clear comparisons but also to confidently troubleshoot any common issues that might arise, ensuring your propagation journey is a successful one. Embrace the joy of creating new Ficus elastica from your existing favorite, and soon you’ll be rewarded with more stunning plants, all for free. Go ahead, grow your collection with newfound confidence!
