Table of Contents
There’s something truly captivating about “mimosa” plants, whether it’s the shy, folding leaves of the Sensitive Plant or the fluffy, pink blossoms of the Mimosa Tree. If you’ve collected seeds or bought a packet hoping to grow one yourself, you might have discovered that getting them to sprout can be a bit challenging. It’s easy to feel discouraged when seeds just don’t seem to cooperate. Adding to the confusion, the planting needs for the Sensitive Plant (often called Mimosa) and the Mimosa Tree are actually quite different!
Don’t worry, successfully planting mimosa seeds is absolutely achievable with the right approach. This simple, beginner-friendly guide will walk you through the entire process, step-by-step. We’ll clearly explain the best techniques for germinating seeds for both the popular Sensitive Plant (Mimosa Pudica) and the Mimosa Tree (Albizia Julibrissin), showing you exactly what each type needs to thrive. You’ll learn how to prepare your seeds, choose the perfect spot or container, and care for your tiny seedlings to give them the best start. Let’s get those beautiful mimosa seeds growing!
Understanding Your Mimosa Seeds: Sensitive Plant vs. Mimosa Tree
Before you start planting, it’s crucial to know which type of ‘mimosa’ seed you have, as their needs differ significantly. Many people are surprised to learn there isn’t just one plant commonly called “mimosa,” and confusing them can lead to germination failures.
Clarifying Mimosa: Sensitive Plant vs. Tree
The most common confusion arises between Mimosa pudica, often called the Sensitive Plant, and Albizia julibrissin, known as the Mimosa Tree or Silk Tree. While they share a similar common name and delicate, fern-like leaves, they are distinct plants with very different growth habits and planting requirements.
Mimosa pudica is a small, herbaceous subshrub famous for its leaves that quickly fold inward when touched. It typically grows as a low-spreading plant or a small, upright specimen, often kept as a houseplant or novelty annual in cooler climates.  Its flowers are small, fluffy pink or purple balls.
In contrast, Albizia julibrissin is a deciduous tree that can grow quite large, reaching heights of 20-40 feet. It produces showy, fragrant pink puffball flowers throughout the summer. This is the plant you likely see growing outdoors as an ornamental tree.
Understanding whether you have Sensitive Plant seeds (Mimosa pudica seeds) or Mimosa Tree seeds (Albizia julibrissin seeds) is the first critical step in successful germination. Their specific needs for planting, including seed preparation, soil type, and temperature, are quite different. We’ll detail these distinct requirements later in this guide to ensure your success.
Now that you know the difference between Sensitive Plant and Mimosa Tree seeds, you’re ready to learn how to prepare them for planting.
Preparing and Planting Your Mimosa Seeds
Proper preparation is key to overcoming common germination issues. Follow these steps carefully for both Mimosa Pudica and Albizia Julibrissin to give your seeds the best chance at sprouting successfully. While the steps share similarities, there are important distinctions depending on whether you’re growing the small Sensitive Plant or the larger Mimosa Tree.
Seed Preparation: Soaking and Scarification
Mimosa seeds, whether from the sensitive plant or the tree, often have a very hard outer shell or seed coat. This tough coating protects the seed but can also prevent water from reaching the embryo inside, which is essential for germination. That’s why seed preparation is so important.
So, do you need to soak mimosa seeds before planting? Yes, absolutely! Soaking mimosa seeds is highly recommended and can significantly improve your germination rates. The process helps soften that hard seed coat, allowing moisture to penetrate and signal the seed that it’s time to grow.
Another common preparation technique, often used alongside soaking, is scarification. Scarification involves physically breaking or weakening the seed coat. This can be done by gently nicking the seed with a knife or nail clippers, or by lightly rubbing it with sandpaper. The goal is just to create a tiny opening or thin spot, not to damage the inside of the seed.
Here are step-by-step instructions for soaking your mimosa seeds:
- Boil a small amount of water.
- Pour the hot (not boiling) water into a heat-safe container.
- Carefully drop your mimosa seeds into the hot water.
- Allow the water and seeds to cool naturally to room temperature.
- Let the seeds soak for 12 to 24 hours. You should notice the seeds swell as they absorb water. Discard any that remain floating or don’t swell after this time, as they may not be viable.
For a visual guide on this process, watch this video demonstrating the technique:
. The key technique shown is using hot water to soften the hard coat, which is a very effective method for these types of seeds.  This image shows seeds soaking, illustrating the initial step.
Proper seed preparation, like soaking mimosa seeds, connects directly to general best practices for preparing seeds for planting. It’s a crucial step for many seeds with hard coats, ensuring they get the moisture needed to sprout.
How to Plant Mimosa Pudica (Sensitive Plant) Seeds
Once your Mimosa Pudica seeds have been properly soaked, they are ready for planting. Follow these steps for a successful start:
- Choose the Right Container: Select small pots or seed starting trays that are at least 3-4 inches deep and have good drainage holes. Mimosa Pudica is well-suited for , so choose containers that fit your indoor space.
- Select the Soil: What kind of soil do mimosa seeds need? For Mimosa Pudica, a light, well-draining potting mix is essential. A specific seed starter mix is ideal, as it provides the aeration and drainage necessary to prevent damping off and root rot, common issues with seedlings.
- Determine Planting Depth: How deep should I plant mimosa seeds? For Mimosa Pudica, plant them very shallowly. Place the soaked seed on the surface of the soil and cover it with just a thin layer of soil or vermiculite, no more than 1/8 inch deep.
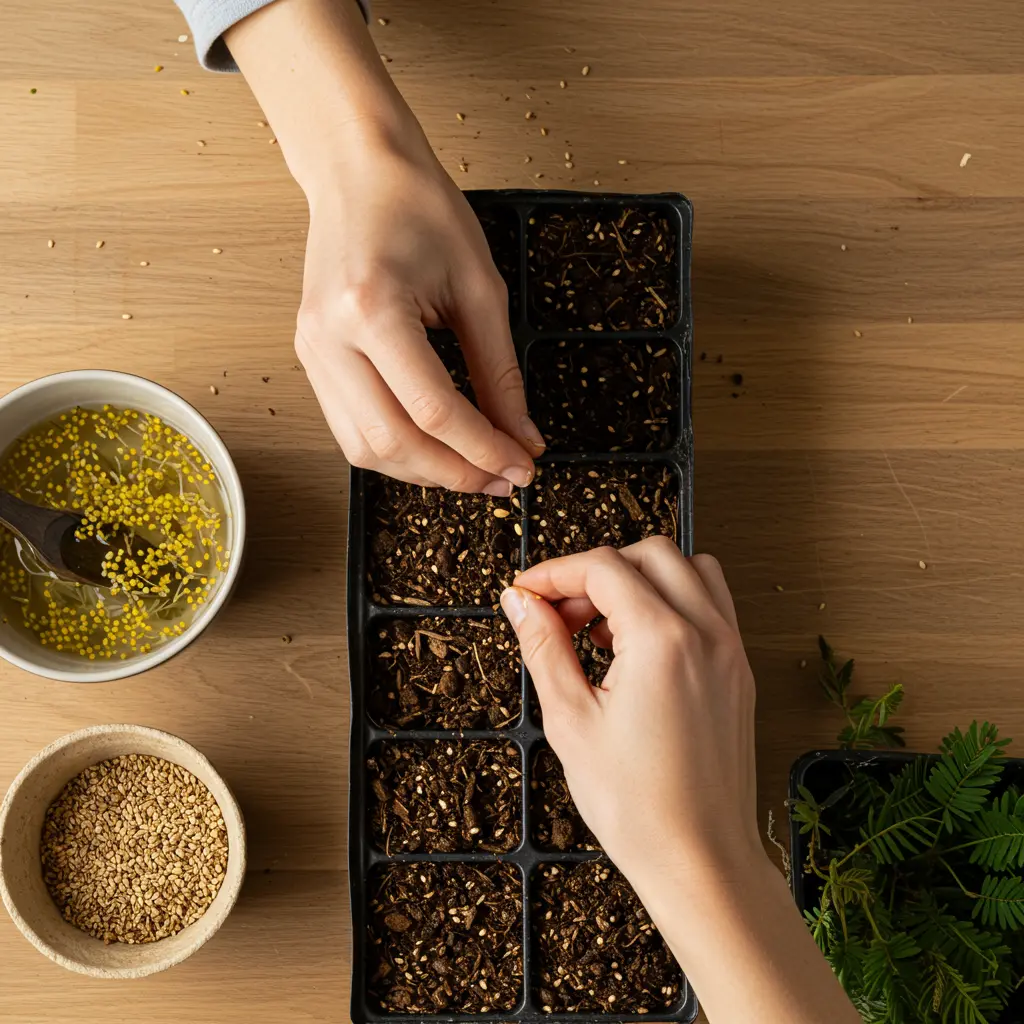
- Planting Process: Gently press the soil down around the seed. You can plant one or two seeds per small pot. This image illustrates the general process of planting seeds indoors.
- Initial Watering: Water gently but thoroughly after planting. The soil should be consistently moist but not waterlogged. Learn more about proper watering techniques for seedlings.
- Provide Ideal Conditions: Place your planted seeds in a warm location, ideally between 70-85°F (21-29°C). They need bright, indirect light. Covering the pot with plastic wrap or a clear dome can help maintain humidity, which aids germination.
Is Mimosa pudica easy to grow from seed? Yes, with proper preparation and care, Mimosa Pudica is generally considered relatively easy to grow from seed, making it a rewarding project for beginners. Just be sure to follow these steps carefully!
Can you grow Mimosa pudica indoors? Absolutely! Its compact size and need for warmth make it an excellent houseplant. These steps are tailored for starting seeds indoors, a technique that works well for Mimosa Pudica.
How to Plant Mimosa Tree (Albizia Julibrissin) Seeds
Planting Albizia Julibrissin, the Mimosa Tree, follows a similar preparation process but differs in planting location and depth compared to the Sensitive Plant.
- Choose Planting Location: Decide whether you will start the seeds in a container or directly outdoors. Given its eventual size, if starting in a container, plan to transplant it later. Choose a sunny location for its permanent home.
- Select the Soil: What kind of soil do mimosa seeds need for the tree? While the Mimosa Tree is quite adaptable, it prefers well-draining soil. It can tolerate a range of soil types, including poor or clay soils, demonstrating an ability for adapting to different soil types, but avoid consistently wet conditions.
- Determine Planting Depth: How deep should I plant mimosa seeds for the tree? Plant Albizia Julibrissin seeds slightly deeper than Mimosa Pudica. Sow them about 1/4 to 1/2 inch deep in the soil.
- Planting Process: Place the soaked seed in the prepared spot or container and cover with soil. This image shows the general process of planting tree seeds.
- Initial Watering and Care: Water the soil thoroughly after planting. Keep the soil consistently moist until germination occurs. If planting outdoors, protect the area from pests or harsh weather if necessary.
It is important to consider: Is the mimosa tree (Albizia julibrissin) invasive? Yes, in many regions, particularly in the southeastern United States, Albizia Julibrissin is considered an invasive species. It can spread aggressively via seeds and outcompete native plants, disrupting local ecosystems. According to the invasive species information, it is listed as invasive or potentially invasive in numerous states. Before planting, check with your local extension office or native plant society to understand its status in your specific area.
Planting tree seeds outdoors, like those of the Mimosa Tree, differs from planting smaller annuals or houseplants. It often involves considering the plant’s long-term needs and potential impact, similar to considerations when planting tree seeds outdoors.
With your seeds now planted, the next crucial step is ensuring they germinate and grow into healthy seedlings.
After Planting: Ensuring Germination and Healthy Seedlings
Once your seeds are planted, providing the right conditions and knowing what to expect is crucial for successful growth. This stage requires careful attention to moisture, warmth, and light as the potential within those tiny seeds begins to emerge.
Post-Planting Care: Germination and Early Growth
After placing your scarified and soaked mimosa seeds into their growing medium, the waiting game begins. Both Mimosa Pudica and Albizia Julibrissin seeds require consistent moisture to germinate. The soil should be kept evenly moist, like a wrung-out sponge, but never waterlogged. Warmth is also critical; a temperature between 70-80°F (21-27°C) is ideal for encouraging germination. You can use a heat mat if your environment is cool. Light is not necessary before germination, but becomes essential the moment seedlings emerge.
So, how long does it take for mimosa seeds to sprout? With proper preparation and ideal conditions, you can typically expect to see signs of life within 1 to 4 weeks. However, germination can sometimes be unpredictable, and a few stubborn seeds might take longer. Successful germination looks like a small loop or hook pushing through the soil surface, soon followed by tiny leaves. 
Once your seedlings have emerged, move them to a location with bright, indirect light. A south-facing window or under grow lights works well. Continue to keep the soil consistently moist, watering gently from the bottom if possible to avoid disturbing the delicate roots. Avoid letting the soil dry out completely, as young seedlings are very vulnerable. This basic care is fundamental to caring for young plants.
If you started your seeds indoors in small pots or trays, you will eventually need to transplant them into larger containers or their final outdoor location once they develop a few sets of true leaves and the weather is appropriate (for outdoor planting). Handle the young seedlings carefully during this process to minimize stress. This applies to both types, but is particularly common when starting Mimosa Pudica indoors.
Troubleshooting Common Mimosa Seed Problems
It can be disheartening when your carefully planted seeds don’t sprout, or your young seedlings struggle. Don’t worry, this is a common part of gardening, and there are often simple explanations and solutions for ‘mimosa seeds not sprouting’ or ‘seedling care issues’.
Potential reasons for germination failure include using old or non-viable seeds, incorrect scarification or soaking, or not providing the right environmental conditions. If your seeds aren’t sprouting, check the temperature – is it warm enough? Is the soil consistently moist but not soggy? Did you prepare the seeds correctly beforehand? Re-evaluating these factors is the first step in troubleshooting. Sometimes, simply adjusting the warmth or moisture level can make a difference.
Once seedlings emerge, they can face new challenges. ‘Seedling care issues’ like damping off (a fungal disease causing seedlings to collapse at the base) are often caused by overly wet soil or poor air circulation. Legginess (tall, thin, weak stems) indicates insufficient light; the seedling is stretching to find it. Yellowing leaves can signal watering issues (too much or too little) or lack of light.
To troubleshoot these issues, focus on adjusting conditions for plant health. Ensure good air circulation, water only when the top layer of soil feels dry, and provide adequate light. If damping off is suspected, ensure drainage is excellent and consider watering less frequently. For legginess, move seedlings closer to a light source or use a stronger grow light. Learning to read these signs and adjusting conditions for plant health accordingly is key to success. This detailed troubleshooting guide covers the most common problems you might encounter during this critical early stage.
Getting your mimosa seeds to sprout and nurturing the young seedlings is a rewarding step, but it’s natural to have more questions as your plants grow.
Frequently Asked Questions about Planting Mimosa Seeds
Here are answers to some of the most common questions beginner gardeners have about growing mimosa from seed. Addressing these frequently asked questions about planting mimosa seeds can help clear up confusion and boost your confidence.
Frequently Asked Questions (FAQ)
How long does it take for mimosa seeds to sprout?
The germination time for mimosa seeds, especially after proper scarification and soaking, can vary. You can often see sprouts within one to four weeks, though it can sometimes take longer depending on conditions and the specific type (Pudica or Julibrissin). Patience is key!
Do you need to soak mimosa seeds before planting?
Yes, soaking mimosa seeds is highly recommended and often essential, particularly for the Mimosa Tree (Albizia julibrissin) and beneficial for Mimosa pudica. Soaking helps soften the tough seed coat, allowing water to penetrate and signal the seed that it’s time to germinate.
Is Mimosa pudica easy to grow from seed?
Mimosa pudica, the sensitive plant, is generally considered relatively easy to grow from seed for beginners, provided you follow the steps for scarification and provide the right warm, humid conditions. Its fast growth and responsive leaves make it a rewarding project.
What kind of soil do mimosa seeds need?
Both Mimosa pudica and Albizia julibrissin seeds do best in well-draining soil. For Mimosa pudica, a standard peat-based potting mix is suitable. For Albizia julibrissin, a general-purpose potting mix or even direct sowing into well-drained garden soil works, as long as it’s not compacted clay.
Is the mimosa tree (Albizia julibrissin) invasive?
Yes, the Mimosa Tree (Albizia julibrissin) is considered invasive in many regions across the United States and other parts of the world. It spreads aggressively by seed. Before planting, it is crucial to check with your local extension office or government resources to understand its status and potential impact in your area.
How deep should I plant mimosa seeds?
The planting depth depends on the type. For Mimosa pudica, plant seeds about 1/8 inch deep. For the larger seeds of the Mimosa Tree (Albizia julibrissin), plant them slightly deeper, around 1/4 to 1/2 inch deep.
Can you grow Mimosa pudica indoors?
Absolutely! Mimosa pudica is actually well-suited to growing indoors as a houseplant. It enjoys warm temperatures, bright light, and consistent moisture, making it a great choice for a sunny windowsill.
Armed with these answers, you’re better prepared for successfully growing your mimosa seeds.
You’ve now unlocked the secrets to successfully planting both the fascinating Mimosa Pudica (Sensitive Plant) and the beautiful Albizia Julibrissin (Mimosa Tree) from seed. By understanding the simple yet crucial differences in their needs and following these clear steps, you can overcome common germination hurdles and confidently start your growing journey. Growing from seed is a rewarding experience, and with this guide, you have the knowledge to nurture tiny seeds into thriving plants. Embrace the process and enjoy watching your mimosa sprout and grow.
Now that you’ve mastered planting mimosa seeds, are you ready for your next seed-starting adventure? Explore our beginner’s guide to planting Foxglove seeds
