Table of Contents
Want to grow beautiful milkweed to support monarch butterflies and other pollinators? It’s a fantastic goal, and starting from seed is a rewarding way to do it! However, if you’re a beginner gardener, you might feel a little overwhelmed by terms like “cold stratification” or wonder if you should plant in fall or spring. Don’t worry – you’re not alone, and it’s simpler than you think.
You need a clear, easy-to-follow plan to successfully germinate those valuable milkweed seeds. That’s exactly what this guide provides. We’ll break down the entire process into simple steps, demystifying cold stratification with easy methods you can do at home. We’ll help you choose the best planting time for your situation and provide practical tips for getting your seeds to sprout and grow into healthy seedlings. Plus, we’ll cover common problems and how to solve them, so you feel confident every step of the way.
Ready to learn the easiest way to start your milkweed patch from seed? Let’s dive in!
Why Plant Milkweed? Supporting Monarchs & Your Garden
Discover the crucial role milkweed plays in the ecosystem, particularly for monarch butterflies, and why adding it to your garden is beneficial. Milkweed is absolutely essential because it’s the only plant monarch caterpillars can eat. Without milkweed, monarch butterflies cannot complete their life cycle, making its presence vital for their survival.
Beyond supporting monarchs, planting milkweed provides valuable nectar sources for a wide variety of other pollinators, including bees and hummingbirds, contributing to a healthier local ecosystem. Plus, with its unique flowers and seed pods, milkweed adds interesting texture and visual appeal to any garden setting. If you’re a beginner gardener looking to make a positive impact, planting milkweed is a powerful way to help these important insects. Learning how to successfully grow it from seed is a rewarding first step!
To begin your milkweed growing journey, understanding the seeds themselves is key.
Understanding Milkweed Seeds & Stratification
Before you plant, let’s cover some essential basics about milkweed seeds and the critical process of cold stratification. Understanding these fundamentals will set you up for success.
Getting Started: Milkweed Seed Basics
When you’re ready to start planting, you’ll likely encounter seeds from common milkweed varieties like Common Milkweed (Asclepias syriaca), Swamp Milkweed (Asclepias incarnata), or Butterfly Weed (Asclepias tuberosa). While their needs are similar, understanding the basics applies across the board for most milkweed types. Milkweed seeds themselves are typically flat, brown, and papery, often attached to fluffy white fibers called “coma” or “pappus” that help them float on the wind.
A common question beginners ask is: “Do milkweed seeds need cold stratification before planting?” The short answer is yes, for most species. This process is crucial because it mimics the natural conditions seeds experience during winter outdoors. This cold, moist period signals to the seed that it’s time to break dormancy and prepare for germination when spring arrives. Successful milkweed germination depends heavily on meeting these specific requirements, including proper temperature and moisture after stratification.
What is Cold Stratification (and Why Milkweed Needs It)
Cold stratification is essentially giving seeds a controlled “winter” experience. It involves exposing seeds to cold, moist conditions for a specific period. So, why do milkweed seeds specifically require this? Like many native plants, milkweed seeds have a natural dormancy mechanism. They won’t germinate just because they get wet; they need that cold period to break dormancy and significantly improve their germination rates once planted in warmer soil. This answers the question again: “Do milkweed seeds need cold stratification before planting?” Yes, it’s a necessary step for reliable sprouting.
What is the easiest way to stratify milkweed seeds? The refrigerator method is widely considered the simplest approach for home gardeners. It allows you to provide the necessary cold, moist environment indoors. For a visual guide on this process, check out this helpful video:
. This video demonstrates the simple steps involved. The basic setup for fridge stratification often involves placing seeds between layers of damp paper towel or peat moss inside a sealed plastic bag or container. You can see an example of this setup here:  . The damp material keeps the seeds moist, while the refrigerator provides the consistent cold temperature needed to break dormancy.
Now that you understand the ‘why’ behind cold stratification, you’re ready to learn the simple steps to perform this essential process yourself.
Step-by-Step: Cold Stratifying Milkweed Seeds (Easy Fridge Method)
Follow these simple steps to easily cold stratify your milkweed seeds using your refrigerator, addressing a common concern for beginners. This method is straightforward and requires minimal supplies, making it accessible for anyone wanting to grow milkweed from seed.
Performing the Easy Fridge Stratification
Cold stratification mimics the natural winter conditions milkweed seeds need to break dormancy and prepare for germination. While there are different methods, using your refrigerator is widely considered the easiest way to cold stratify milkweed seeds, especially for home gardeners. Here’s how to do it:
- Gather Your Materials: You will need your milkweed seeds, a paper towel or coffee filter, a resealable plastic bag or small container with a lid, water, and a marker.
- Moisten the Medium: Lightly dampen the paper towel or coffee filter with water. It should be moist, but not soaking wet – you don’t want water pooling.
- Place and Fold: Scatter your milkweed seeds evenly across half of the moist paper towel or filter. Fold the other half over the seeds.
- Bag and Label: Carefully place the folded paper towel with seeds into the plastic bag or container. Seal it shut. Use your marker to label the bag with the type of milkweed and the date you started stratification.
- Refrigerate: Place the sealed bag or container in your refrigerator. The cool temperature provides the necessary conditions for cold stratification milkweed seeds effectively.
Leave the seeds in the refrigerator for the recommended duration. While 30-60 days is a common range, it’s always best to check your specific seed packet for exact timing, as requirements can vary by species. Occasionally check the bag to ensure the paper towel remains slightly damp and to look for any signs of mold. If mold appears, discard the seeds and start over with a fresh batch and clean materials. This simple process is a crucial step in how to plant milkweed from seed successfully.
Once your seeds have completed their cold stratification period in the fridge, they are ready for the next step: planting.
Planting Your Milkweed Seeds: Timing and Methods
Once your milkweed seeds have completed their cold stratification period (or if you’re planning for natural stratification by planting directly in the fall), it’s time to get them in the ground or started indoors. Getting the timing and method right is crucial for successful germination. Let’s explore the best approaches to give your future milkweed plants the best start.
When to Plant Milkweed Seeds: Fall vs. Spring Planting
One of the most common questions beginner gardeners have is, “When is the best time to plant milkweed seeds?” The answer isn’t a simple one-size-fits-all, as both fall and spring planting have their merits.
Fall Planting: This method mimics nature’s process. You sow the seeds directly outdoors in the late fall, typically after the first hard frost but before the ground freezes solid. The seeds remain dormant through the winter, receiving their natural cold stratification from the cold temperatures and snowmelt.
- Pros of Fall Planting: Requires less effort as nature does the stratification for you; seeds are ready to germinate as soon as conditions are right in spring; can lead to robust root systems as plants establish naturally.
- Cons of Fall Planting: Seed loss can occur due to animals, heavy rain, or wind; germination rates can be less predictable compared to controlled indoor starts; location is fixed once seeds are sown.
Spring Planting: This involves planting seeds that have already undergone artificial cold stratification (like the method described previously). You can sow these stratified seeds directly outdoors after your region’s last expected frost, or start them indoors several weeks before the last frost.
- Pros of Spring Planting: Potentially higher germination rates due to controlled stratification; allows for starting seeds indoors to get a head start; offers flexibility in choosing the final planting location for seedlings.
- Cons of Spring Planting: Requires the extra step of artificial stratification; indoor starts require more supplies and care (lights, pots, soil); transplanting seedlings can cause stress.
For beginners, understanding this distinction is key. If you prefer a hands-off approach and don’t mind potentially lower germination rates, fall planting is simple. If you want more control over the process and potentially higher success with fewer seeds, spring planting after stratification is a great option. Whichever you choose, ensure you are planting milkweed types native to your area, as these are best adapted to local conditions and most beneficial to pollinators. You can find native milkweed recommendations for your region through resources like your local extension office or native plant societies.
Planting Milkweed Seeds Directly Outdoors
If you’ve chosen the fall planting method or are sowing stratified seeds in the spring, direct sowing outdoors is straightforward.
First, choose your planting site. Milkweed generally thrives in full sun (at least 6-8 hours daily) and well-draining soil. Avoid areas that stay waterlogged.
Step 1: Prepare the Planting Area. Clear the area of any weeds or grass that could compete with your seedlings. Loosen the top 4-6 inches of soil with a trowel or fork to allow roots to establish easily.
Step 2: Sow the Seeds. Place seeds on the surface of the prepared soil. How deep should I plant milkweed seeds? A depth of about 1/4 inch is ideal. Gently press the seeds into the soil surface, then lightly cover them with about 1/4 inch of soil or compost. Can I just scatter milkweed seeds on the ground? While some seeds might germinate if scattered, pressing them into the soil and lightly covering them significantly improves contact with the soil, which is essential for germination and prevents them from washing away or being eaten.

Step 3: Gently Water. Water the area gently but thoroughly after planting to settle the soil around the seeds. Be careful not to wash the seeds away. Keep the soil consistently moist (but not soggy) until germination occurs.
Remember, if planting in the fall, sow after the first hard frost. If planting stratified seeds in the spring, wait until after your average last frost date.
Starting Milkweed Seeds Indoors
Should I start milkweed seeds indoors or outdoors? Starting milkweed seeds indoors is an excellent option if you want to get a head start on the growing season, protect young seedlings from pests or harsh weather, and potentially achieve higher germination rates from your stratified seeds.
Step 1: Choose Containers. Select clean seed starting trays, small pots, or even recycled containers with drainage holes.
Step 2: Fill Containers. Fill your chosen containers with a sterile seed starting mix. This provides a light, well-draining medium ideal for germination and young roots.
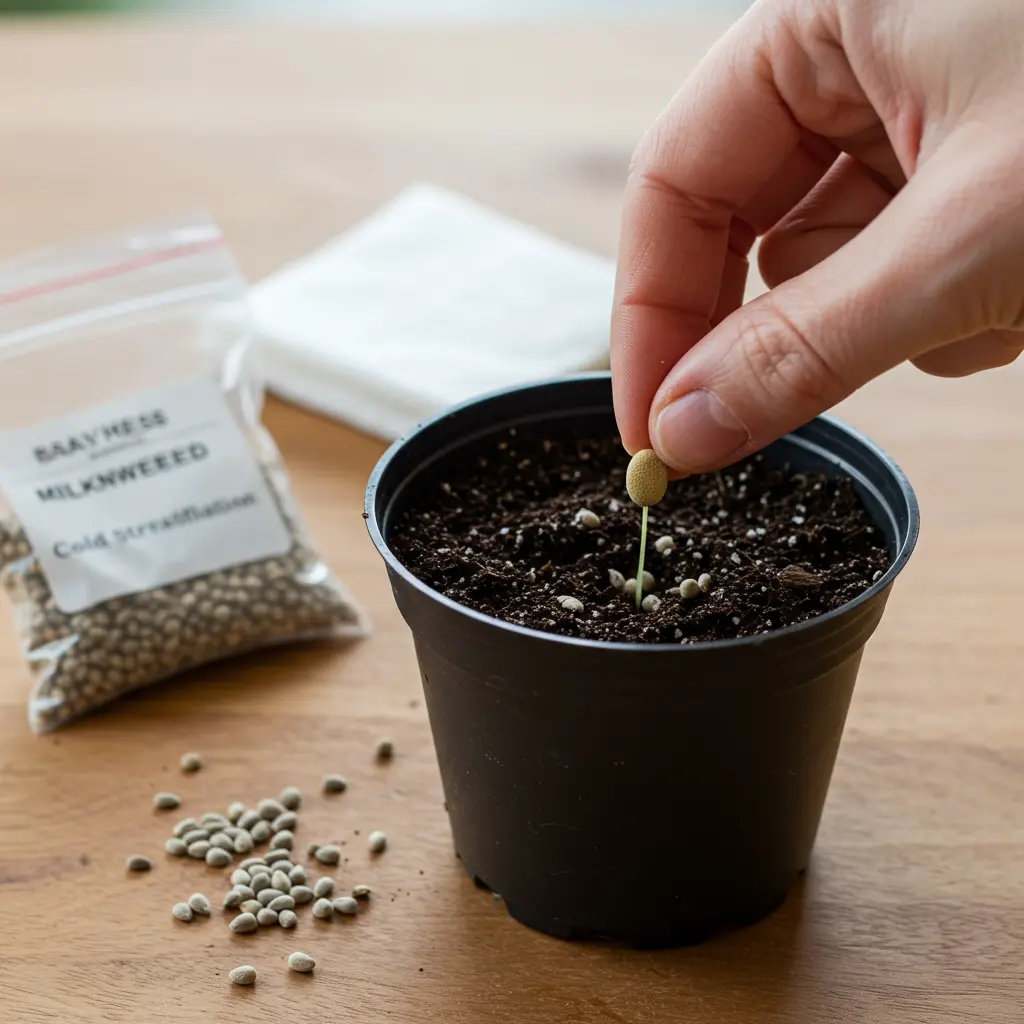
Step 3: Plant Stratified Seeds. Plant one or two stratified milkweed seeds per cell or small pot. Reiterate the correct planting depth: Just like outdoors, how deep should I plant milkweed seeds? About 1/4 inch below the soil surface is perfect. Lightly cover the seeds with the starting mix.
Step 4: Water Gently. Water the containers from the bottom (by placing them in a tray of water) or gently from the top until the soil is evenly moist.
Step 5: Provide Warmth and Light. Place the containers in a warm location (around 70-75°F is ideal for milkweed germination). Once seedlings emerge, they will need plenty of light to prevent them from becoming leggy. A sunny south-facing windowsill can work, but a grow light placed a few inches above the seedlings is often best.
Start seeds indoors about 4-6 weeks before your average last frost date to have seedlings ready for transplanting when the weather warms up.
With your seeds planted, either outdoors or indoors, the next step is patiently waiting for them to sprout and learning how to care for the emerging seedlings.
After Planting: Germination, Care & Troubleshooting
Your seeds are planted! Now, the waiting game begins. This chapter will cover what to expect during germination, how to care for your young milkweed seedlings as they grow, and how to tackle some of the common problems that can arise during this stage.
Milkweed Germination and Seedling Care Tips
So, how long does it take for milkweed seeds to germinate? Typically, you can expect to see signs of life within 10 to 30 days after planting, though this can vary depending on the specific milkweed species, soil temperature, and moisture levels. Emerging milkweed seedlings usually appear as small, green sprouts with two initial seed leaves (cotyledons) before their first true leaves develop.
Caring for these young seedlings requires consistent attention, but it’s not complicated. The most crucial factors are consistent moisture and sufficient sunlight. Keep the soil consistently moist but never waterlogged, as this can lead to problems. Providing adequate sunlight is essential for healthy growth; seedlings started indoors will need a bright south-facing window or grow lights. If you planted multiple seeds close together and they all sprout, you’ll need to thin the seedlings to ensure the strongest ones have room to grow without competing for resources. Gently snip weaker seedlings at the soil line, leaving the healthiest one or two per spot or pot.
For seedlings started indoors, remember they’ll need a period of adjustment before moving outside permanently. This process, called hardening off, gradually exposes them to outdoor conditions like wind, direct sun, and temperature fluctuations over a week or two. Proper watering technique is vital throughout this stage, ensuring the soil is moist but not soggy. You can learn more about getting watering right in our guide on basic watering needs. A healthy young milkweed plant will have sturdy stems and vibrant green leaves. 
Troubleshooting: Common Milkweed Seed Planting Issues
It’s completely normal to encounter a few hiccups when starting seeds, especially for the first time. Don’t let potential problems discourage you! Understanding common issues and how to fix them is key to success. Providing in-depth troubleshooting is a core part of this guide, designed to help you overcome challenges.
One common frustration is seeds not germinating at all. This can happen for several reasons: improper or insufficient cold stratification, old or non-viable seeds, planting too deep, or incorrect moisture or temperature conditions. If seeds don’t sprout within the typical timeframe, you can try re-stratifying them if you suspect that was the issue, or simply check that the planting conditions (moisture, warmth, light) are correct.
Another issue beginner gardeners sometimes face is seedlings suddenly wilting and dying, often called “damping off.” This is usually caused by fungal diseases thriving in overly wet soil, poor air circulation, or non-sterile planting mix. To prevent this, always use a sterile seed starting mix, avoid overwatering, and ensure good air flow around your seedlings.
Finally, you might notice slow growth. This could be due to insufficient light (especially indoors), lack of nutrients (though seedlings don’t need much early on), or temperatures that are too cool. Ensure they get enough light, consider a very dilute liquid fertilizer if they seem stalled after their true leaves appear, and remember that some milkweed species naturally grow slower than others – patience is often required! Reinforcing the importance of proper cold stratification and consistent seedling care, as discussed earlier, is your best defense against many of these problems.
Now that you know what to expect after planting and how to handle common issues, let’s look at some frequently asked questions.
Milkweed Planting FAQ
Here are answers to some of the most frequently asked questions about planting milkweed from seed. We’ve covered the essentials, but sometimes specific questions pop up as you learn how to plant milkweed from seed.
Frequently Asked Questions About Planting Milkweed Seeds
Do milkweed seeds need cold stratification before planting?
Yes, most native milkweed species absolutely need a period of cold stratification milkweed before they will germinate. This mimics the natural winter cycle they experience outdoors and breaks down germination inhibitors in the seed coat.
What is the easiest way to stratify milkweed seeds?
The easiest way to stratify milkweed seeds is using the “fridge method.” You simply mix the seeds with a slightly damp medium like sand or peat moss (or use a damp paper towel), place them in a sealed bag or container, and store them in your refrigerator for 30-60 days.
When is the best time to plant milkweed seeds?
You have options for when to plant milkweed seeds. Planting in the fall allows nature to handle the cold stratification over winter, often leading to robust spring growth. Planting in the spring requires you to artificially cold stratify the seeds in your refrigerator first, but gives you more control over timing and conditions.
How deep should I plant milkweed seeds?
Milkweed seeds should be planted quite shallowly. Aim for a depth of about 1/8 to 1/4 inch. Planting too deep can prevent them from germinating successfully.
How long does it take for milkweed seeds to germinate?
After proper stratification and planting in suitable conditions, milkweed germination typically takes between 10 to 30 days. Patience is key, as some seeds may take longer than others.
Should I start milkweed seeds indoors or outdoors?
Starting seeds indoors gives you a head start on the growing season and allows you to provide ideal conditions. Starting outdoors is simpler and allows nature to handle stratification (if planting in fall), but germination and early growth can be more variable. Both methods can be successful.
Can I just scatter milkweed seeds on the ground?
Simply scattering milkweed seeds on top of the ground is generally not as effective as pressing them gently into the soil surface. Seeds need good contact with moist soil to germinate successfully and stay in place.
With these common questions answered, you’re better equipped to anticipate and handle the different stages of planting and growing milkweed from seed.
You’ve taken the first crucial step in planting milkweed from seed, navigating the often-confusing process of cold stratification and understanding the right timing. With clear, step-by-step instructions tailored for beginners, this guide has equipped you with the knowledge to successfully prepare your seeds, choose your planting method (indoors or out, fall or spring), and give your seedlings the best start. Overcoming the initial hurdles means you’re well on your way to establishing a thriving milkweed patch, a vital resource for monarch butterflies and a beautiful addition to your garden. Embrace the journey and watch your efforts take flight!
Ready to keep growing your green thumb? Subscribe for more beginner-friendly plant care advice and gardening guides!
